
Your Custom Text Here

Large Format Photography
Lockdown has given us some time to perfect our large format photography process - we were able to shoot a few during our most recent wedding, and we’ve shot some portraiture at home using each other as subjects.

Woz, shot by Em.
We’re using the Intrepid 4x5 as shown in previous posts and using sheet film, in this case Ilford HP5.

The film has changed what we can photograph. Previously working with paper negatives meant we needed so much light, and such long exposures that the process wasn’t really practical, especially in winter.
The film allows us to even take pictures indoors with windowlight.
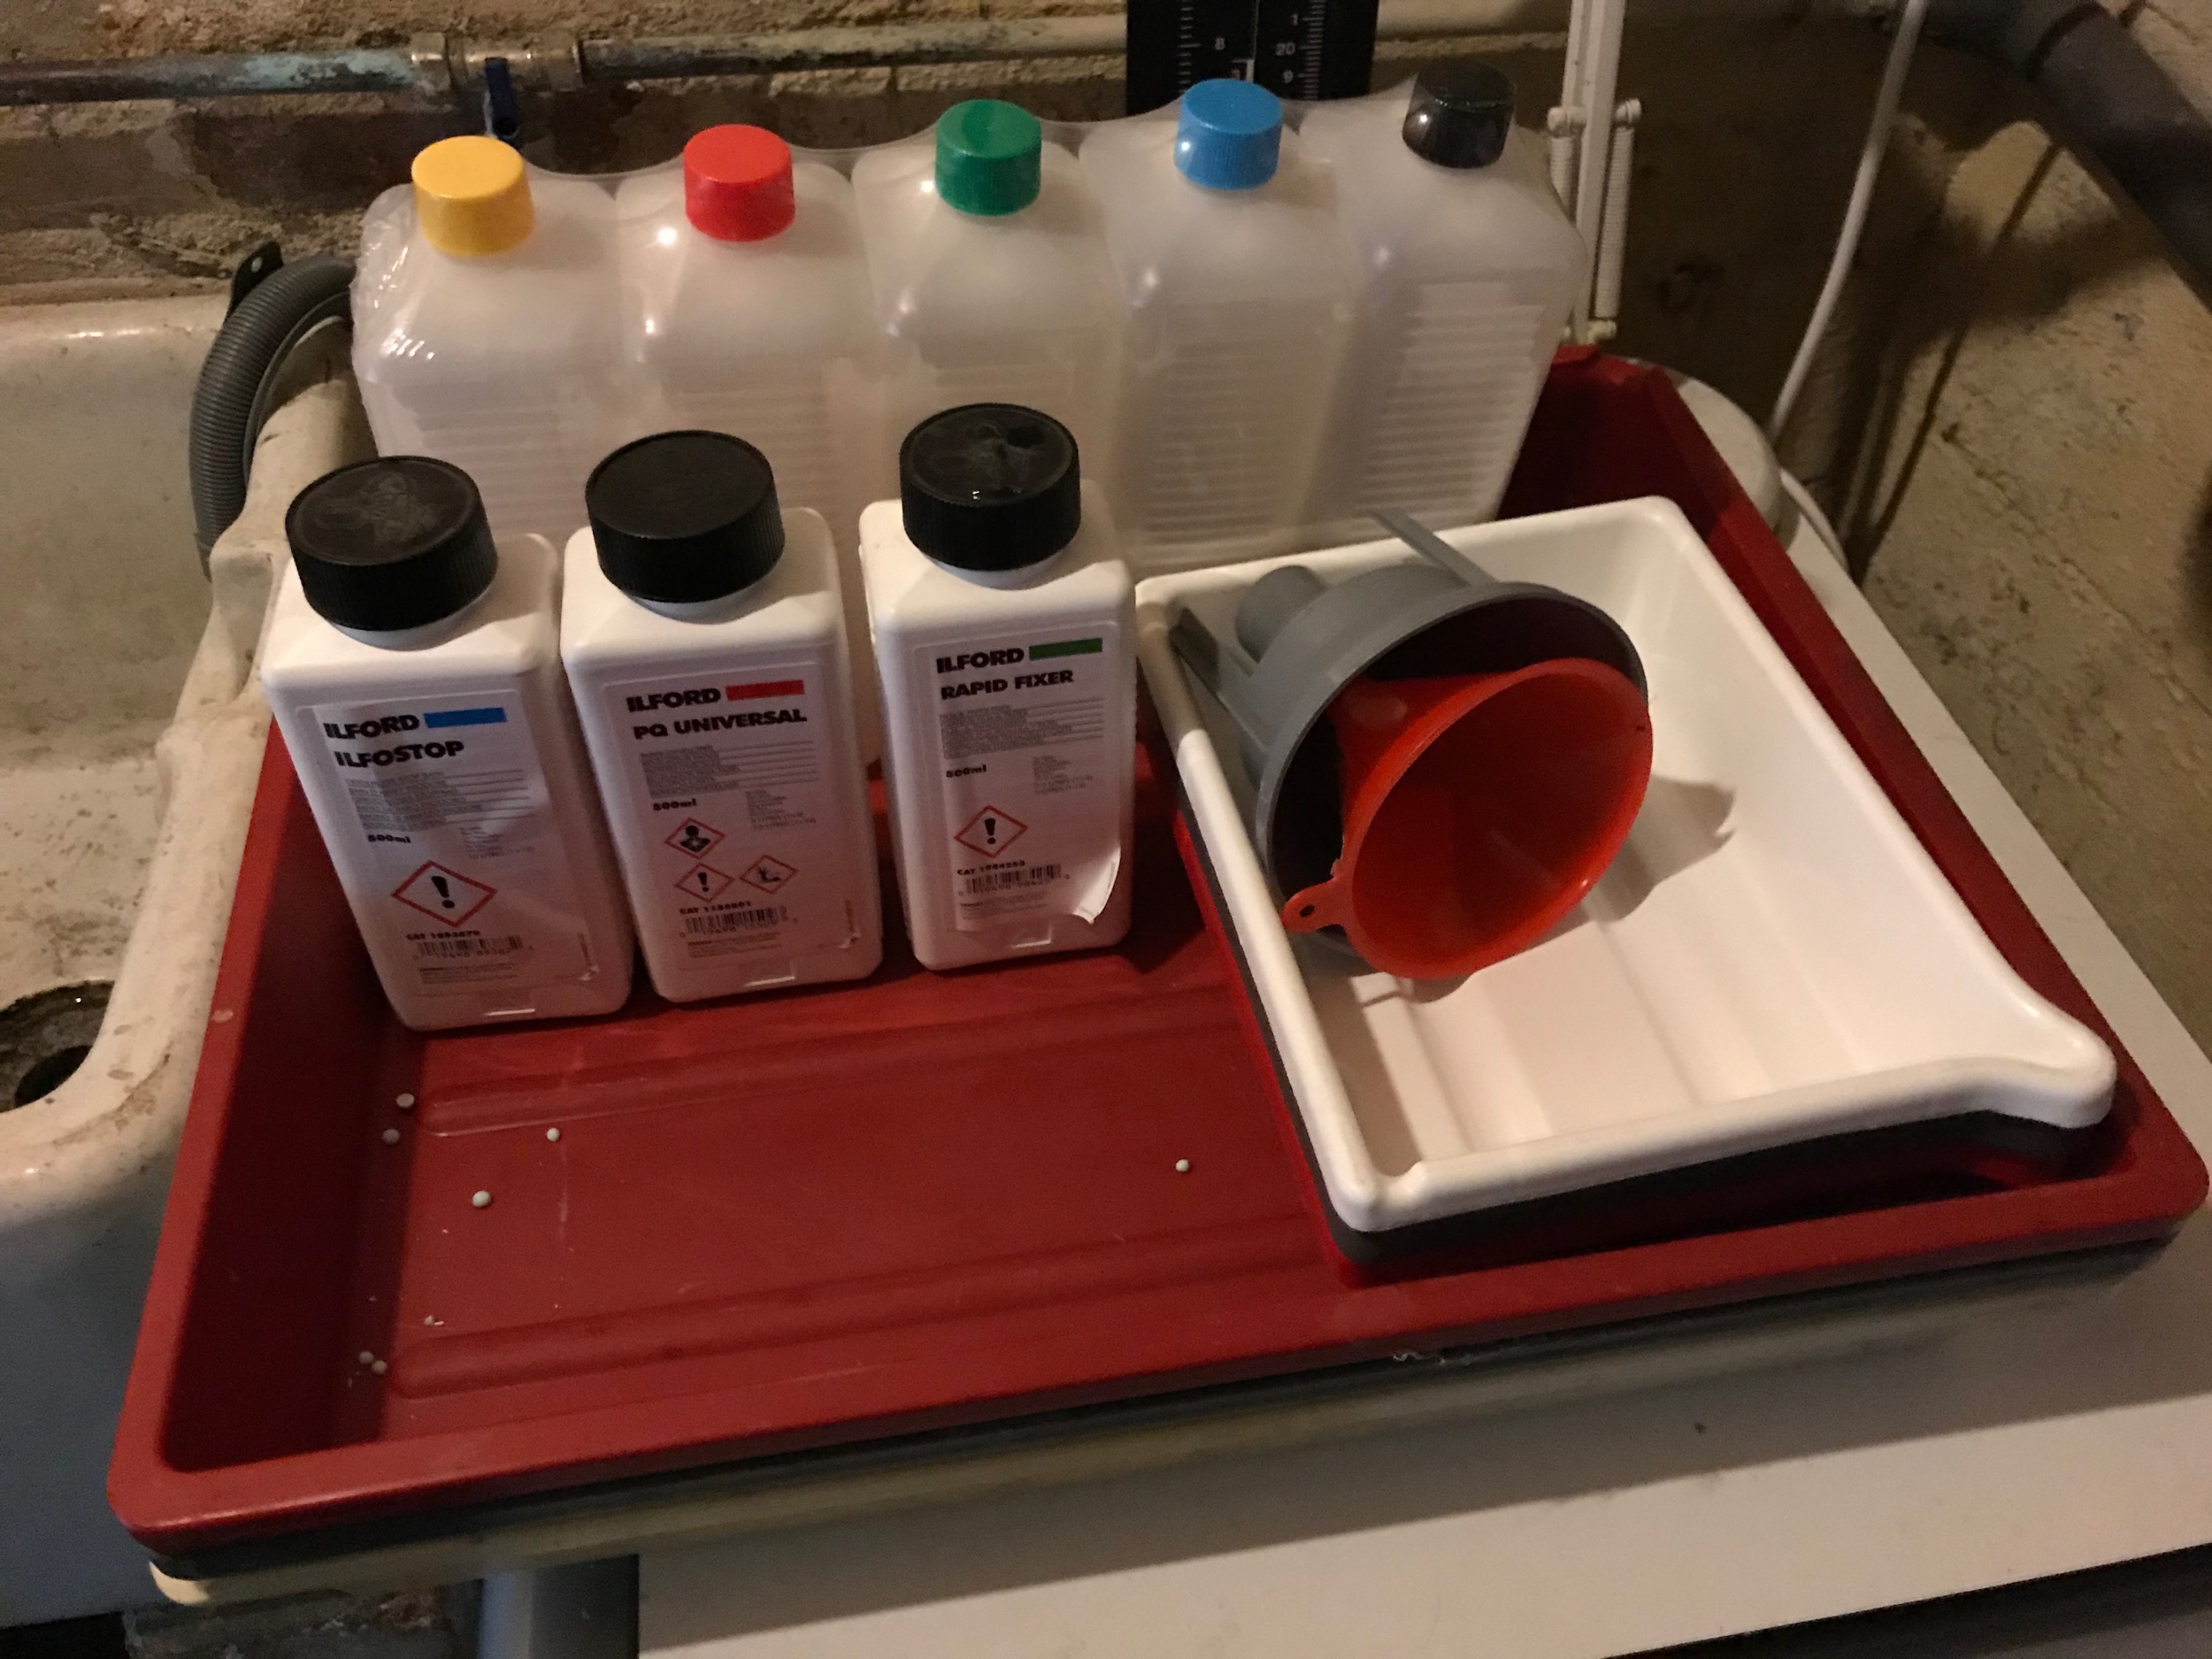
Pictured with the film is the processing system we’re using - an SP-445 from stearmanpress.com
This is what’s enabled us to shoot film - as film is far more sensitive to light, it’s much harder to process in a darkened room as even a tiny amount would fog the image.
This is what it looks like with the lid off:

It’s essentially a light proof bottle that allows you to pour and mix the chemicals in daylight, meaning that you don’t need a darkroom to process the negatives.
That said, it’s still a long process, needing a sink and lots of different bottles. Calling it a processing system makes it sound a lot more automatic than it is!

Woz, shot by Em.
This and the above portrait were both shot in window light, with a single reflector being used to create some fill. Without this, one side of my face would be in very dark shadow. The reflector was hung from a light fitting in the kitchen! Not exactly a studio, but it does show that we could do this anywhere where there’s enough light.
Even in my little cottage with small windows, the exposure times aren’t too bad - these were at 1/15s, which means we won’t be shooting any indoor sports or even vague movement!
I’ll write in another post about the trials and tribulations of actually using large format in a wedding situation, which offers many more challenges!

Michael Eavis

Michael Eavis
There aren’t many people out there, I am sure, that haven’t heard of the legendary music get together Glastonbury Festival!
With being a massive music lover and a local lass to the festival, I can’t honestly describe the overwhelming feeling when entering the site….a vast beautiful city of lights, people, tents and music risen from the earth…nah I can’t explain it! Anyway, what I’m trying to say is that the magical place still amazes me now and I’ve been going since 1997 - there is nowhere quite like it.
The festival launched in the grounds of Worthy Farm in Pilton, run by farmers Michael & Jean Eavis in 1970 (my mum went that first one along with 1500 people!). Entrance fees were a mere £1 and you received a free bottle of milk. It’s come a long way since then, and now with over 200,000 people attending the five day festival, with 79 stages to pick from to watch the largest range of music in the world. Whether it’s sunny or more often than not wet, you’ll never cease to be amazed of what Glastonbury Festival offers to you.
In recent times, I arranged to meet the very jovial Michael Eavis when he opened up a village hall in a Somerset village close to Pilton. I have met him a few times in the past but never had the opportunity to take his photo. Most of the time I see him popping into my local Sainsbury’s and didn't feel it was appropriate to ask!
Unfortunately and understandably like many other major events, Glastonbury Festival was cancelled this year due to the pandemic but we are keeping our fingers and toes crossed for next year….


Michael Eavis

The Escott Family

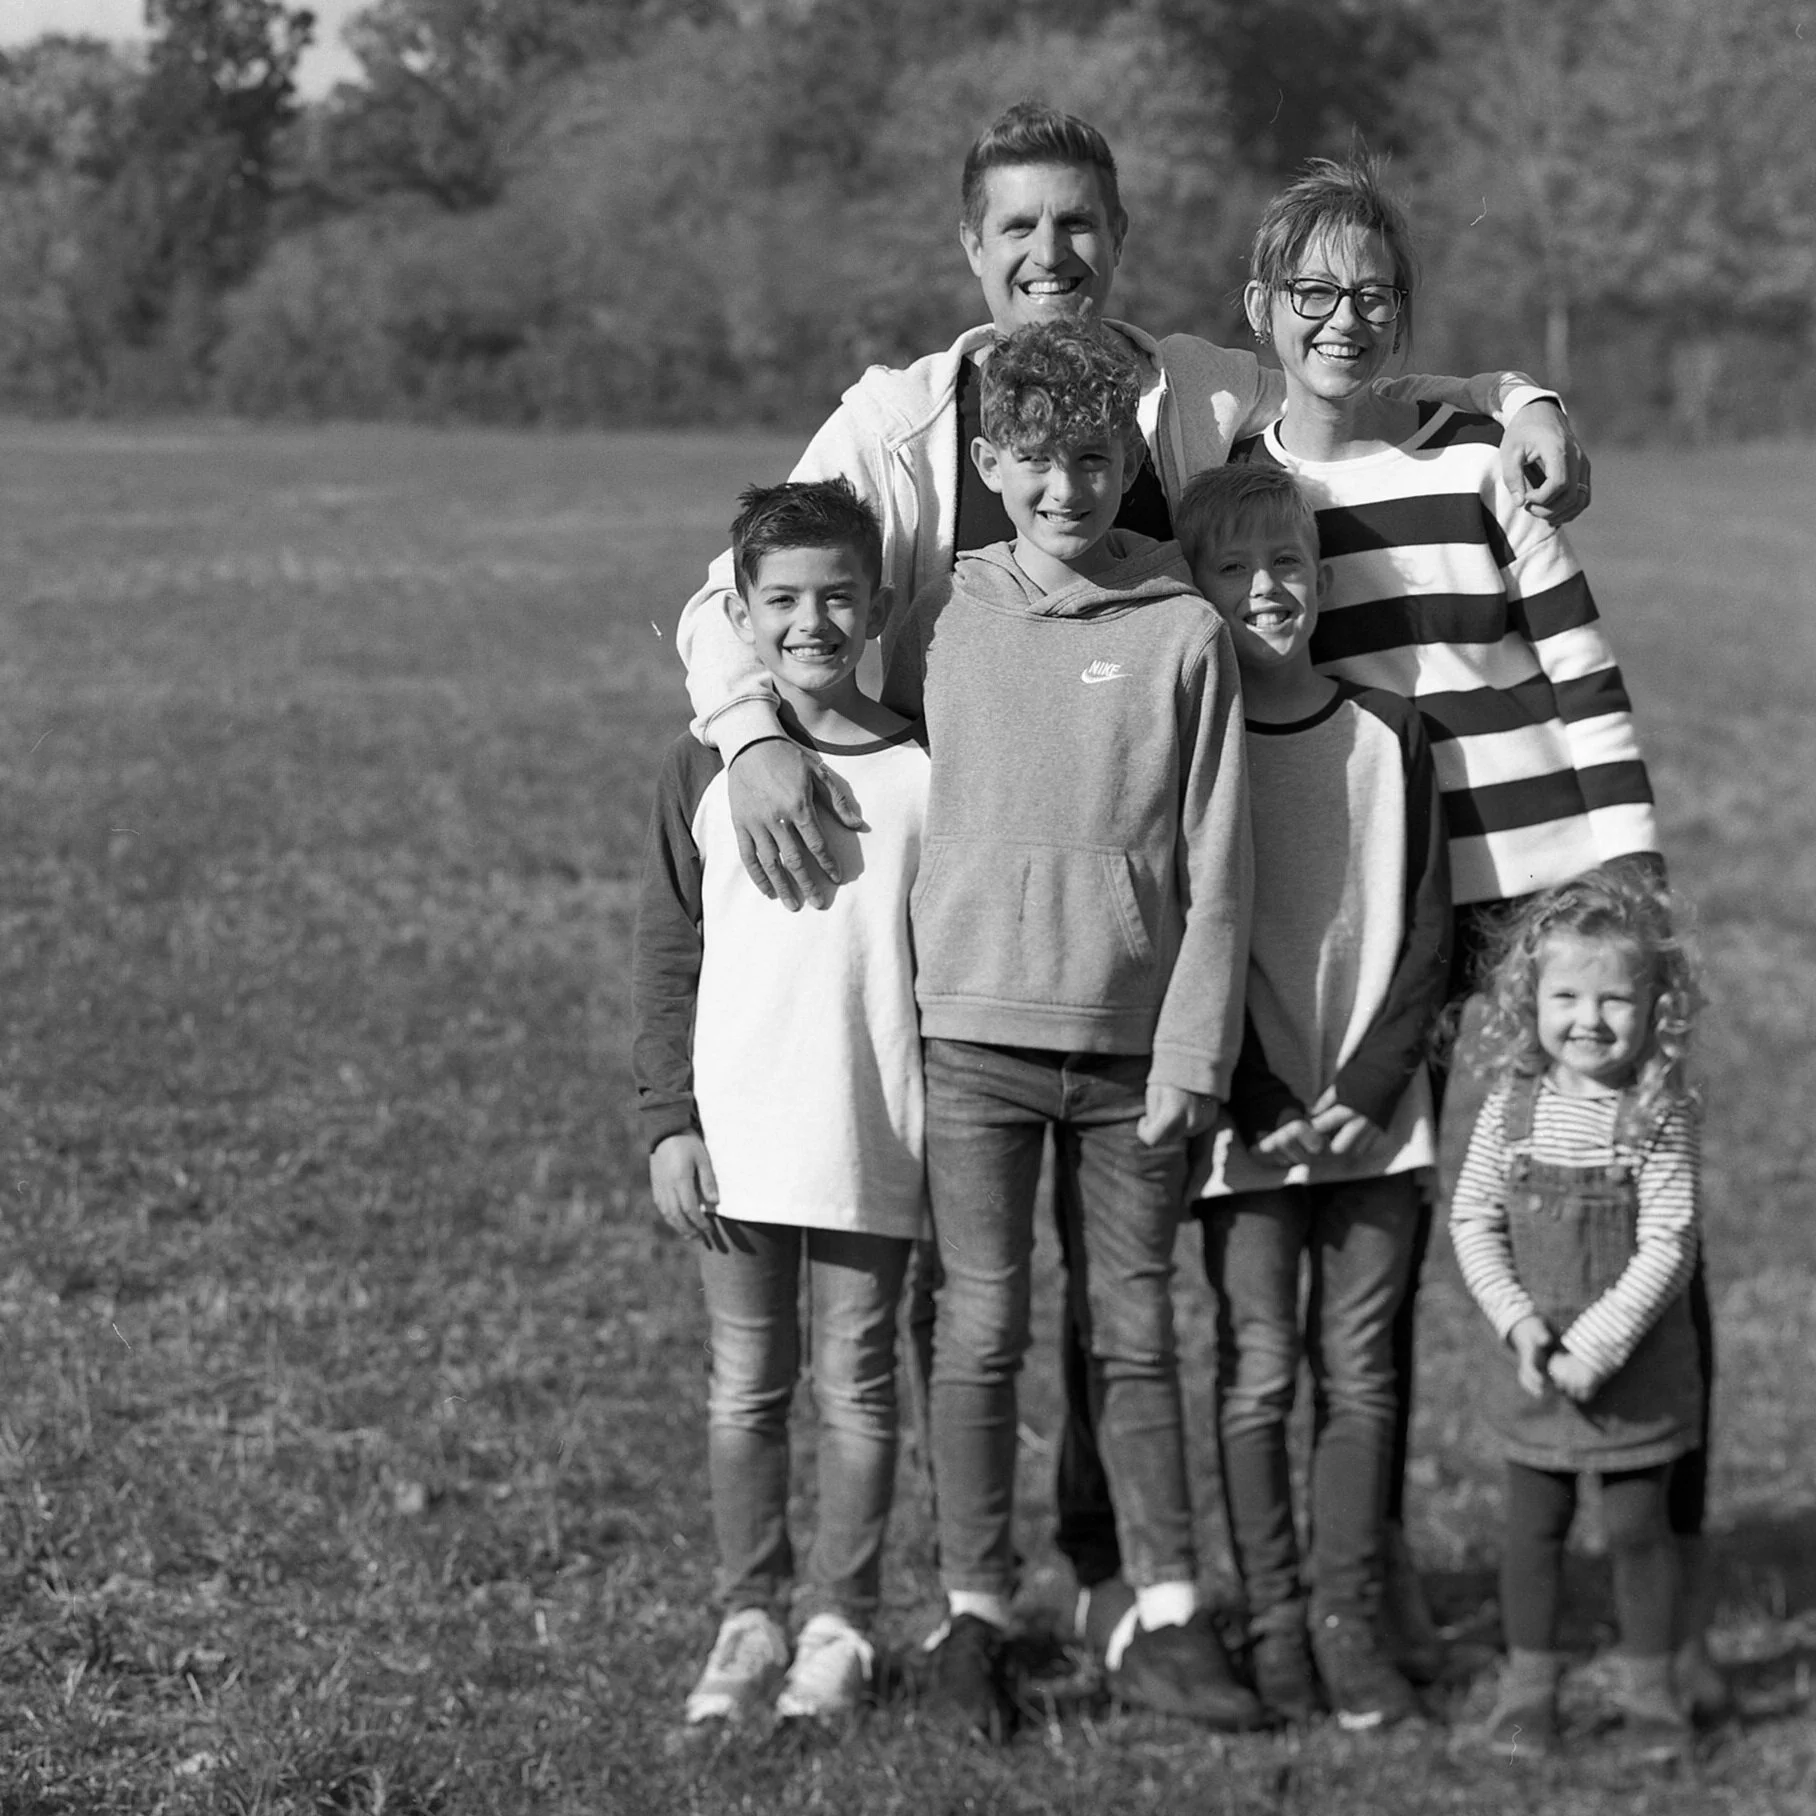
Over the weekend we had brilliant fun with the Escott family who wanted some pictures to send to relatives during the strange times we are having at the moment. We had to arrange this a bit in advance as getting diaries and weather all matching was a bit of a nightmare. Finally, we had a day with some sun and we thought the trees would be lovely at this time of year, so we all met up near a local monument at Burton Pynsent to have a family shoot.
The location is perfect as the monument provides a bit of interest and texture for group photos while the woods below is gorgeous at all times of year, but particularly now with the explosion of autumnal colours in full effect.
It was a lovely time as they were all so happy and full of smiles - although getting them all to look at us at the same time was, as usual, quite challenging!
We are still taking bookings for socially distanced family photo shoots before Christmas so don’t hesitate to get in touch!
Press the button below to take you straight to our contact page!
Intrepid Camera family shoot
We had a family shoot towards the end of October and as we were preparing to finish we asked if they would be happy to pose long enough for us to try out our Intrepid large format camera. They were very keen! When the camera emerged from the car they were all extremely curious and wanted to get under the dark cloth and have a look at the screen to see what we saw.
The image you get on the back, as you’re focussing the camera, is upside down and reversed, which makes framing the image quite interesting!
When you add that you can’t just ‘click a button’ and get a picture, the whole thing becomes much more of an event than using a digital camera.
Here’s the rough process, to give you an idea of the time it all takes:
Arrange everyone in the frame. There’s no zoom and everything is cumbersome and on a tripod, so this involves moving people and camera around a lot…which you’ll see we didn’t quite get right!
Get under the dark cloth and focus the image.
Get a meter reading (we cheated and used one of our Fuji cameras)
Set the Aperture and shutter speed.
Realise people have moved, so refocus the image.
Notice a cloud has covered the sun, so take another meter reading and change the settings!
Manually cock the shutter - this is priming a spring that will open and close the shutter for a set time when you eventually get to press it!
Close the shutter - you have to do this manually and if you forget you will expose the film when you remove the dark slide at step 10 and get no picture.
Insert the film holder (you can’t do this before as it goes in front of the focussing screen and blocks your view).
Remove the dark slide.
Get everyone to smile…while noticing the cloud has moved so the light has changed!
Press the shutter button.
Replace the dark slide.
Remove the film holder.
This process happens for each shot, and takes a while! Weirdly though, it’s such a performance that the family posed really well and it’s about the only time we got them all to hold still and smile at the same time!
Of course, we had no idea if we’d managed to actually capture anything on our 4 shots, so off we went to process the film.
Result!

Of the four shots, we got one dud, which we think was because the shutter was cocked but not closed, and two that are a bit too contrasty because the light changed before we took the picture.
Overall though, we’re happy with the results on this first trial. Next time, we’ll definitely spend more time posing and hopefully less time in the process of taking the image!


David Bailey, David Hurn & Martin Parr
“It takes a lot of imagination to be a good photographer. You need less imagination to be a painter because you can invent things. But in photography everything is so ordinary; it takes a lot of looking before you learn to see the extraordinary.”
David Bailey
As massive fans of photography, we love to visit The Martin Parr Foundation at Bristol Paintworks. Being regulars, we sometimes get to hear about events before they get a chance to sell out, and one such time was when the one and only David Bailey was booked to give a talk alongside David Hurn and Parr himself.
If you are into photography whether it’s a hobby of yours or you photograph as a profession, there is no way that the name David Bailey has escaped you. Bailey along with Terence Donovan and Brian Duffy captured and assisted in creating the 'Swinging London’ of the 1960s with a culture of fashion and celebrity chic. The three photographers socialised with actors, musicians and royalty, and found themselves elevated to celebrity status.
I’ll be honest with you I wasn’t entirely sure what to make of Bailey initially as his whole demeanour gives a grumpy disposition but as soon as he started talking he had a very dry wit, was incredibly entertaining and funny. He doesn’t hold back and says how it is (I admire that!) and sure has a tale to tell having spent sixty years as a photographer!
You know when you really admire someone and you try to act ‘cool’ and ‘normal’ when you’re around them?! well that was me when I took his photo using my Olympus OM-n1 camera. Now obviously using a 40 year old film camera is always a bit risky when it comes to taking photos but as you can see it still works a treat! Bailey was very gracious in having his photograph taken and was very patient in signing all my books!
David Bailey (taken on Olympus OM-1n 35mm)
“The most important piece of equipment after the camera is a good pair of shoes”
David Hurn
David Hurn is a self-taught photographer who began his career in 1955 working as an assistant at the Reflex Photo Agency. He has a longstanding international reputation as one of Britain’s most influential reportage photographers and gained his reputation as a photojournalist for his documentation of the Hungarian revolution in 1956. Hurn eventually turned away from coverage of current affairs preferring to take a more personal approach to photography and became an associate member of Magnum in 1965 and a full member in 1967. He is a big supporter of the Martin Parr Foundation and we’ve had the pleasure to meet him on a few occasions when we’ve been visiting the Paintworks for talks.

David Hurn (taken on Olympus OM-1n 35mm)
“I am what I photograph”
Martin Parr
Martin Parr is a British documentary photographer and photojournalist who has a very distinctive and garish style, consisting of busy frames and often bold colours, which are down to the film stock and digital processes he uses. Recently he has been using amateur film such as Fuji 400 Superior, and Agfa Ultra or Fuji 100 asa film for the ring flash and macro lens. The combination with the flash gives a high colour saturation therefore no photoshop required. His photographs offer the public an opportunity to see the world from his unique perspective.
Parr has been researching leisure, consumption and communication on his worldwide travels over several decades. He enables us to see things that seem familiar to us in a completely new way and creates his own image of society. He presents and publishes the same photographs in the context of art photography, in exhibitions and in art books. Parr is now a member of Magnum and his instantly recognisable style has gathered him many admirers.

Martin Parr (taken on Olympus OM-1n 35mm)

David Hurn, David Bailey & Martin Parr

Jethro
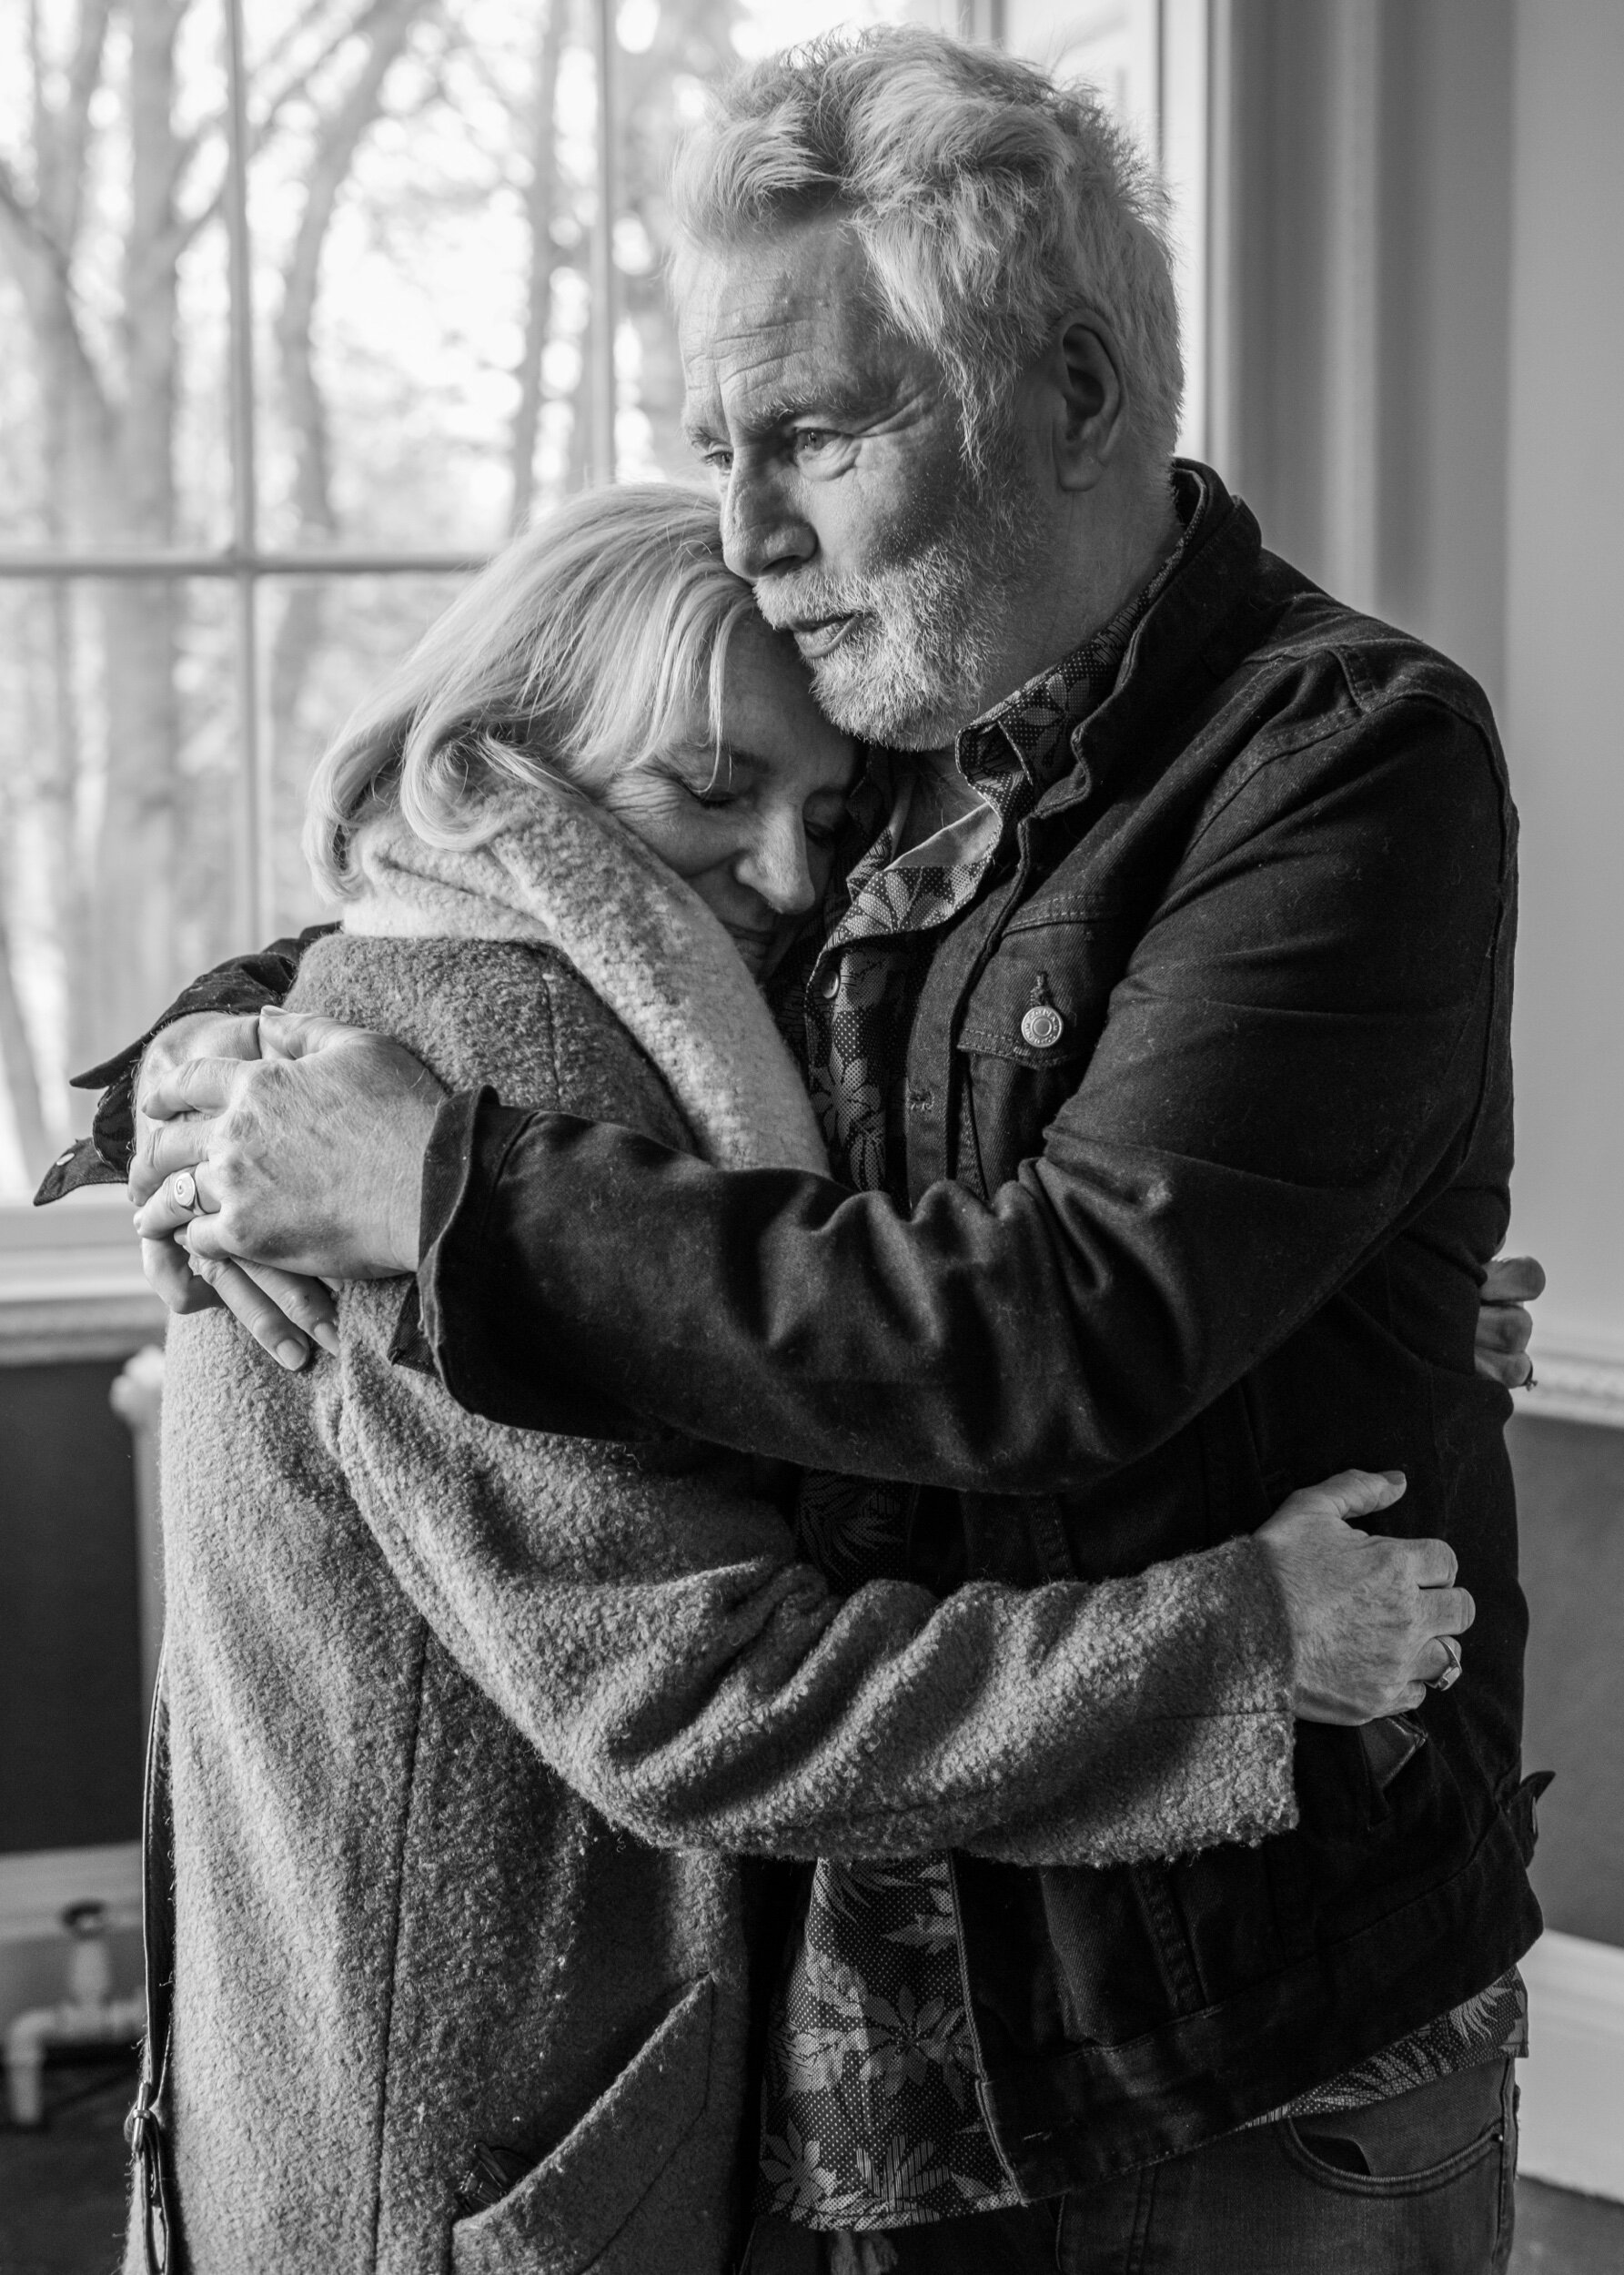
Jep is a very talented actor based in London and I have been great friends with him for over thirty years. We grew up next door to each other in the same Somerset village where our parents still live and from time to time we manage to meet up. Taking his photograph has always been a complete joy especially as he has, dare I say it, an amazing characteristic and handsome face but also it’s a great opportunity to have a long overdue catch up! Having always had a deep interest in the theatre and live performance (and yes, can you believe it, I have a qualification in performing arts!) I thoroughly enjoy hearing about what Jethro is up to in the world of theatre, tv and film. In 2012, I went to the Globe in London to witness Jethro star alongside Stephen Fry, Mark Rylance & Roger Lloyd Pack in Shakespeare’s Twelfth night, little did I know that one of my favourite photographers, Mary McCartney, was photographing them back stage! These head shots were taken just before we went into lockdown in Jethro’s parents garden, little did we know then what a strange six months would be ahead of us…


Dawn & Ron
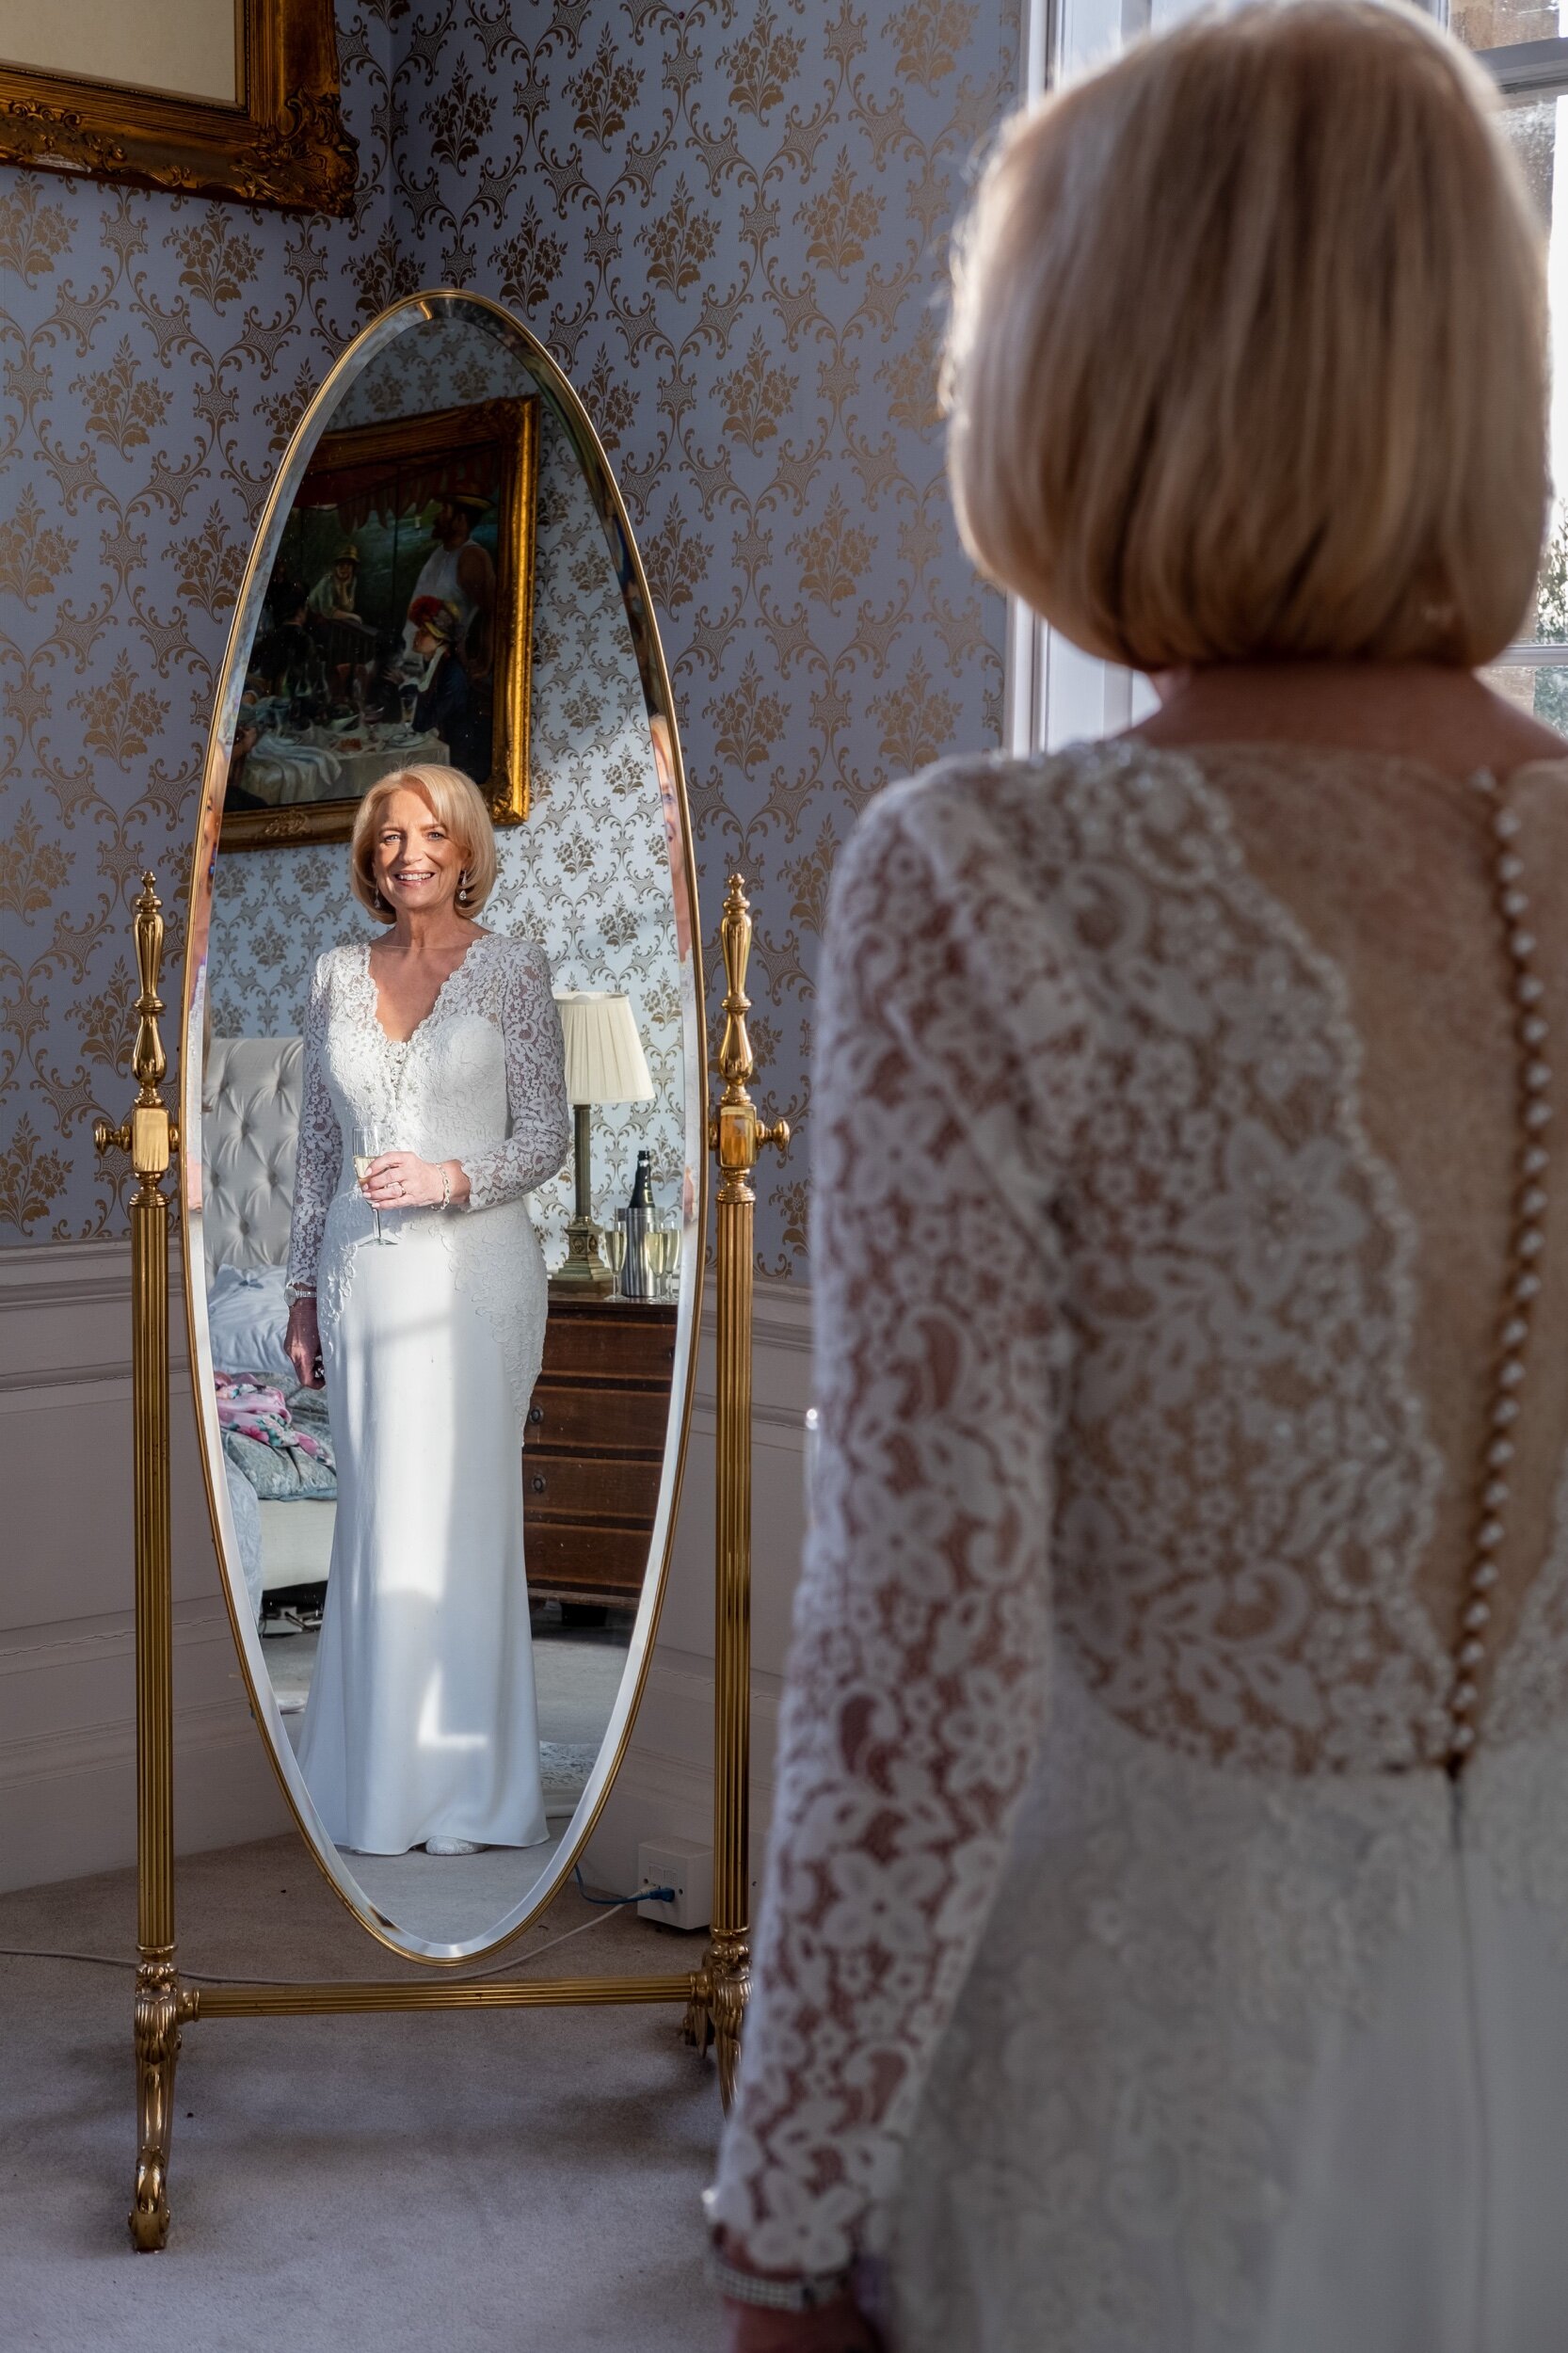
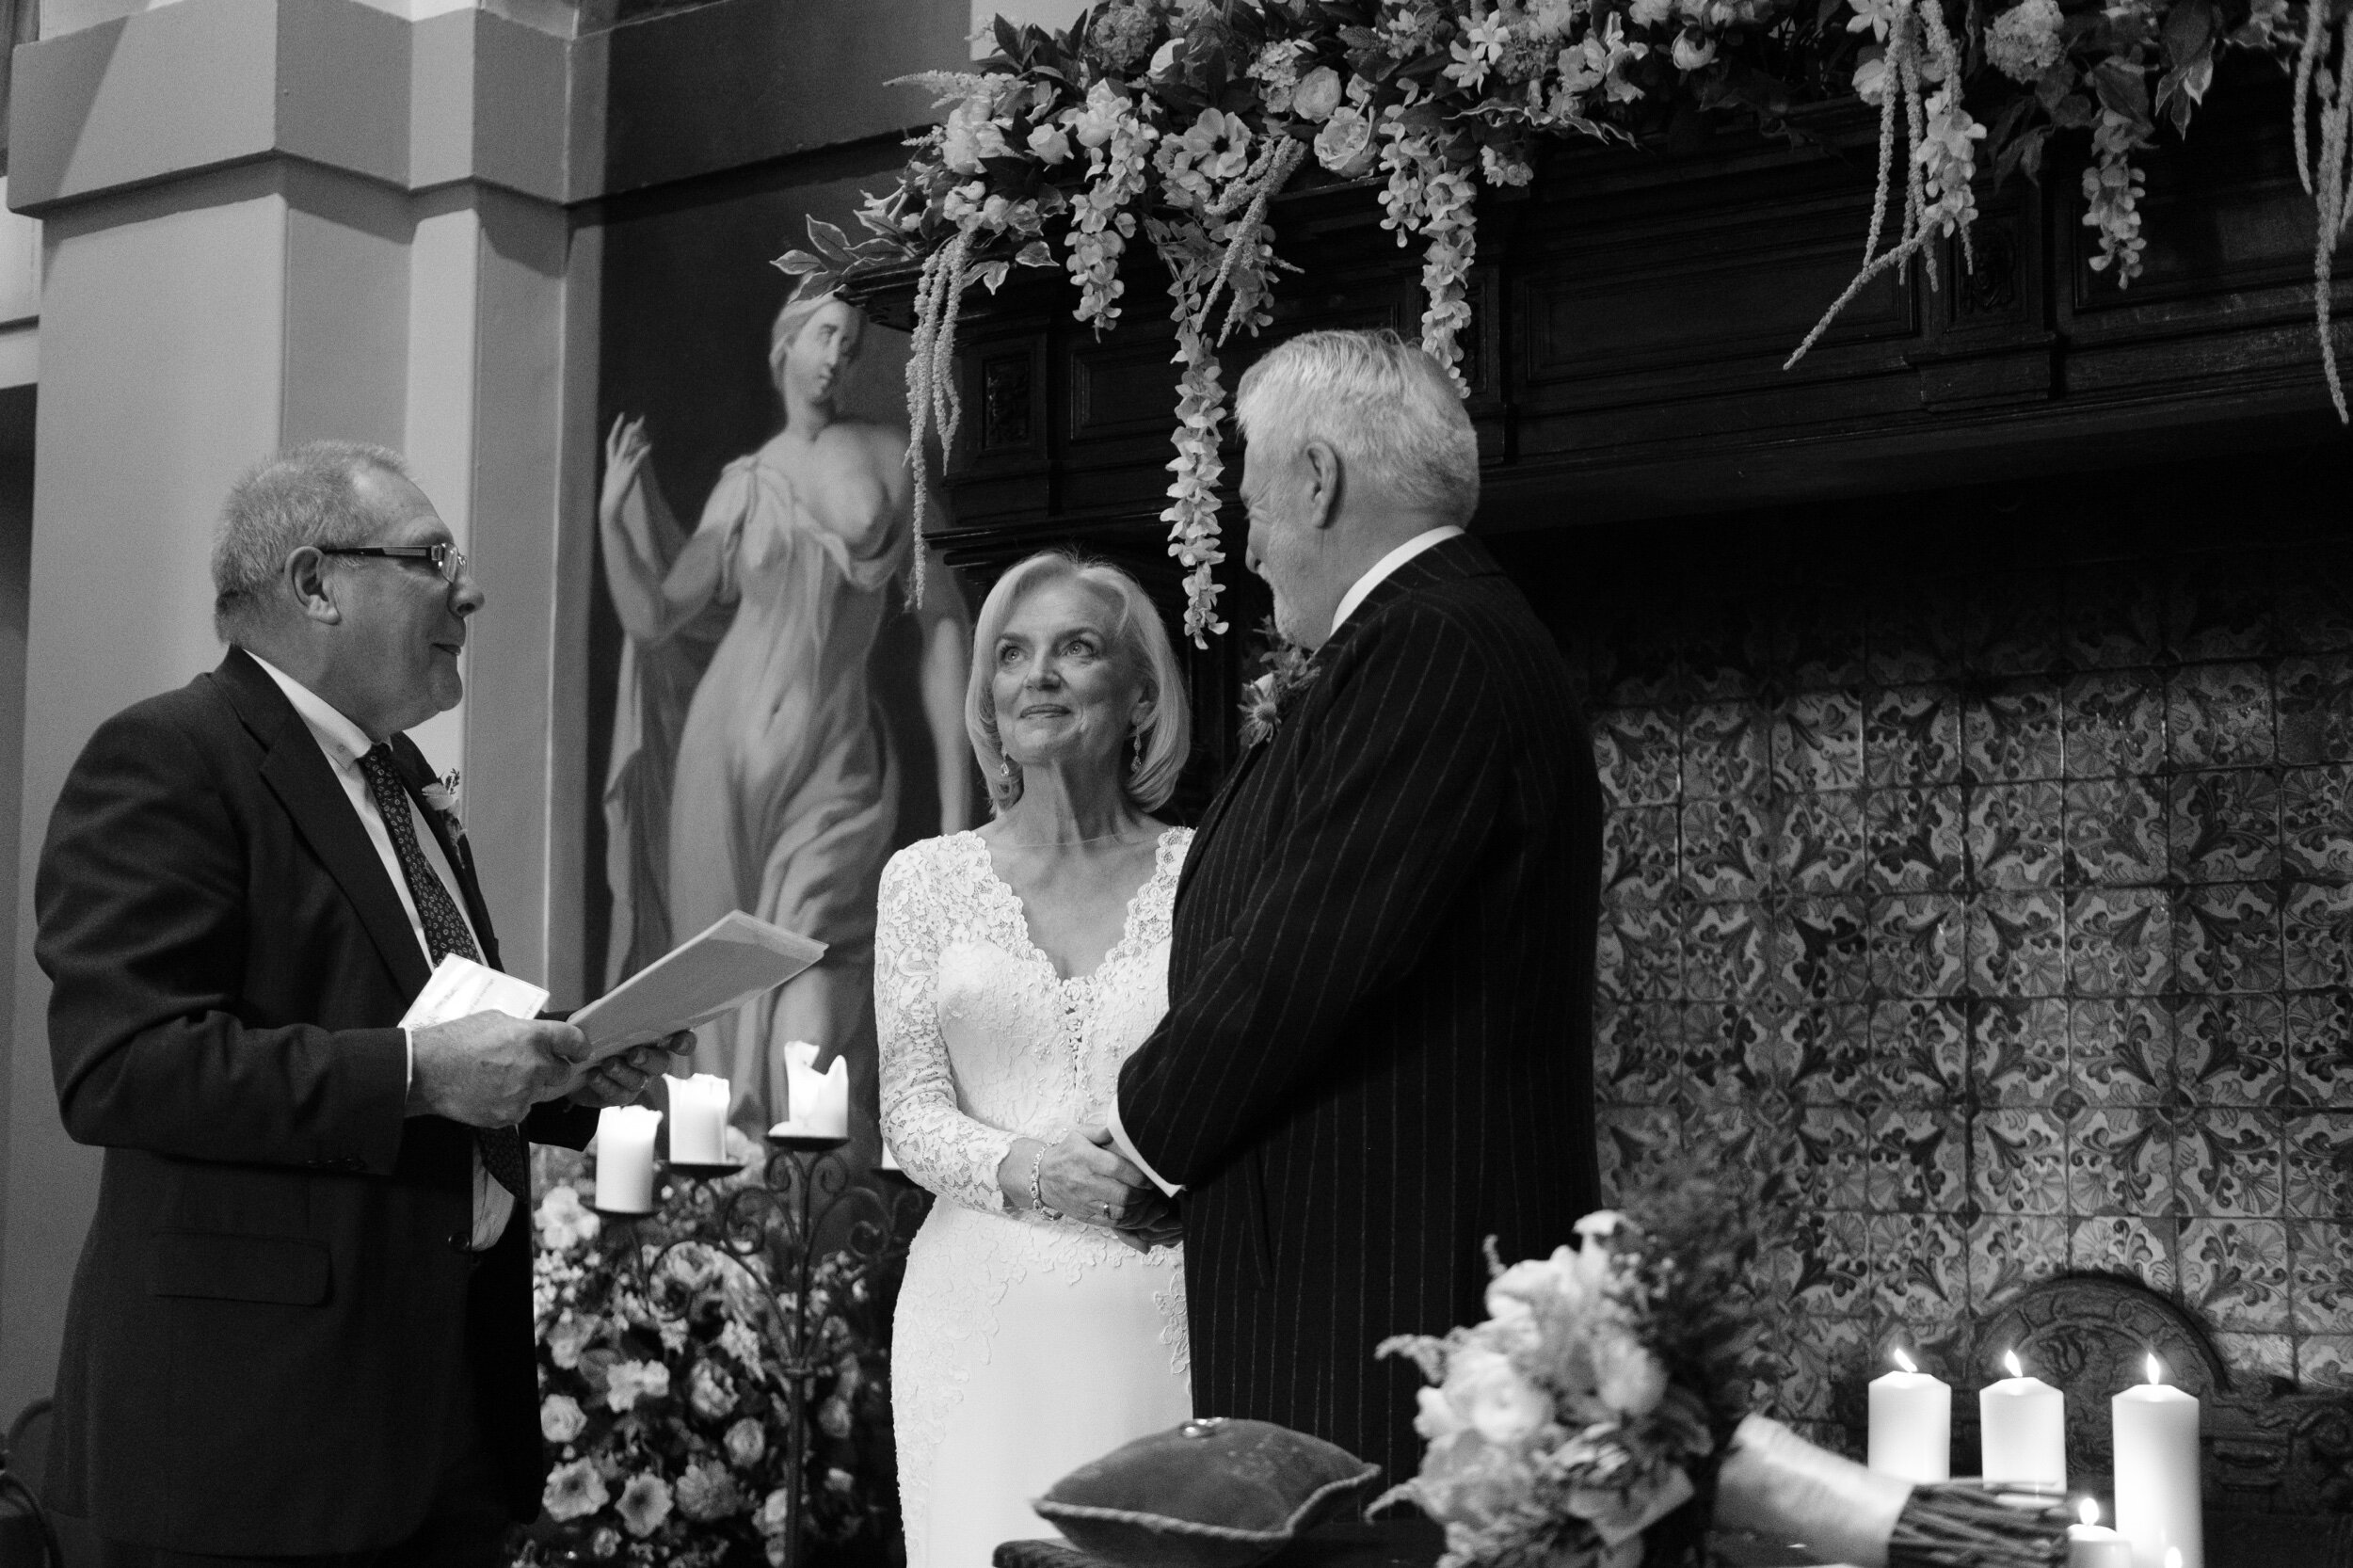
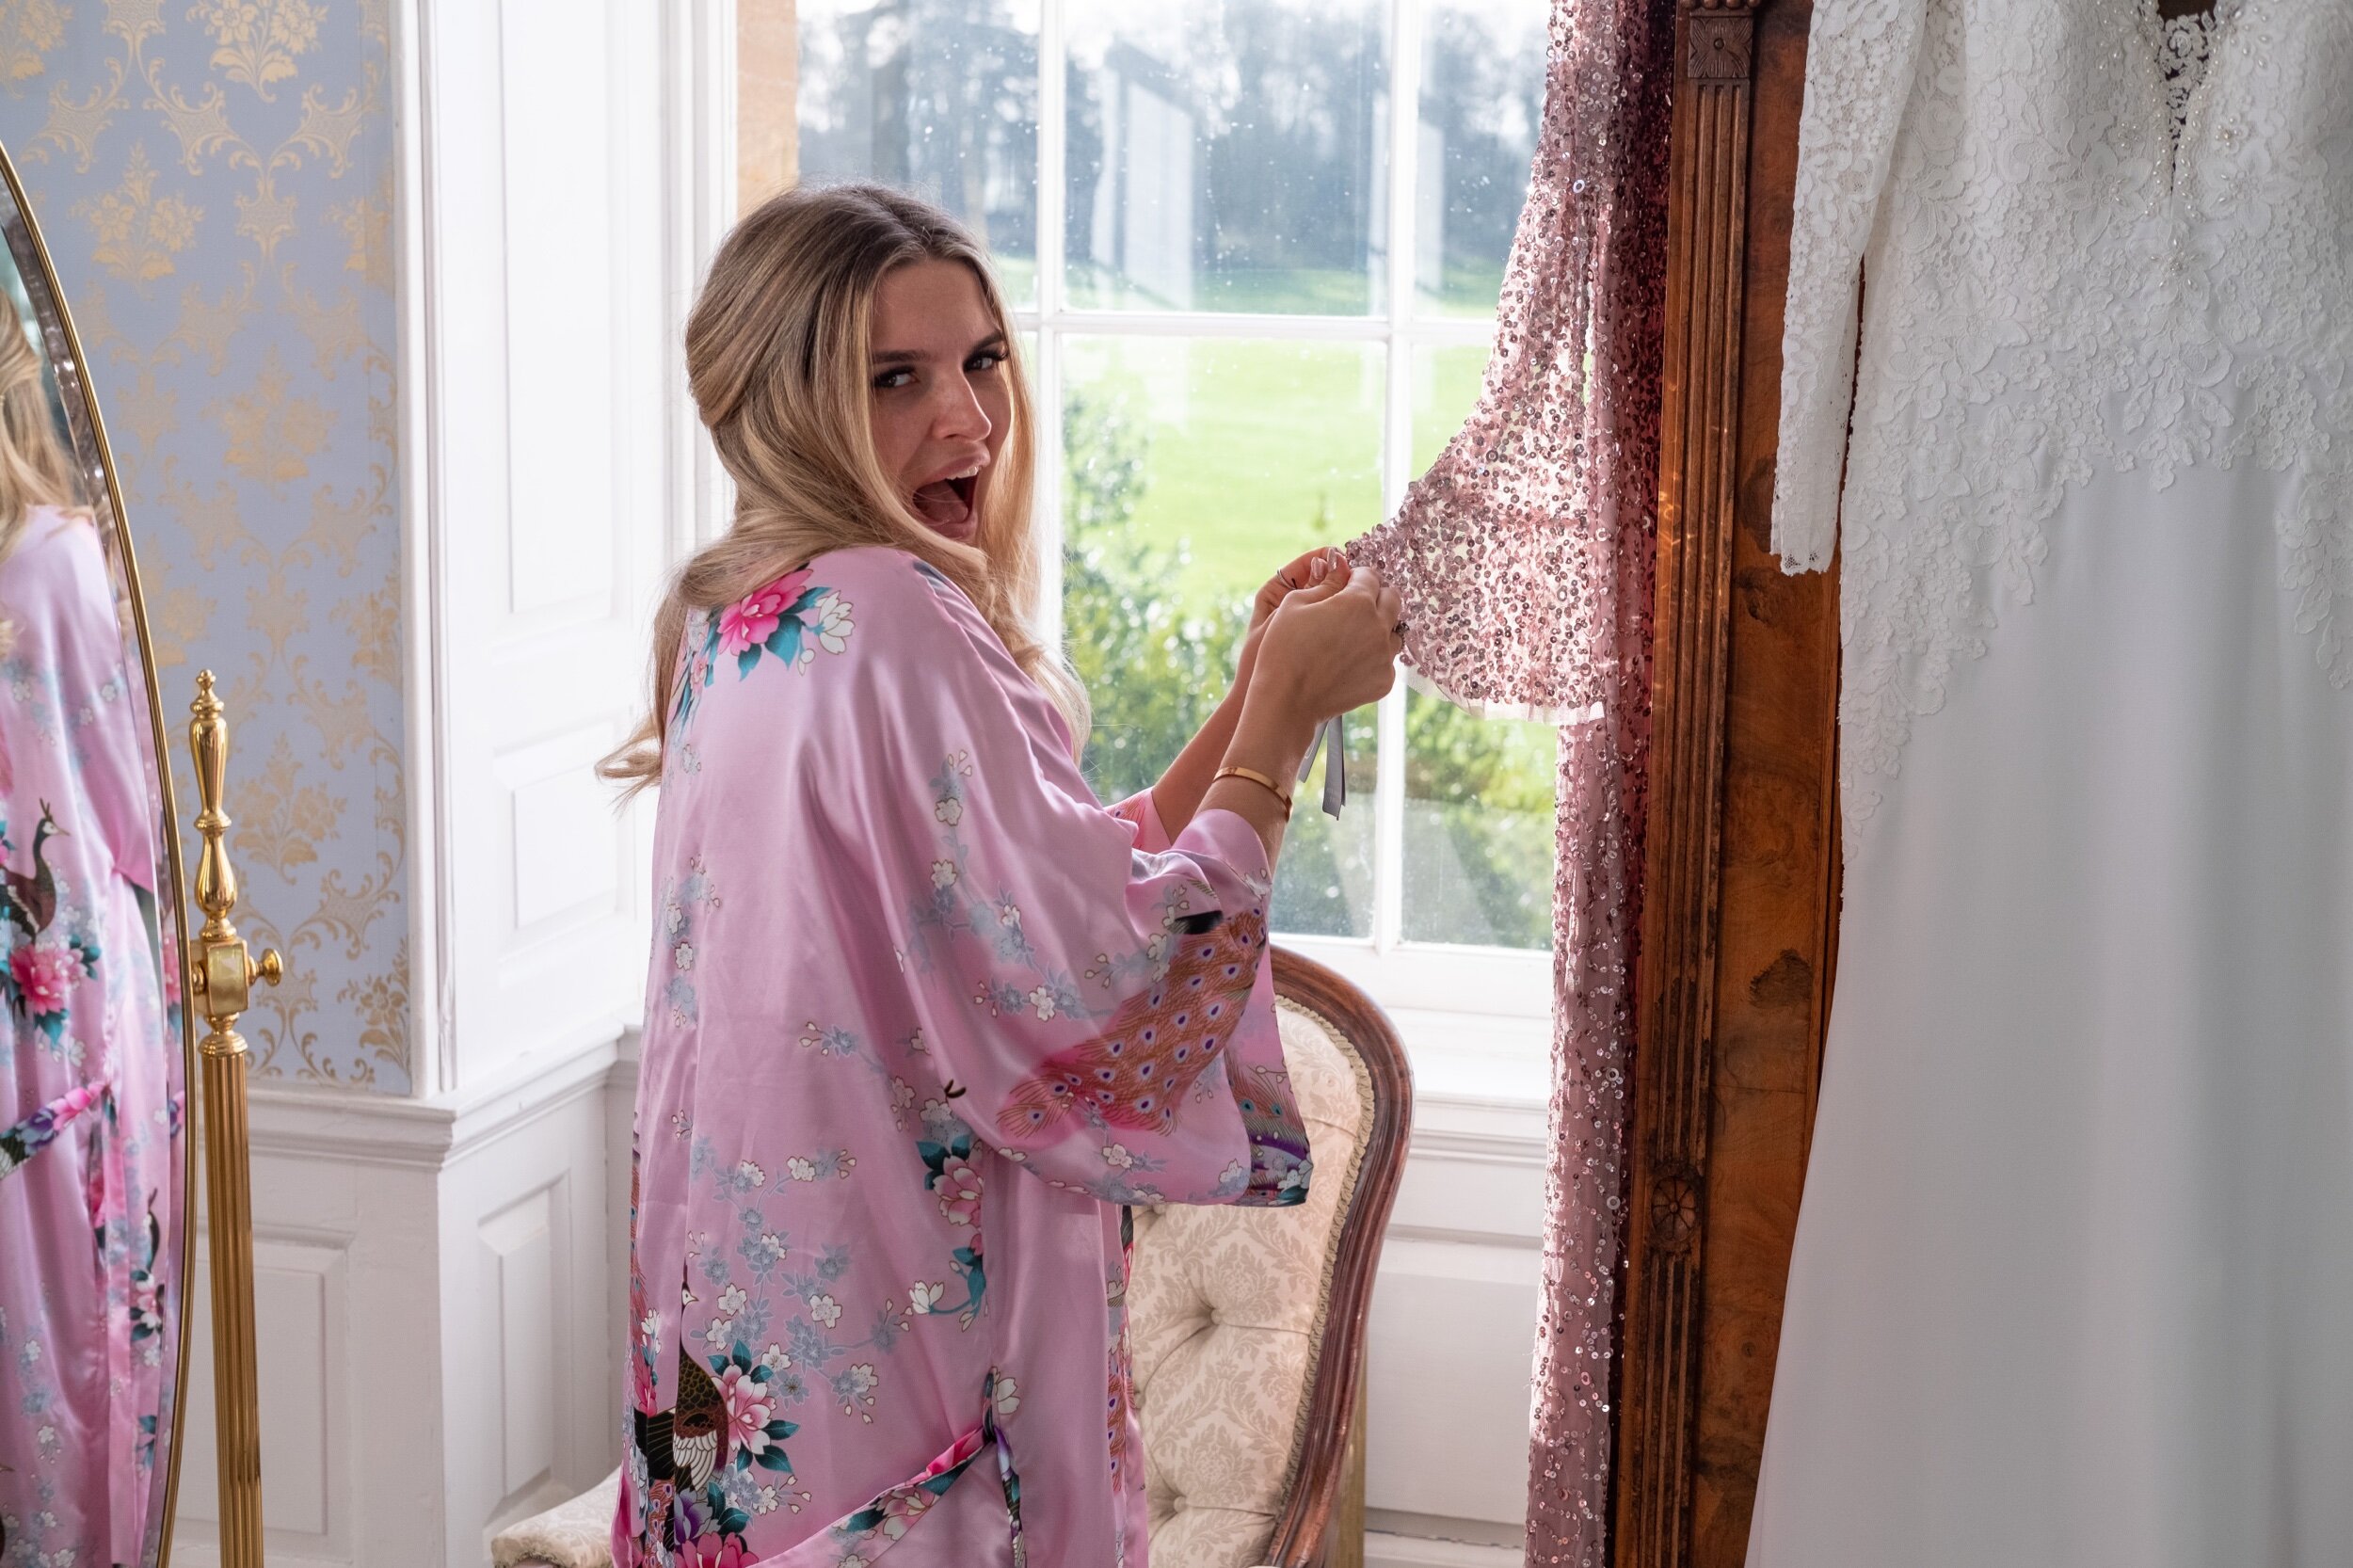
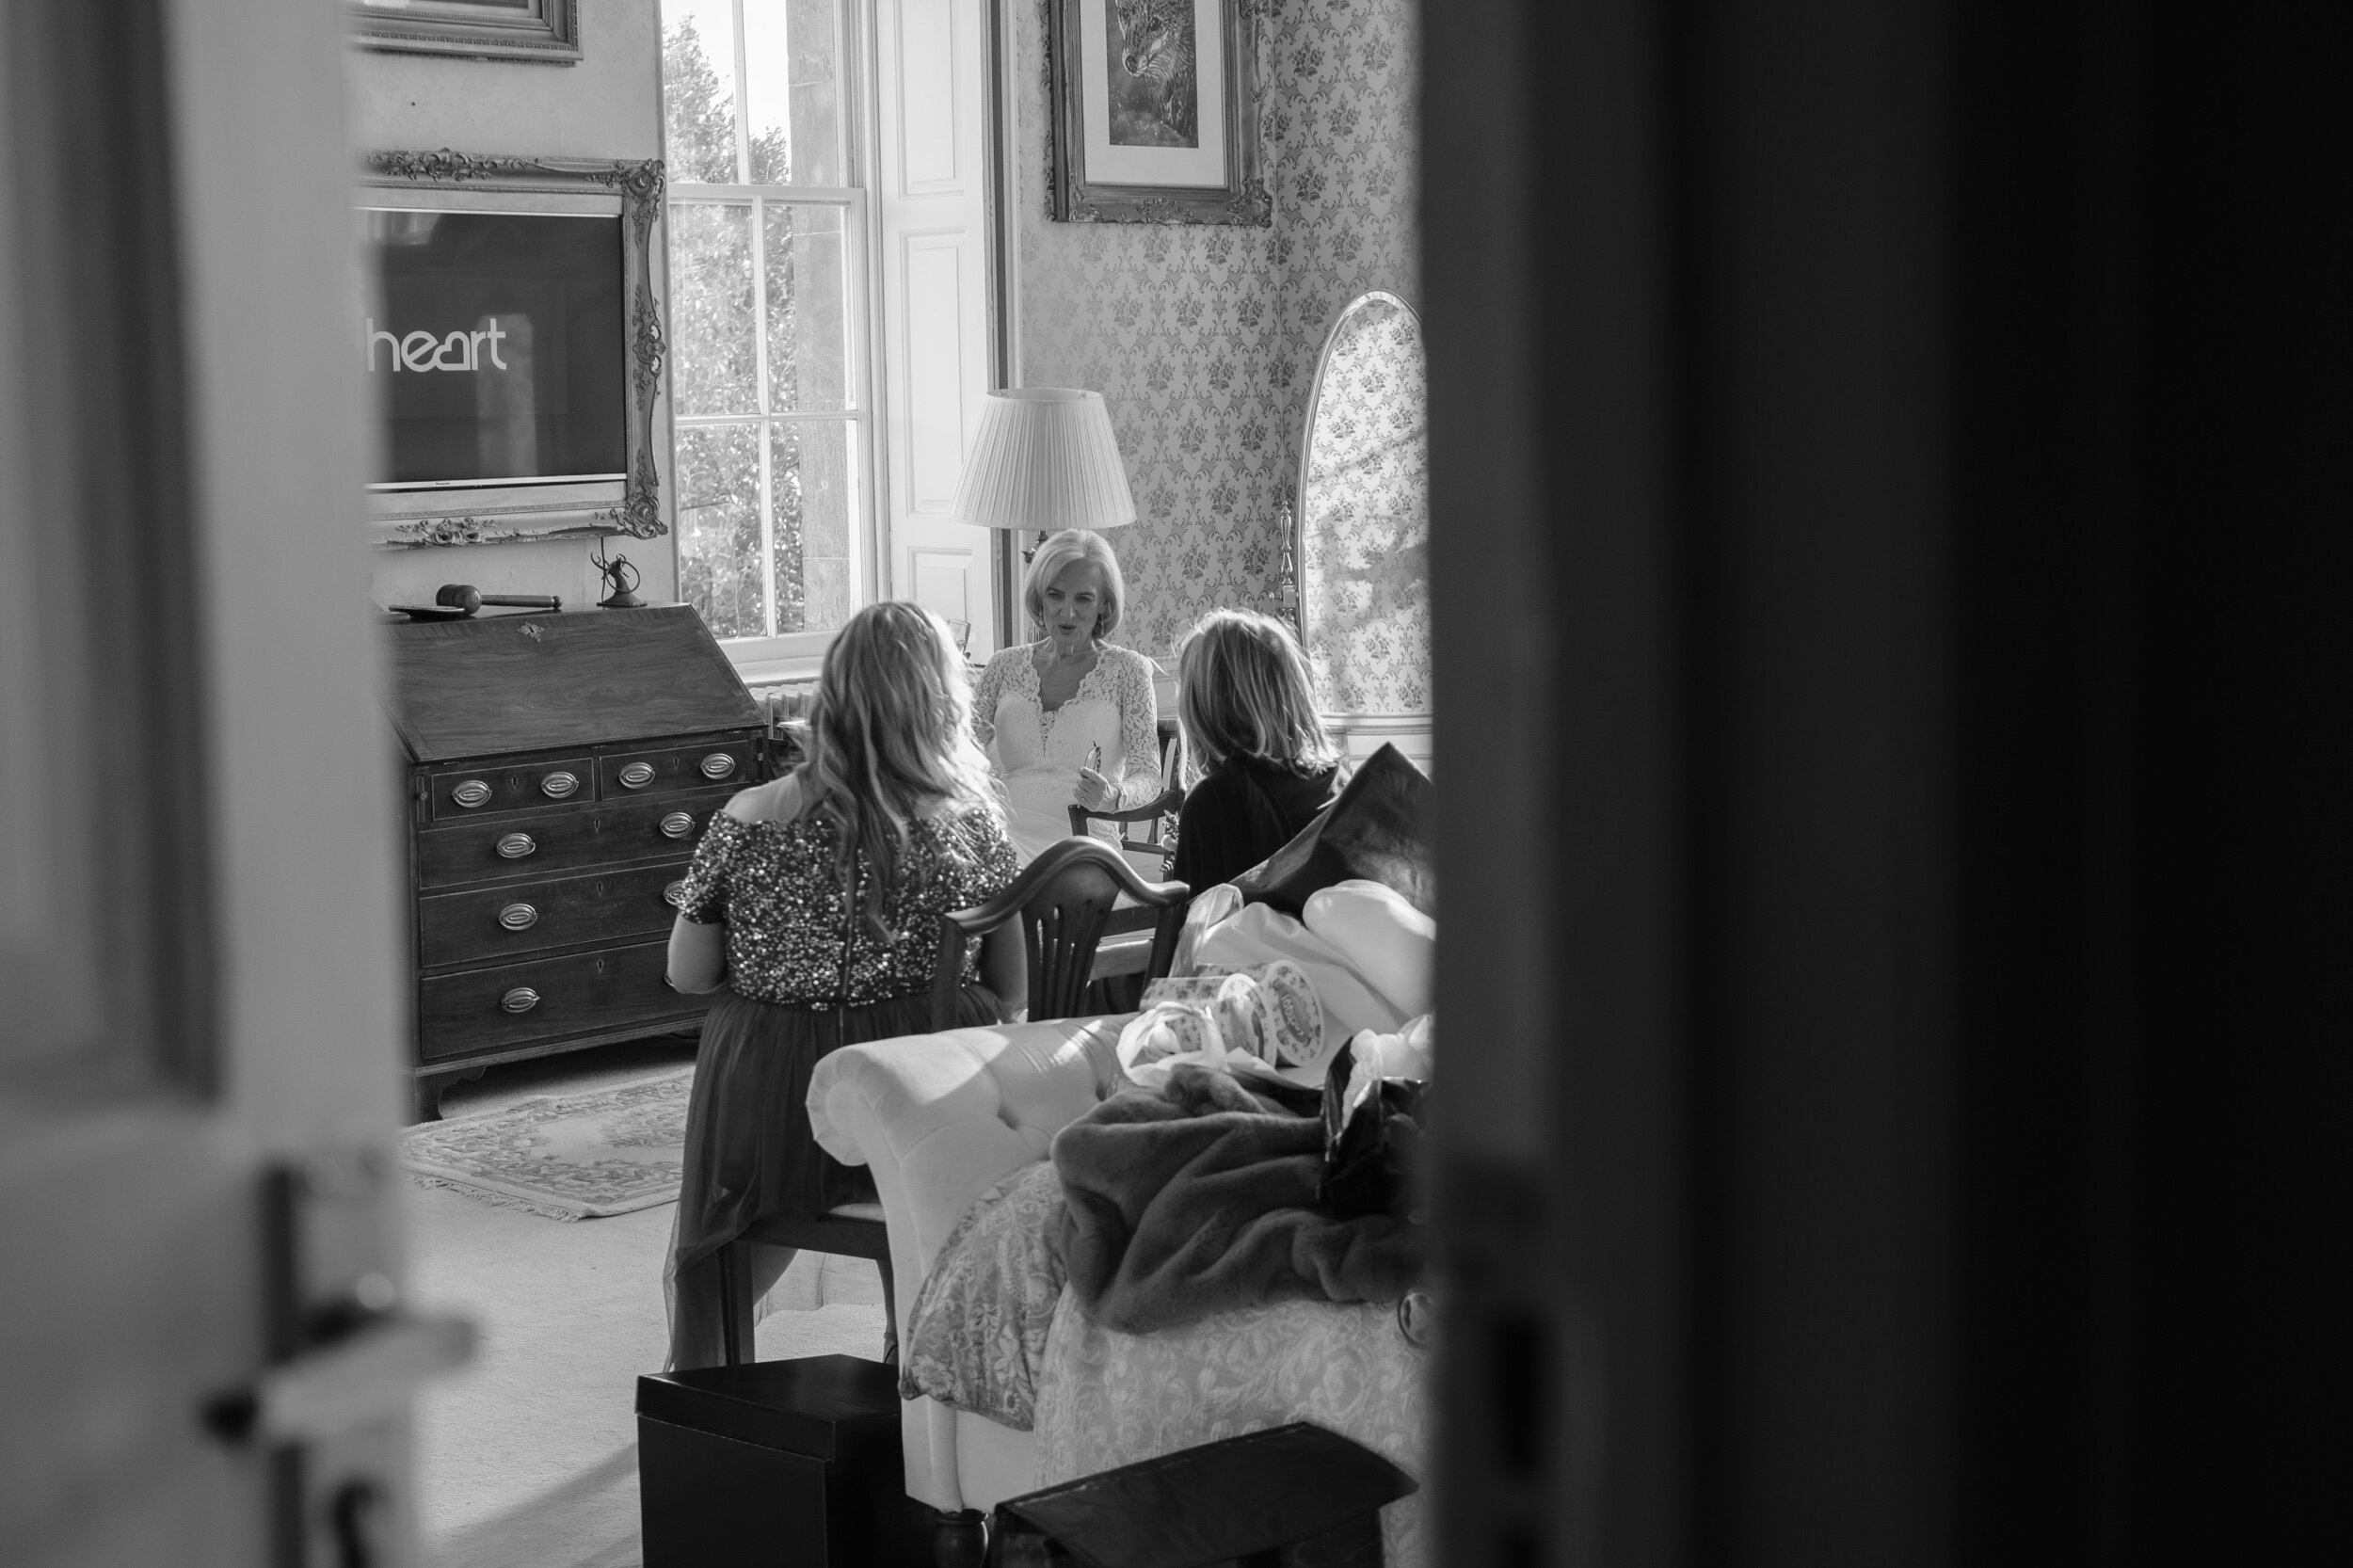
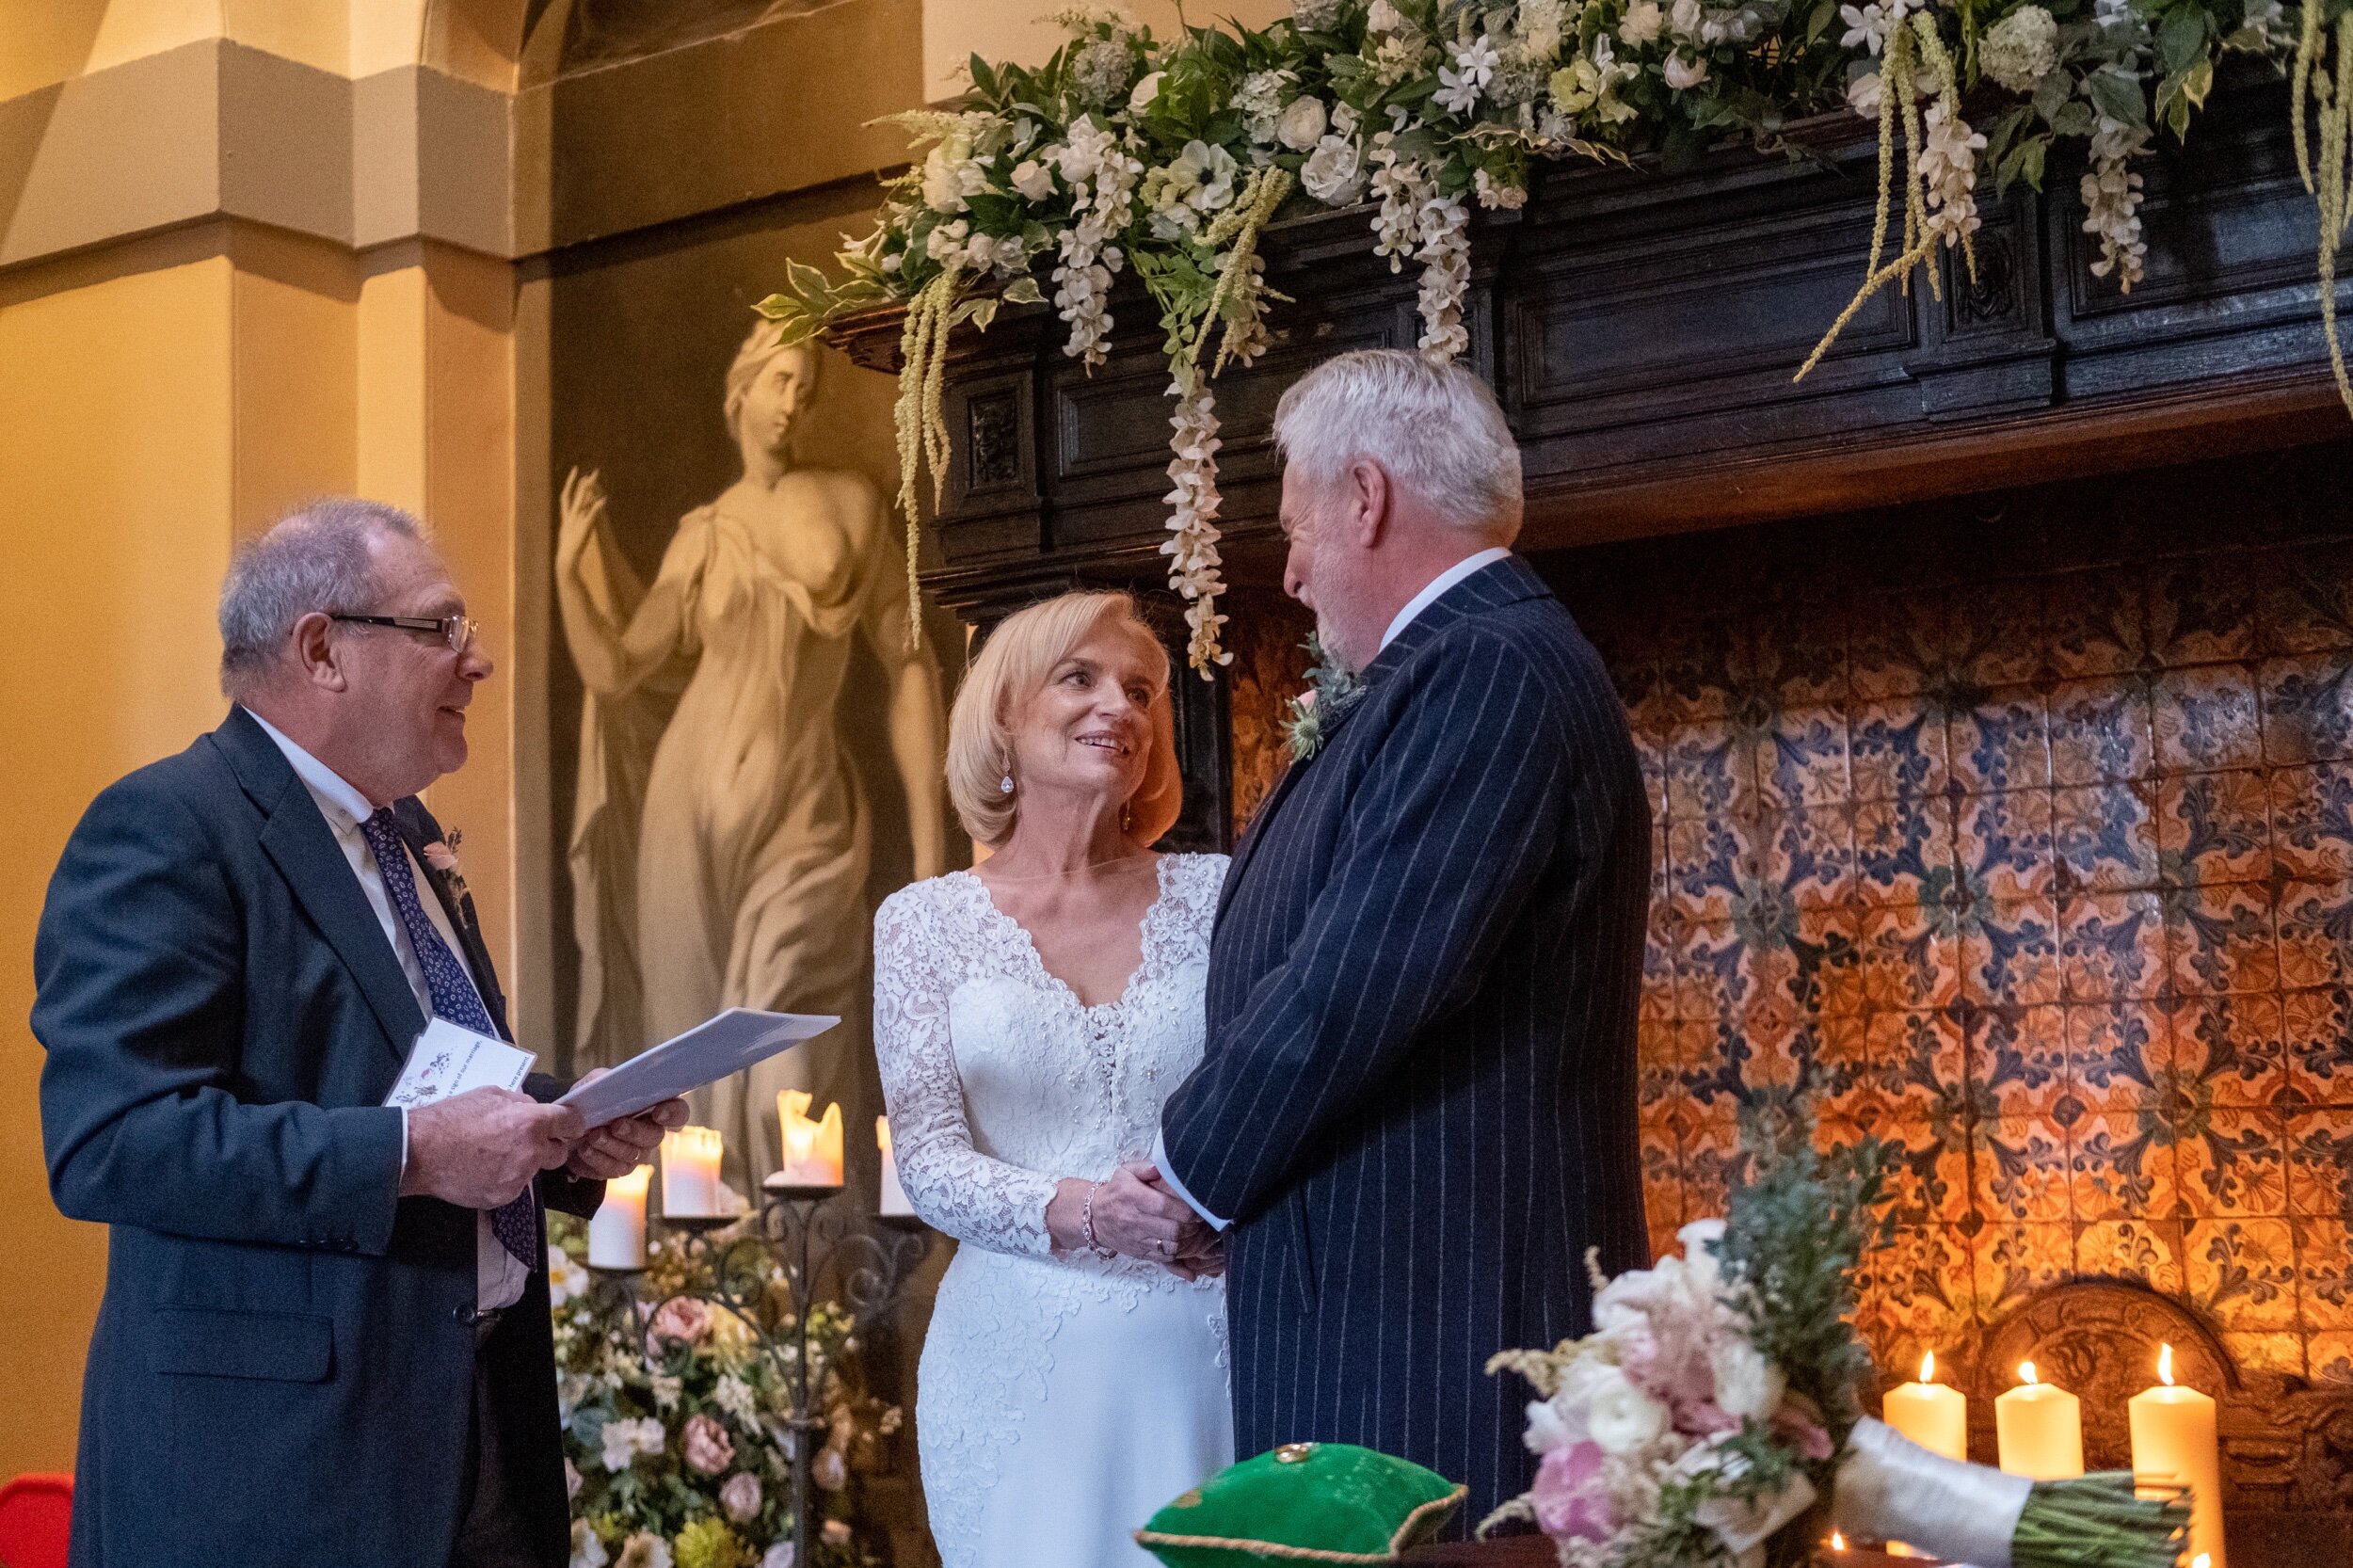
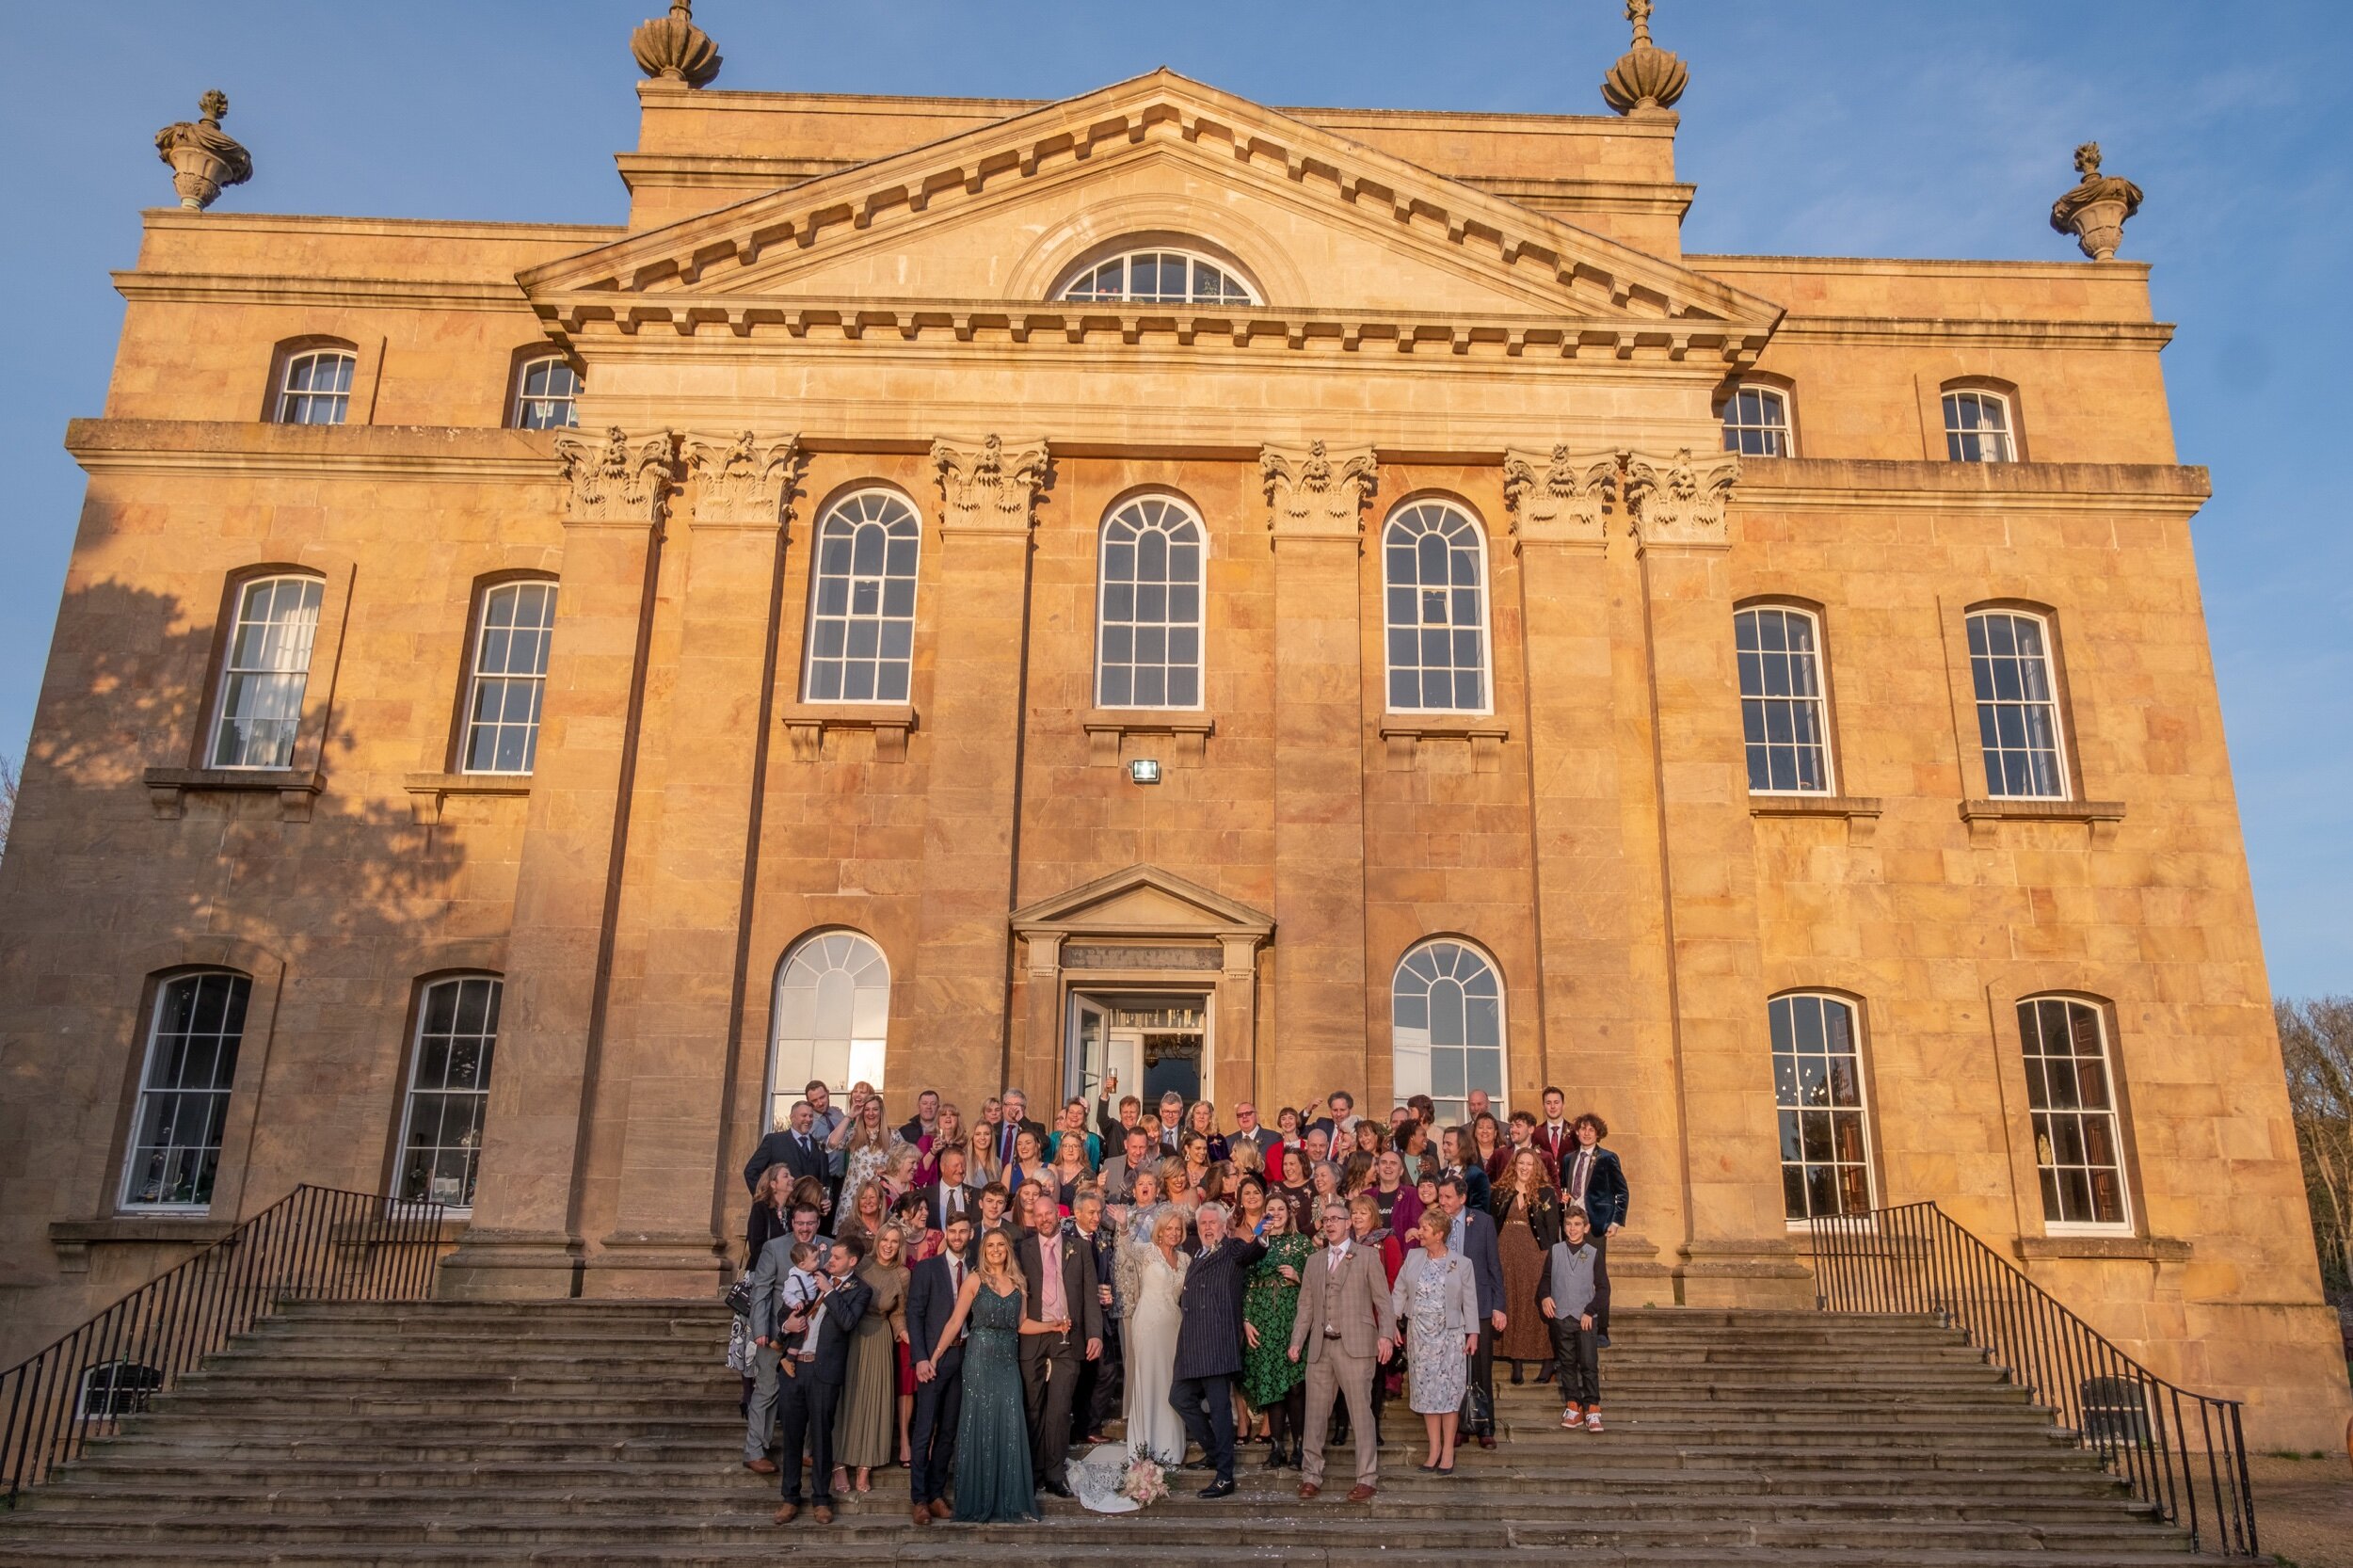
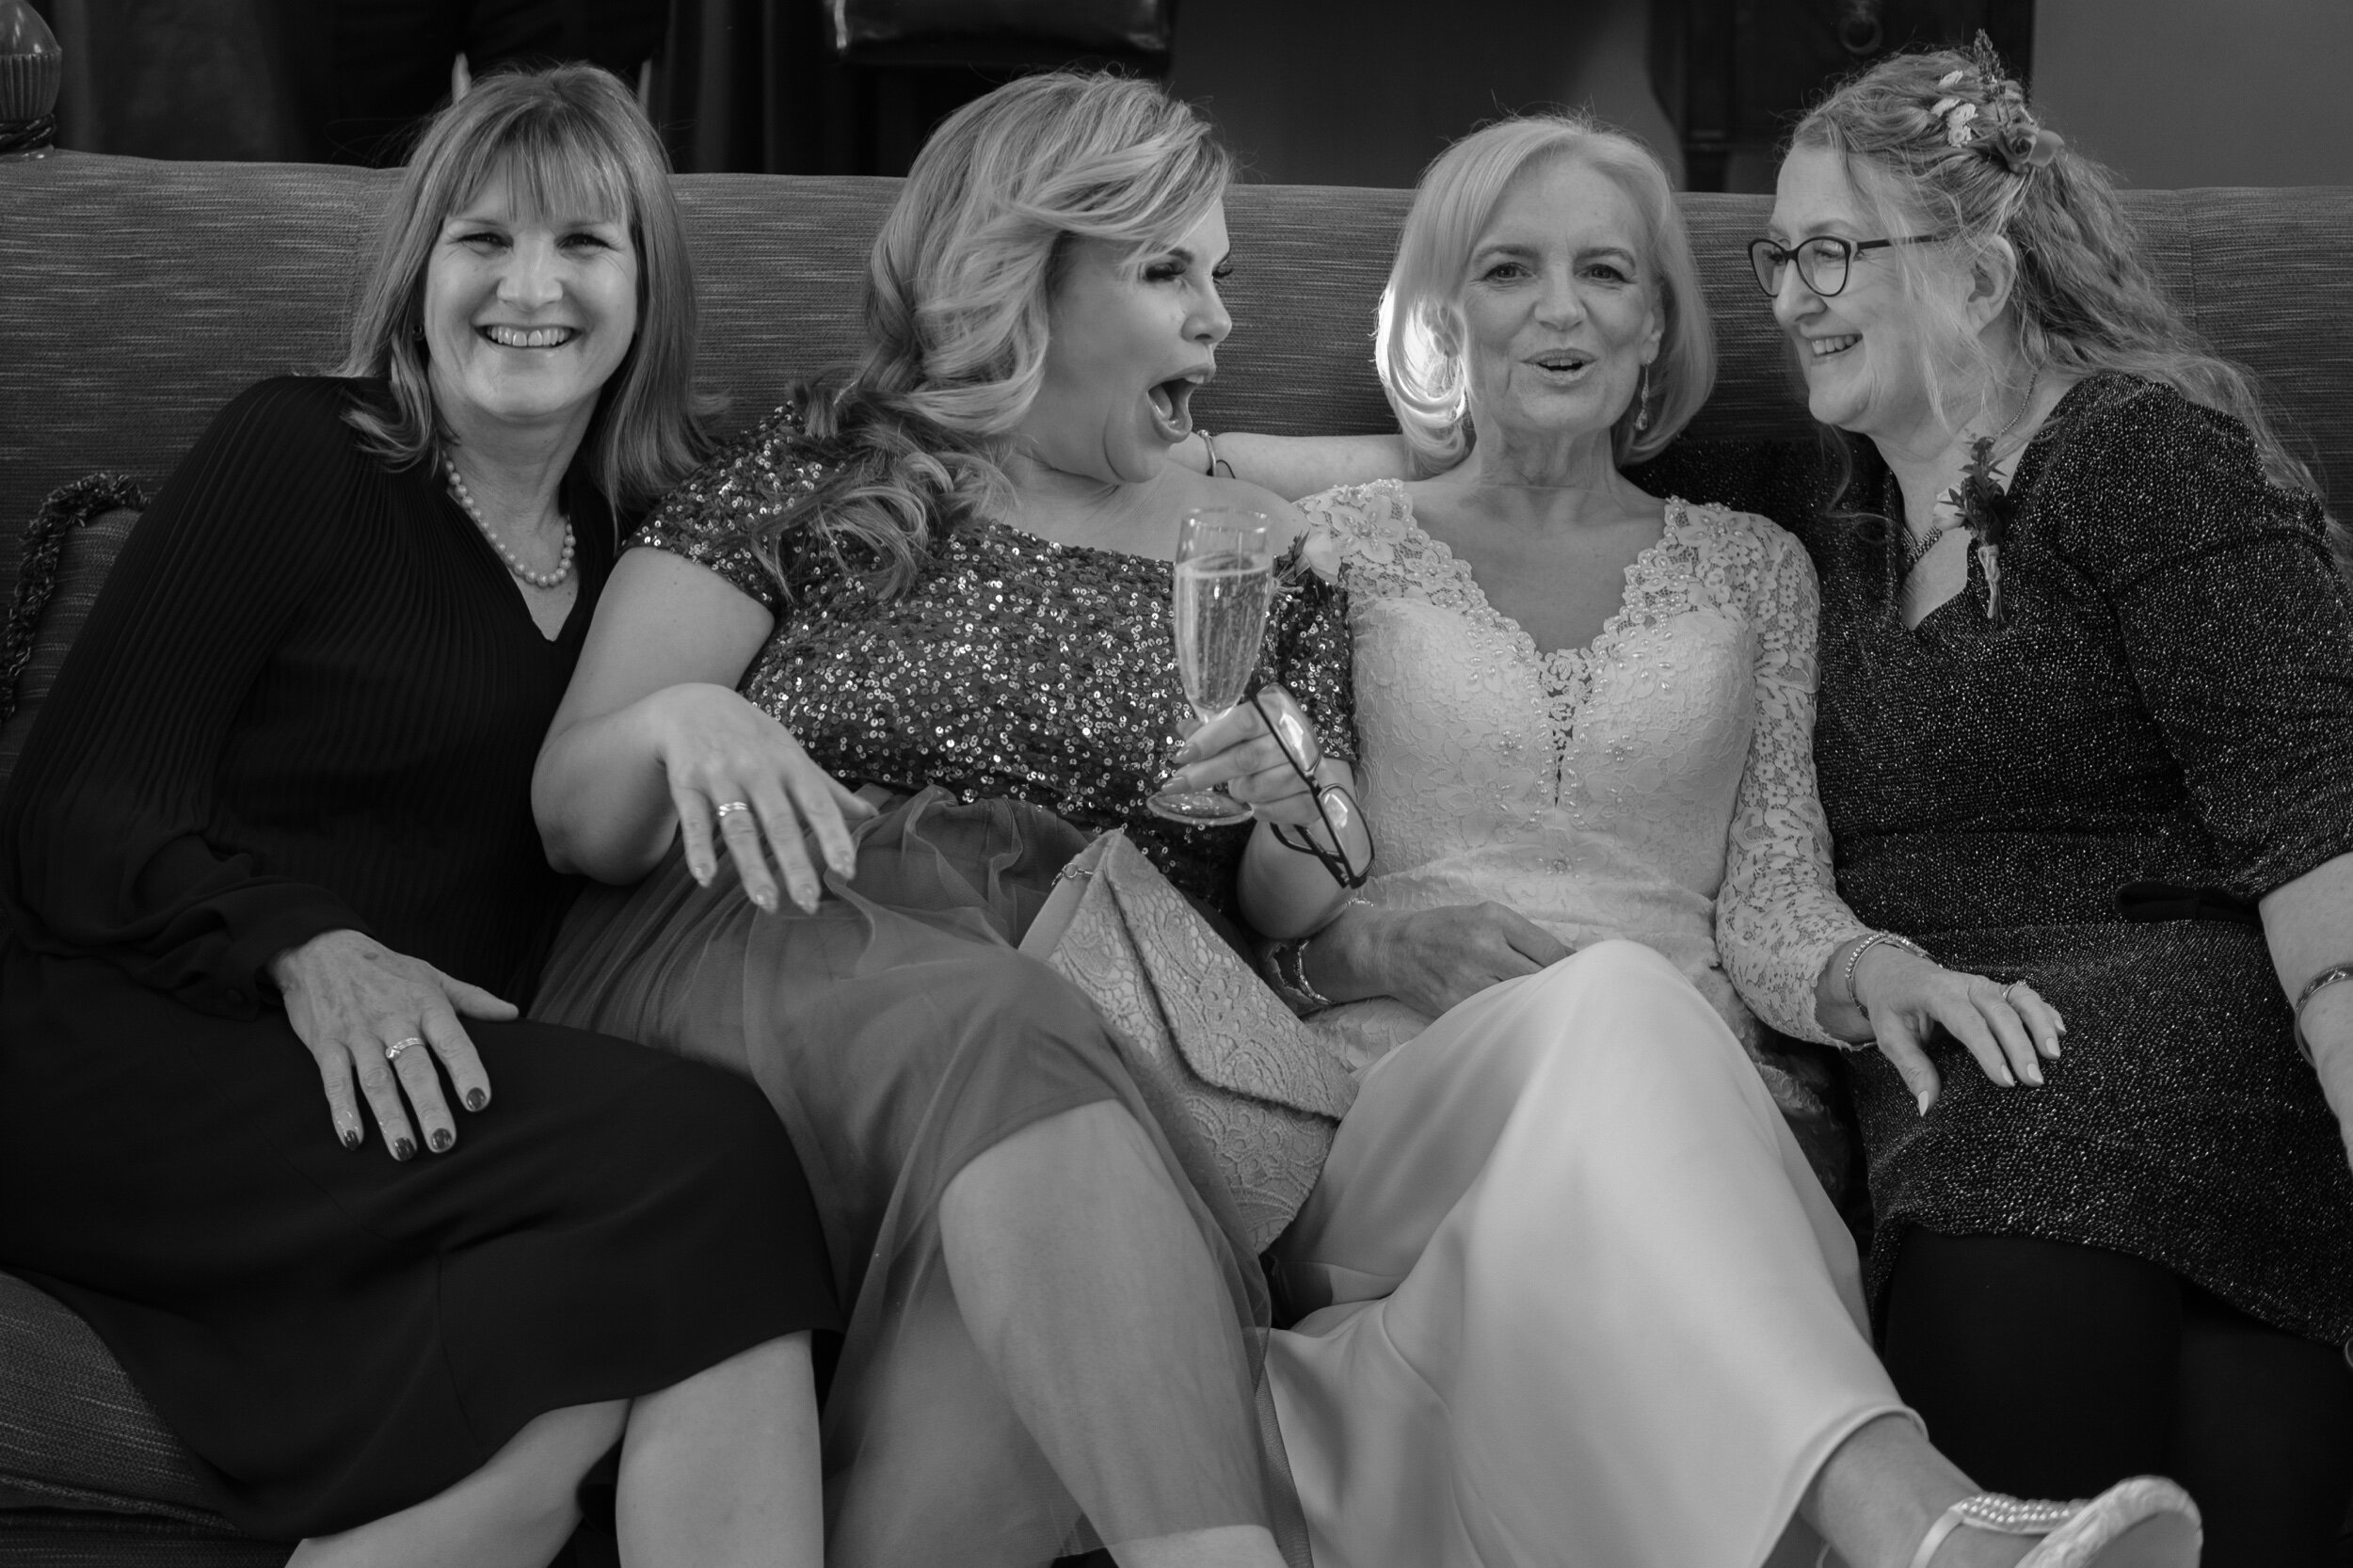
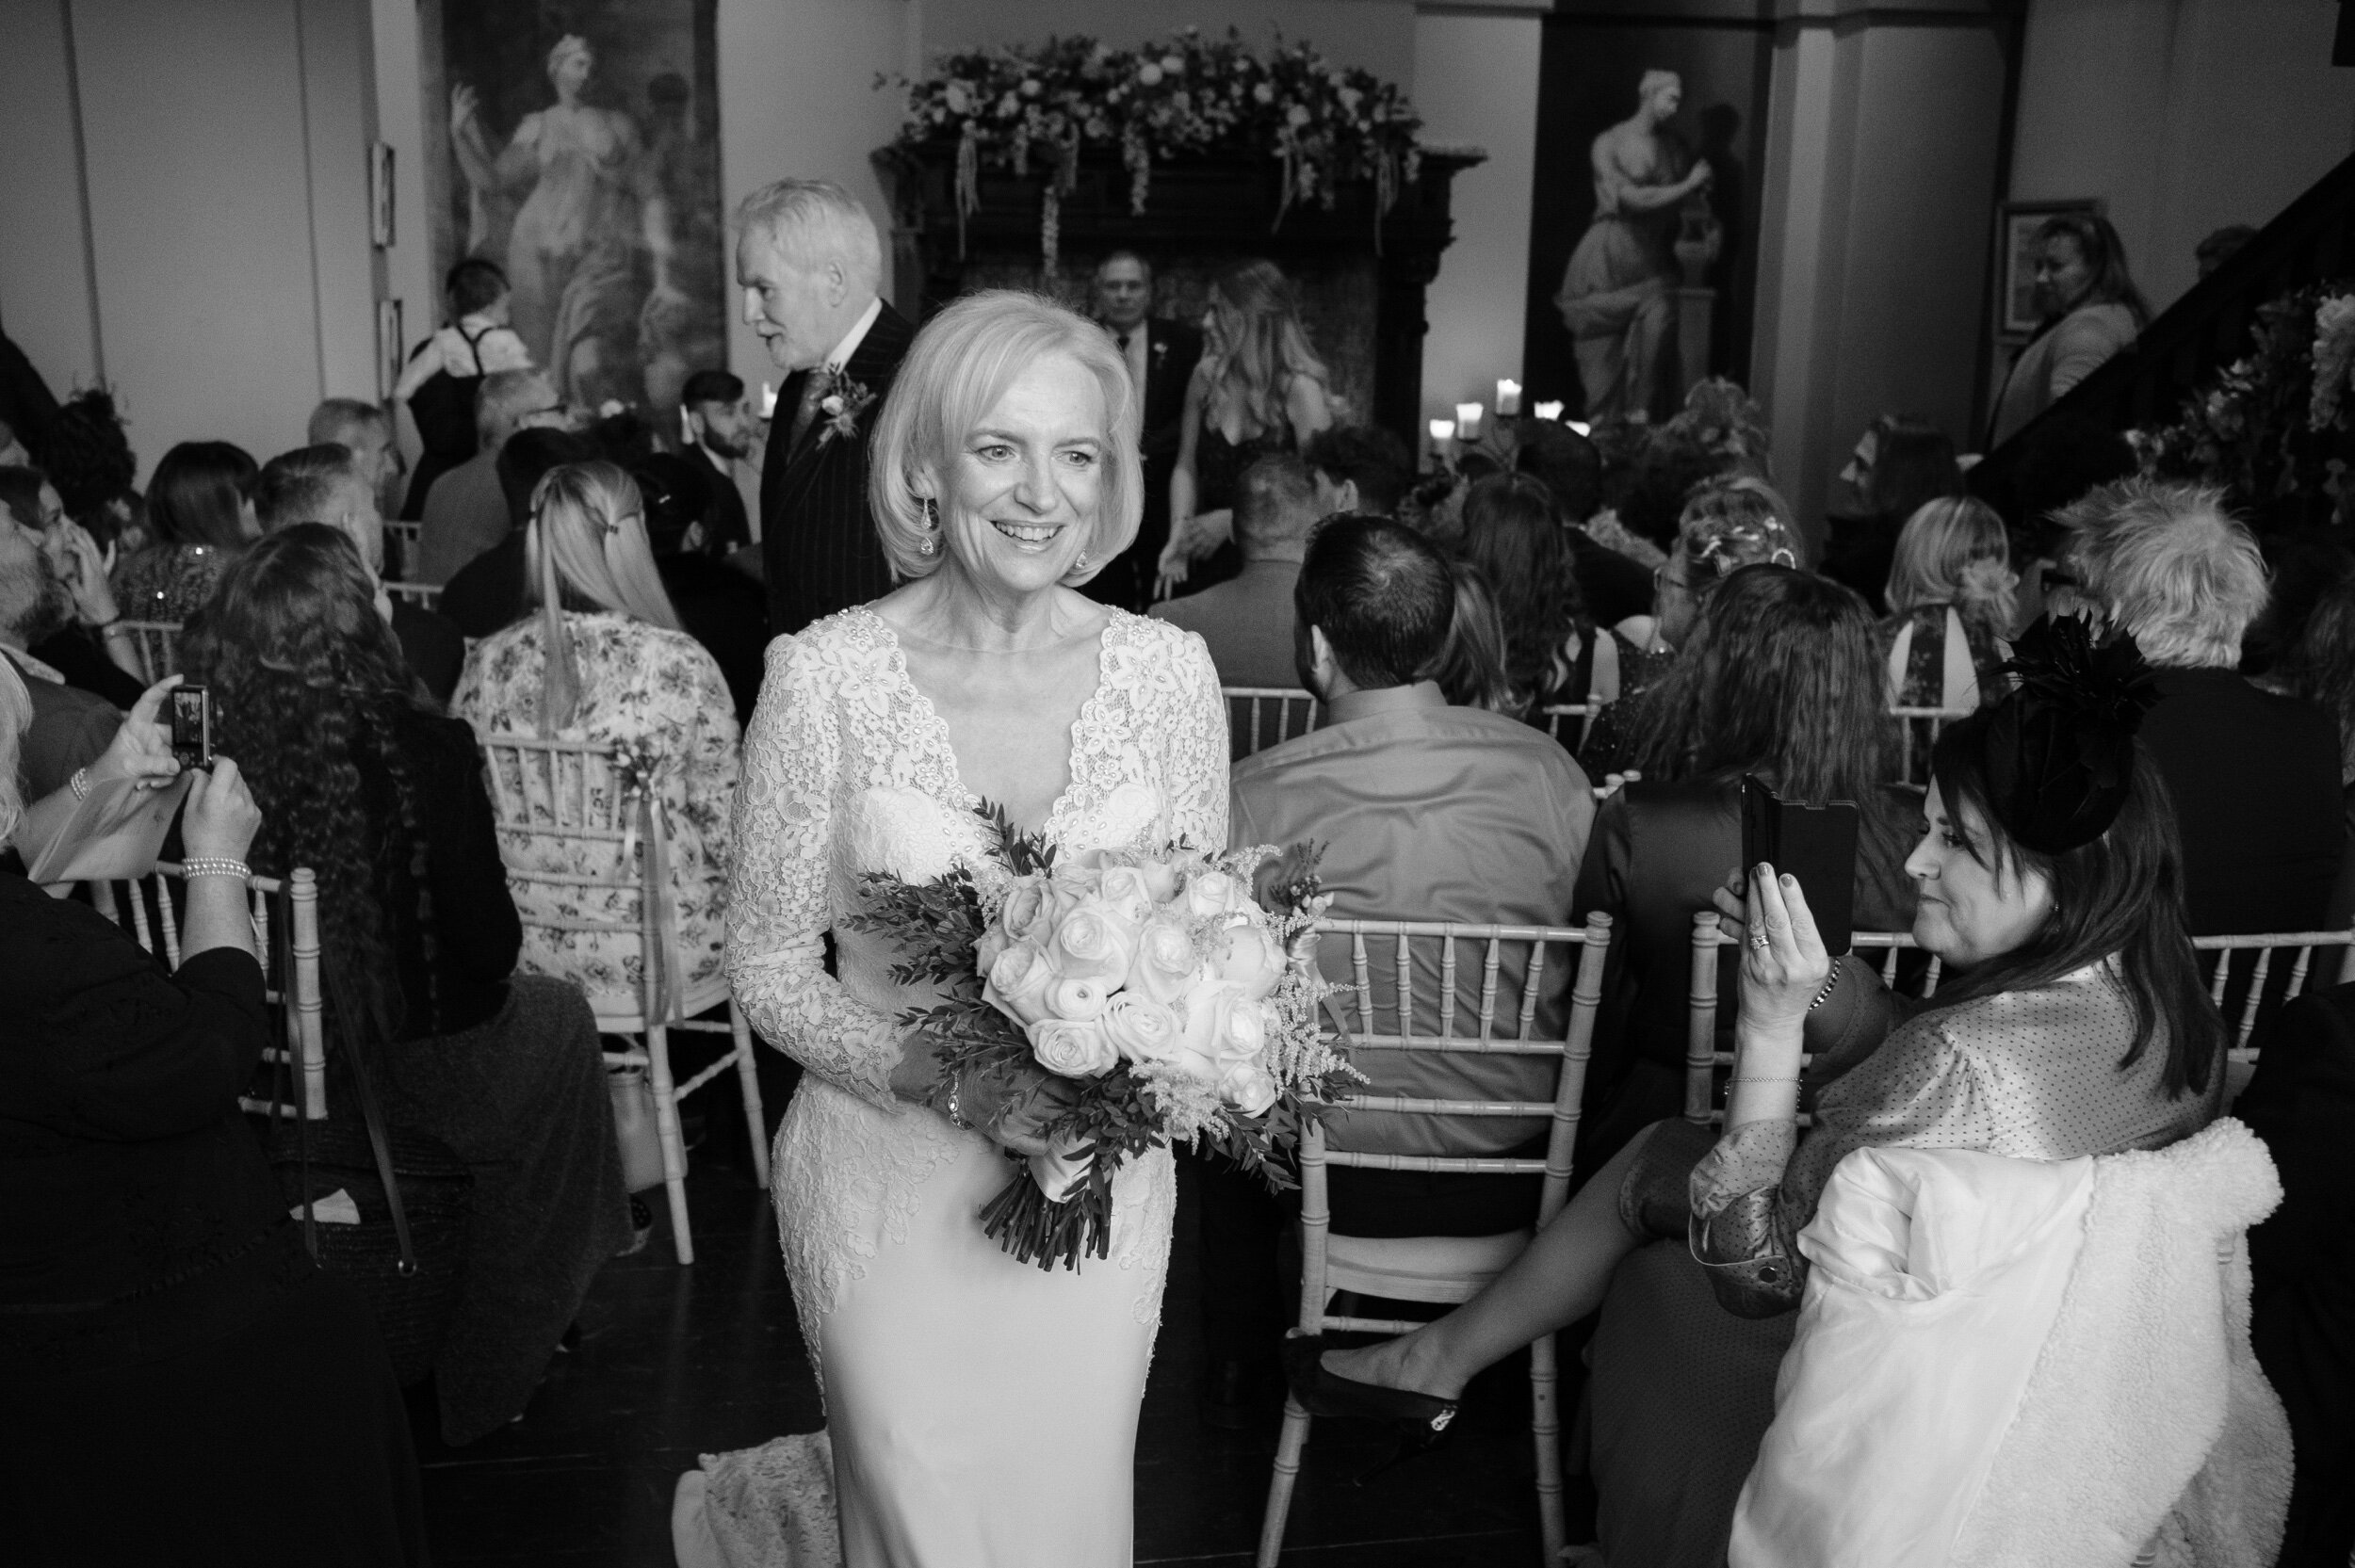
We had the real pleasure of photographing a particularly special wedding. Dawn and Ron got married in the beautiful setting of Kings Weston House just outside of Bristol. The house is situated looking over the port of Avonmouth which holds a very special place for both Dawn and Ron. The couple celebrated with their nearest and dearest and we had the most wonderful day witnessing such a happy occasion.


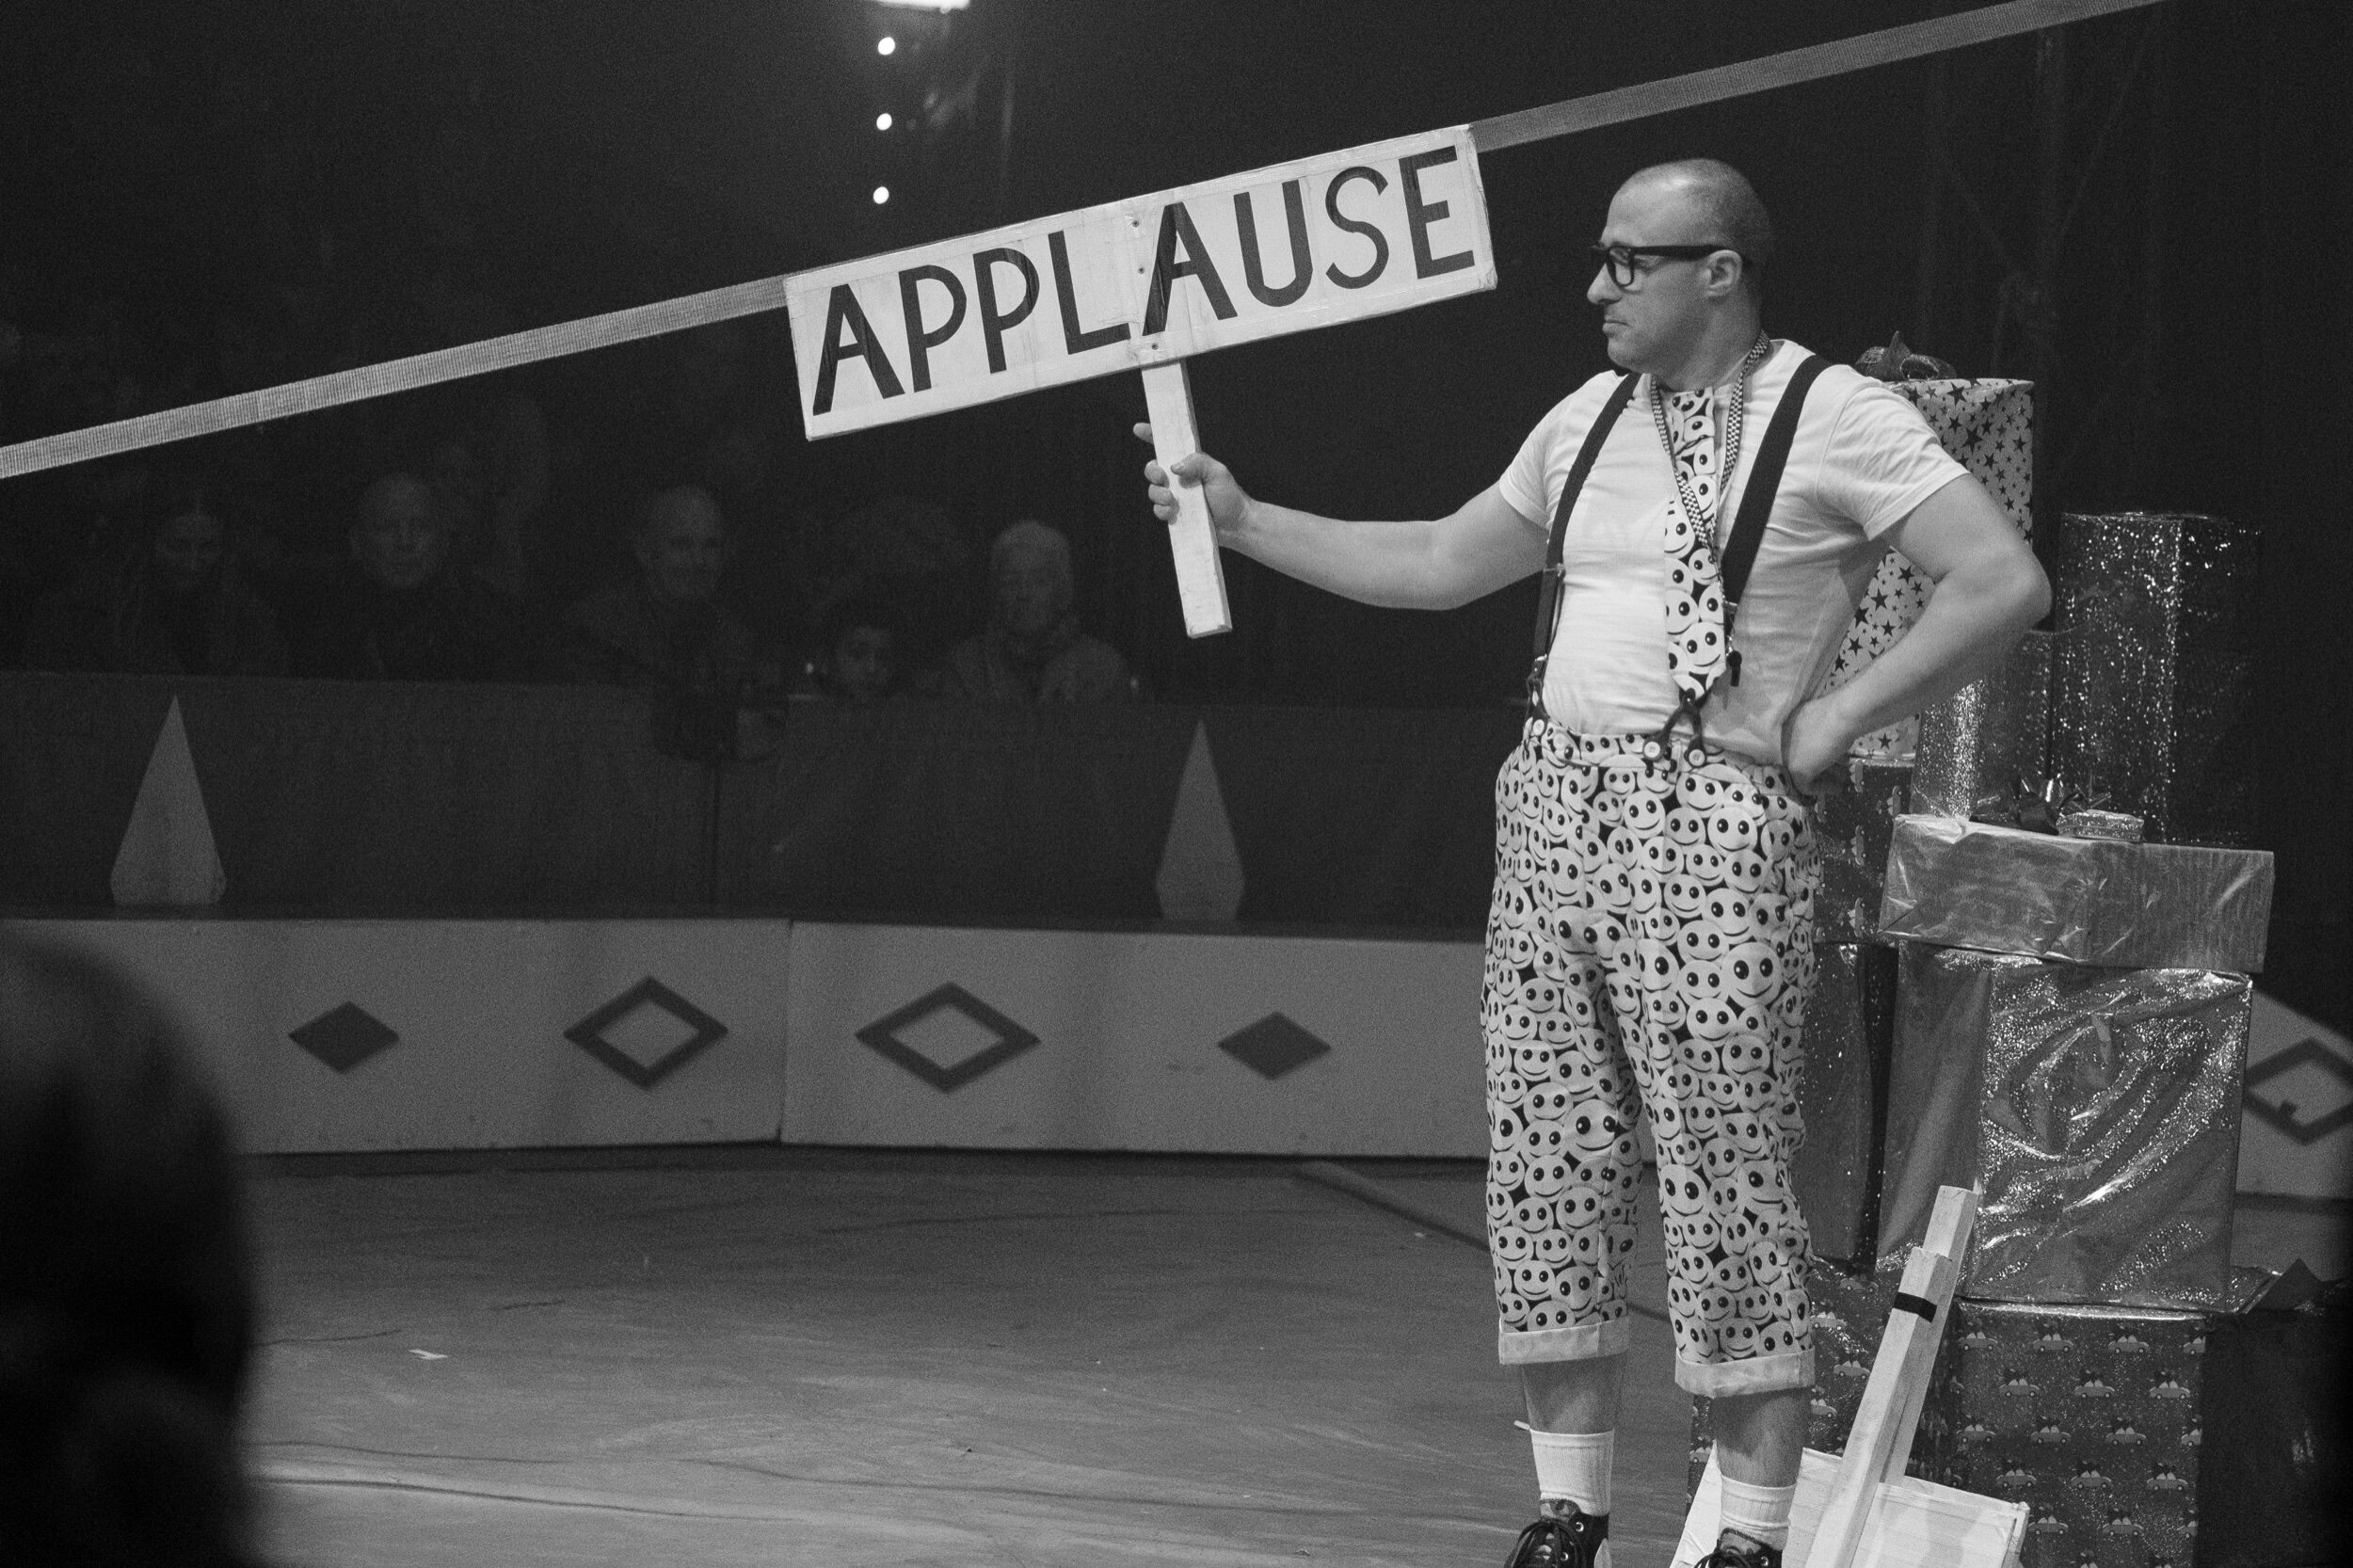
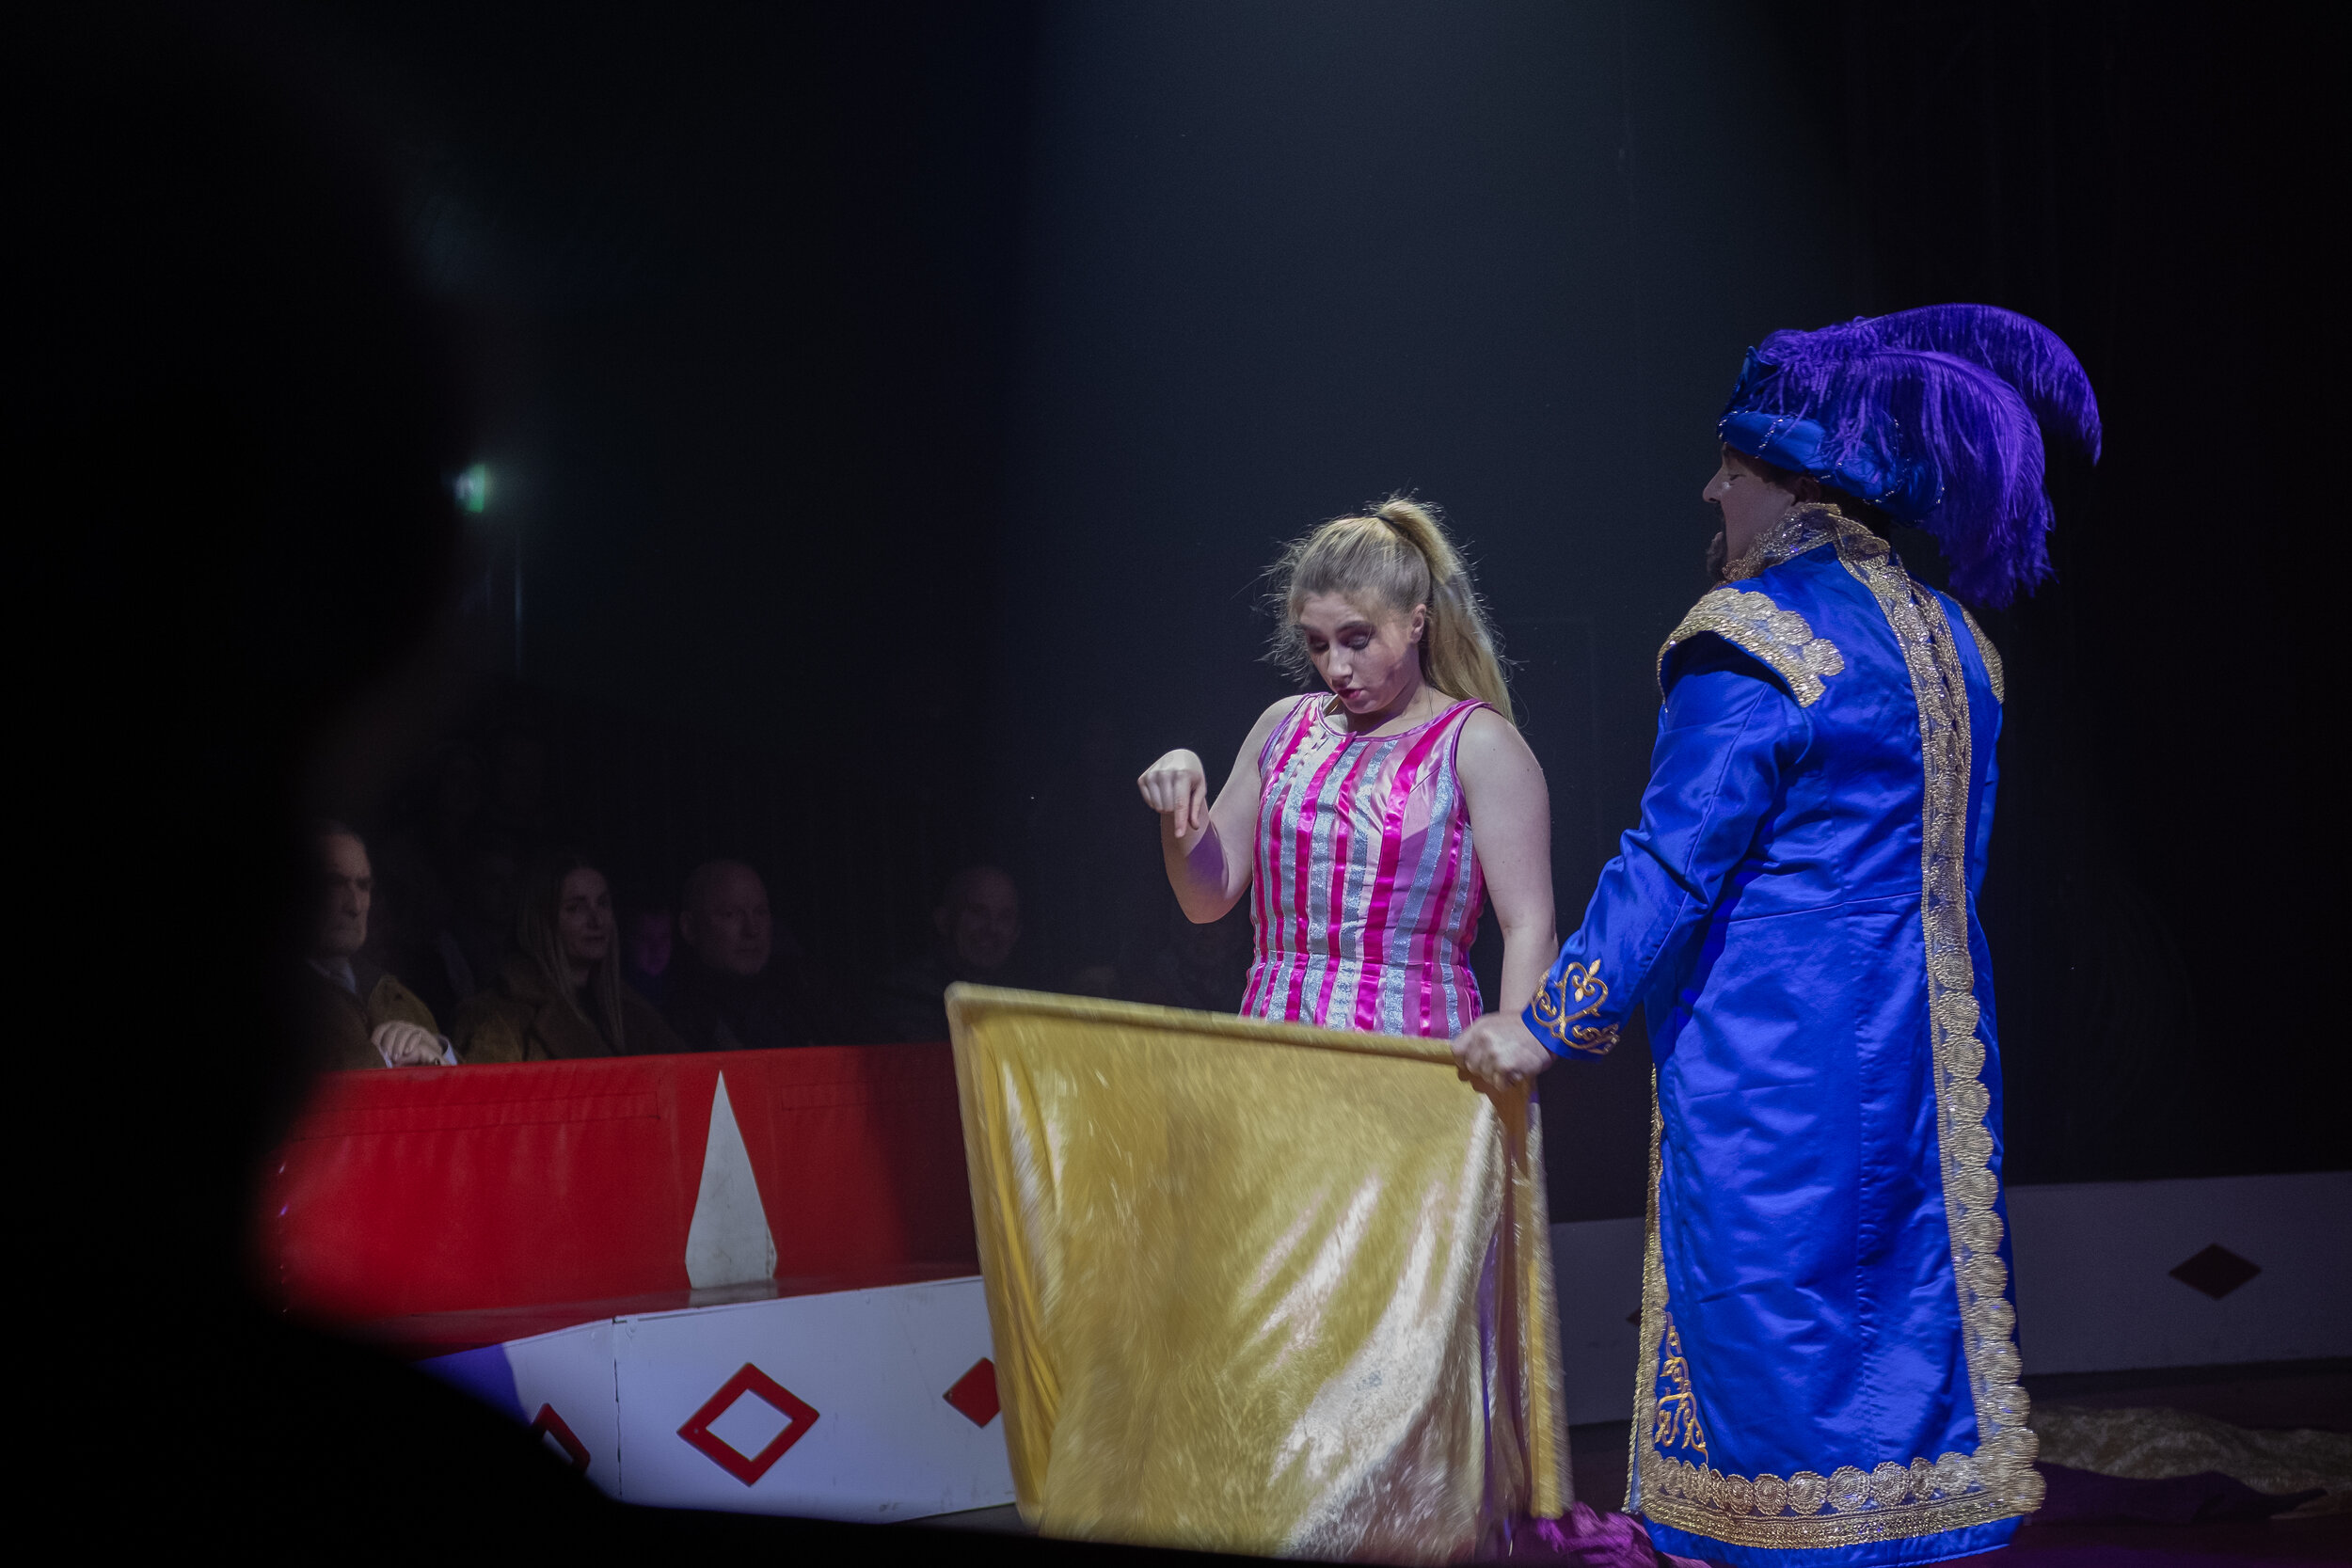
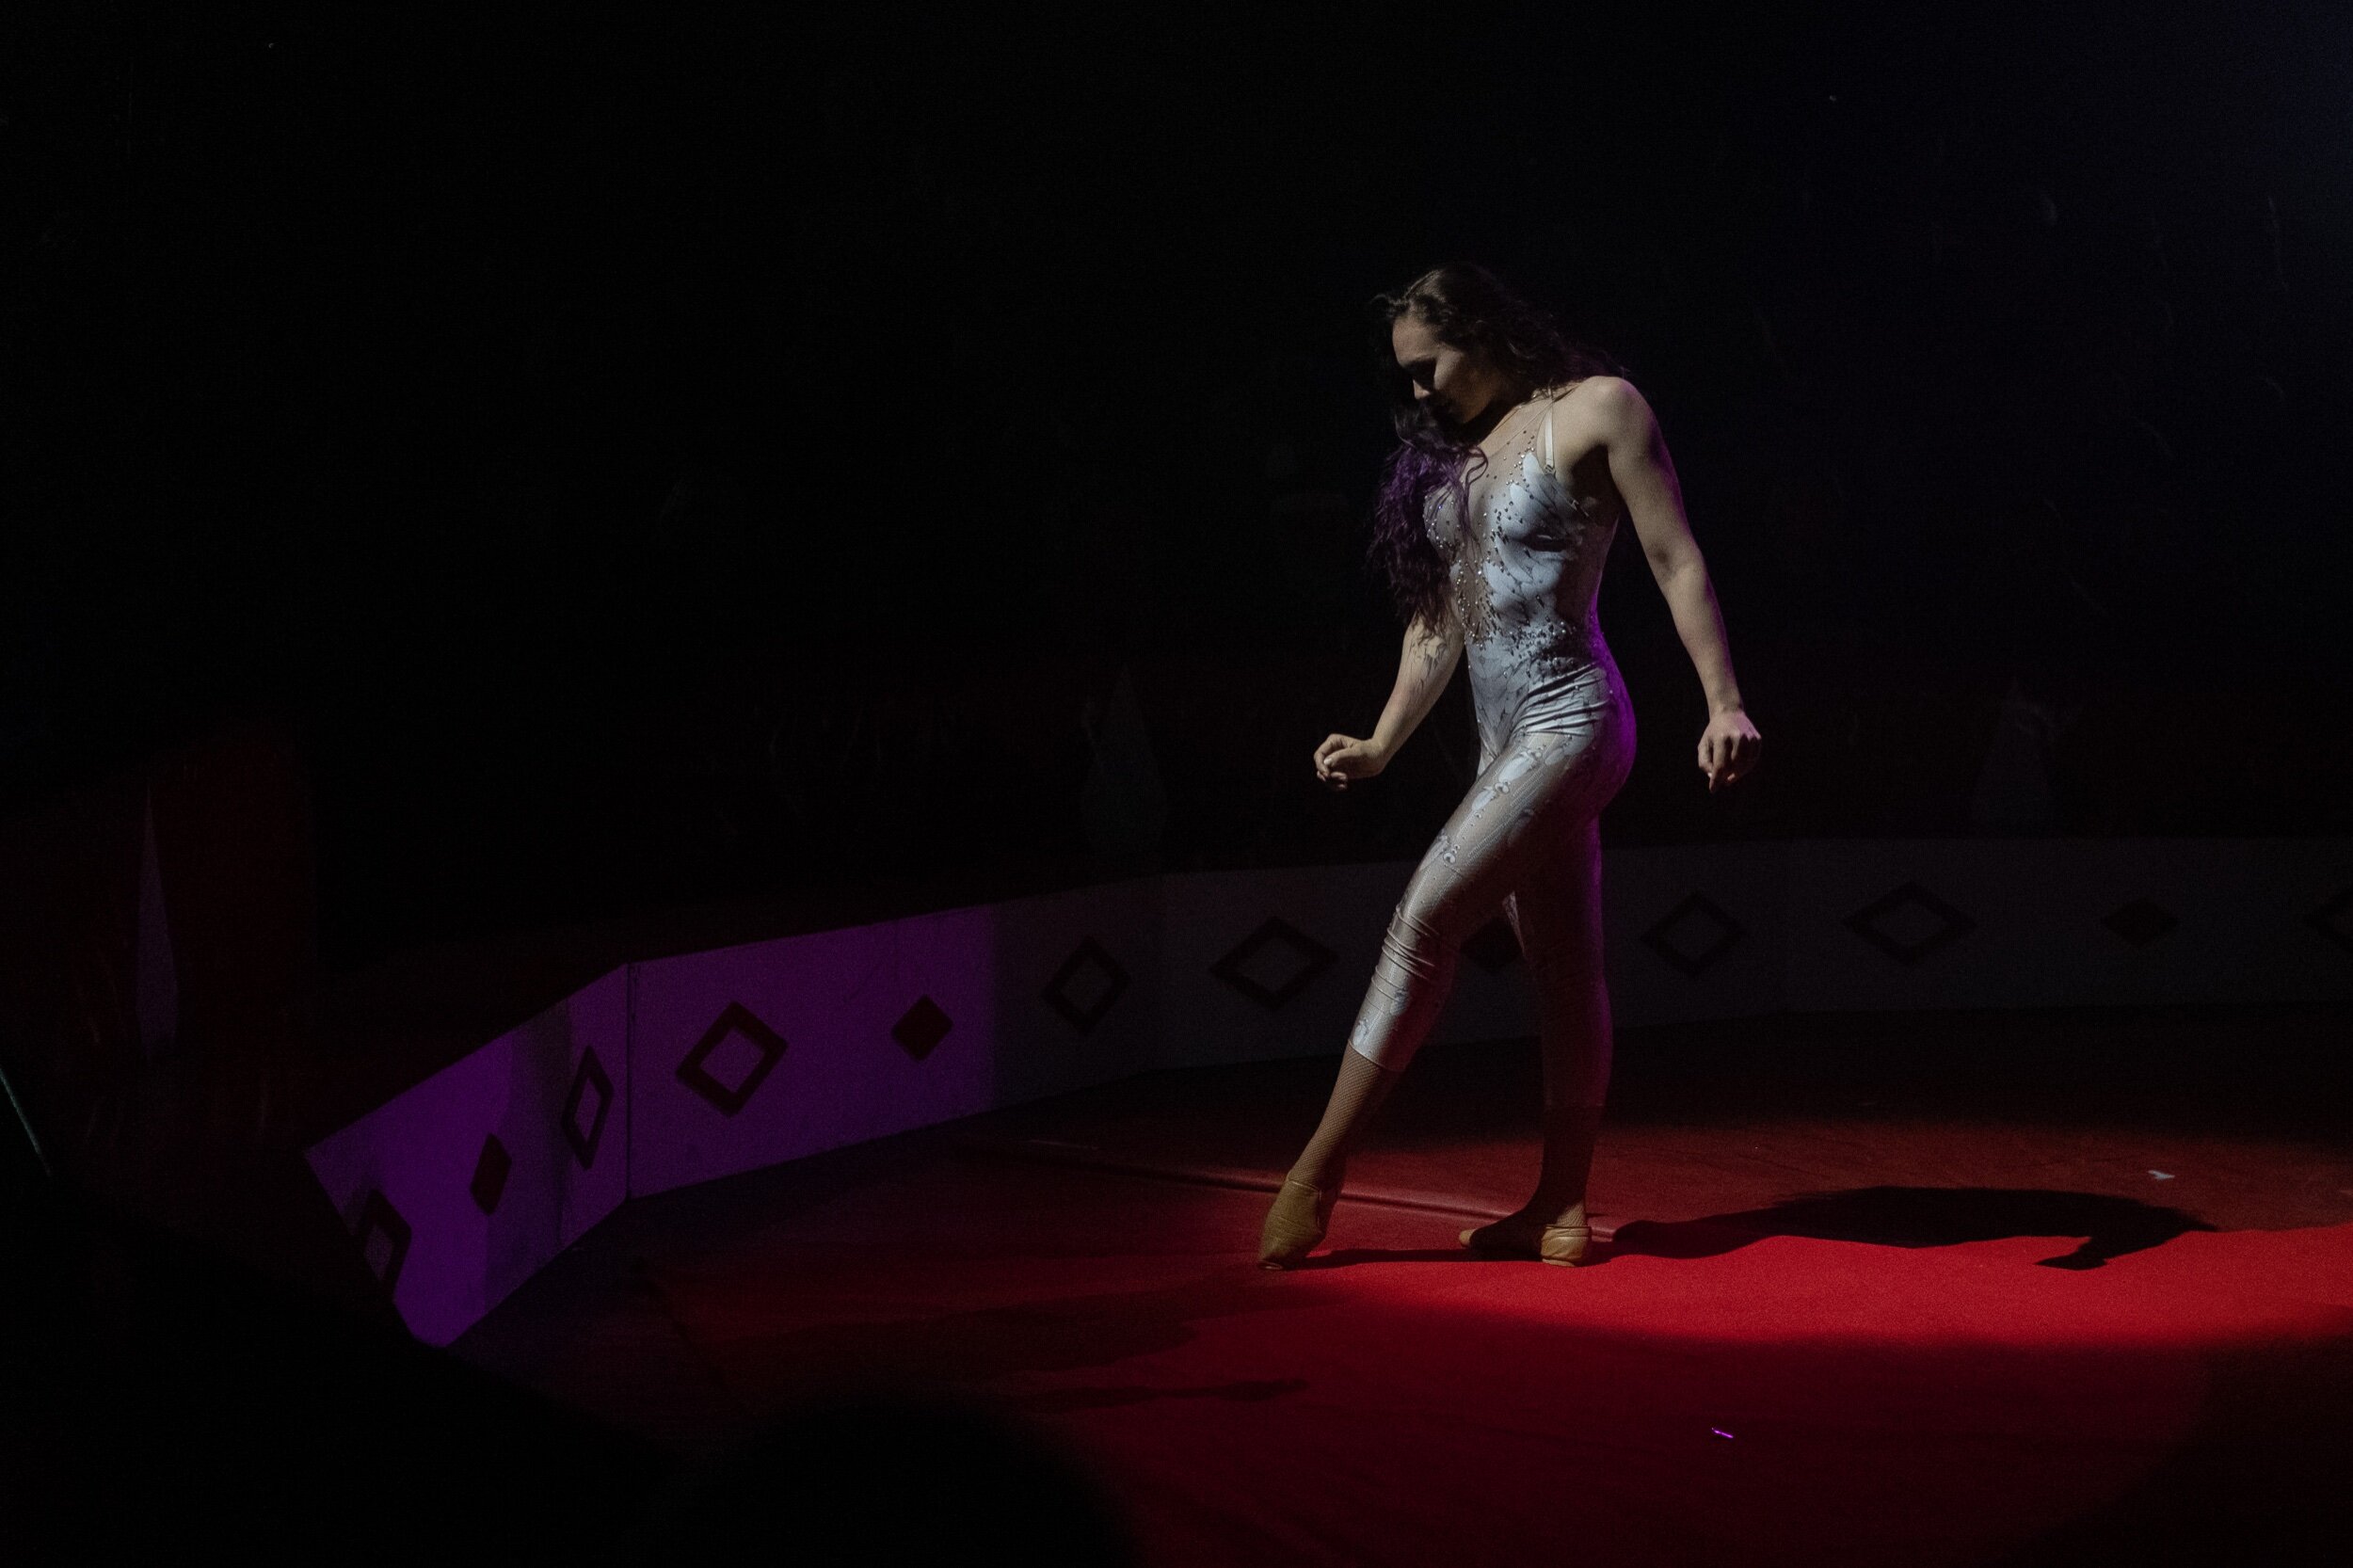
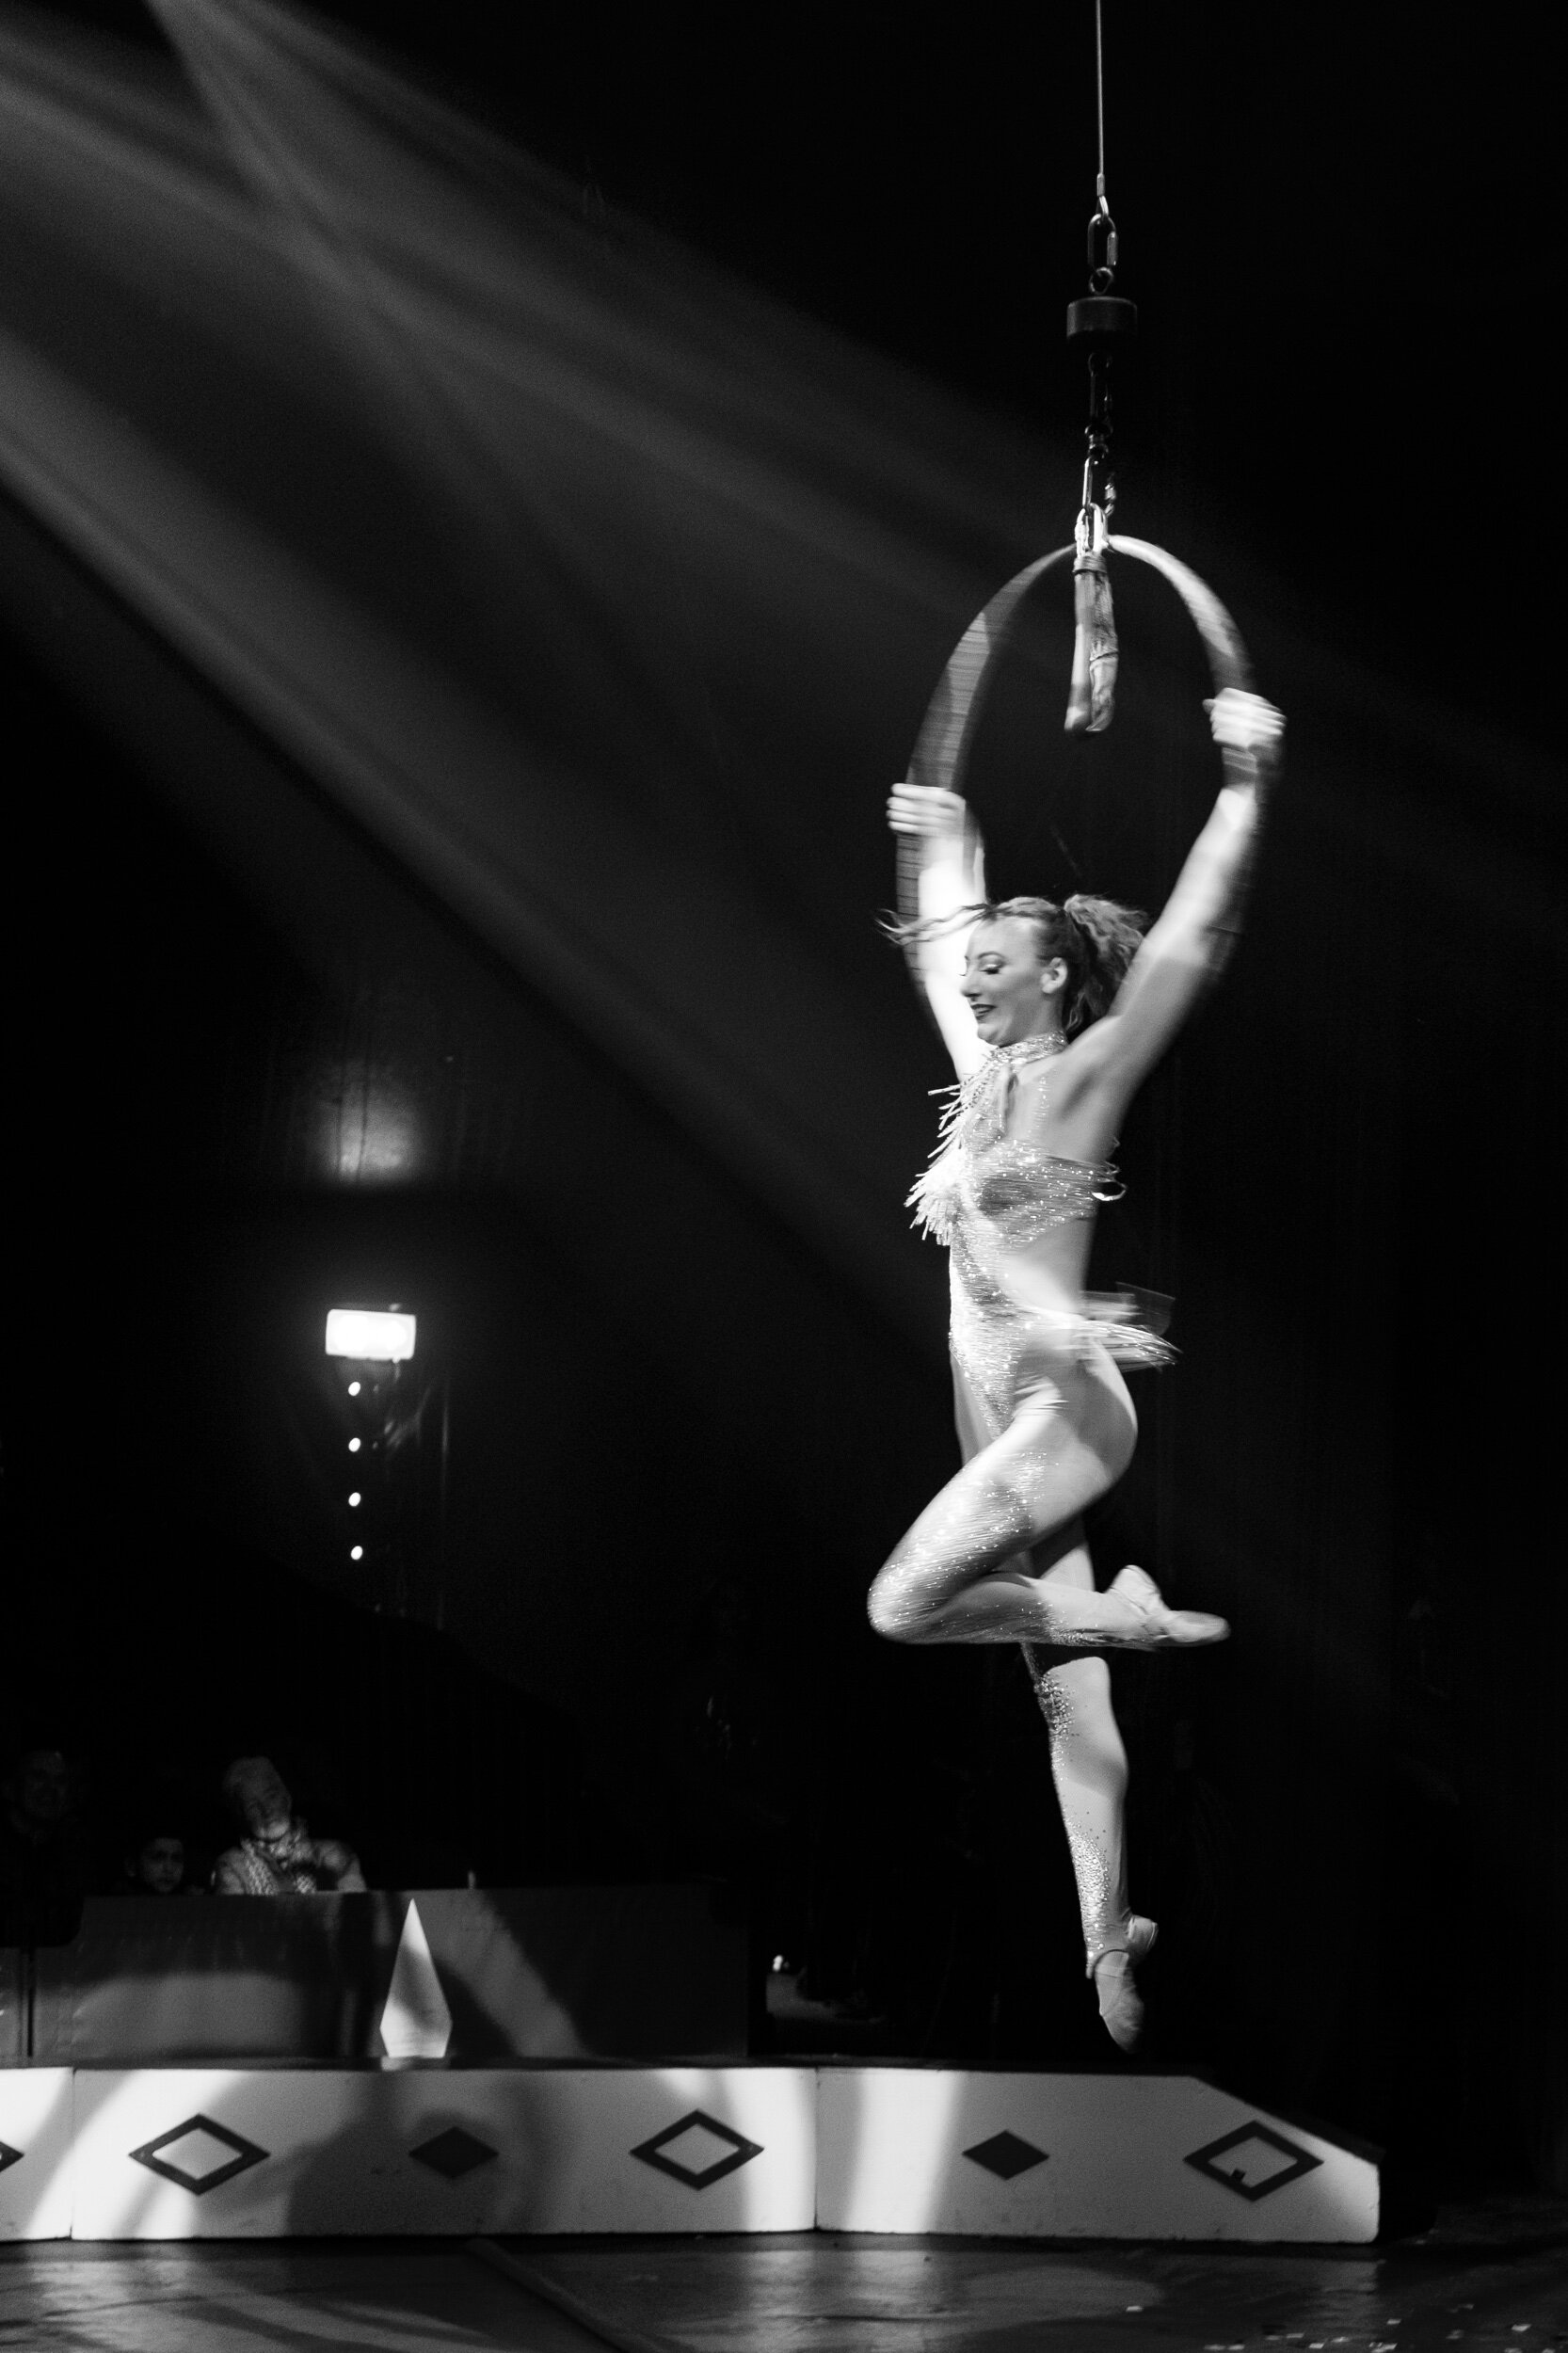
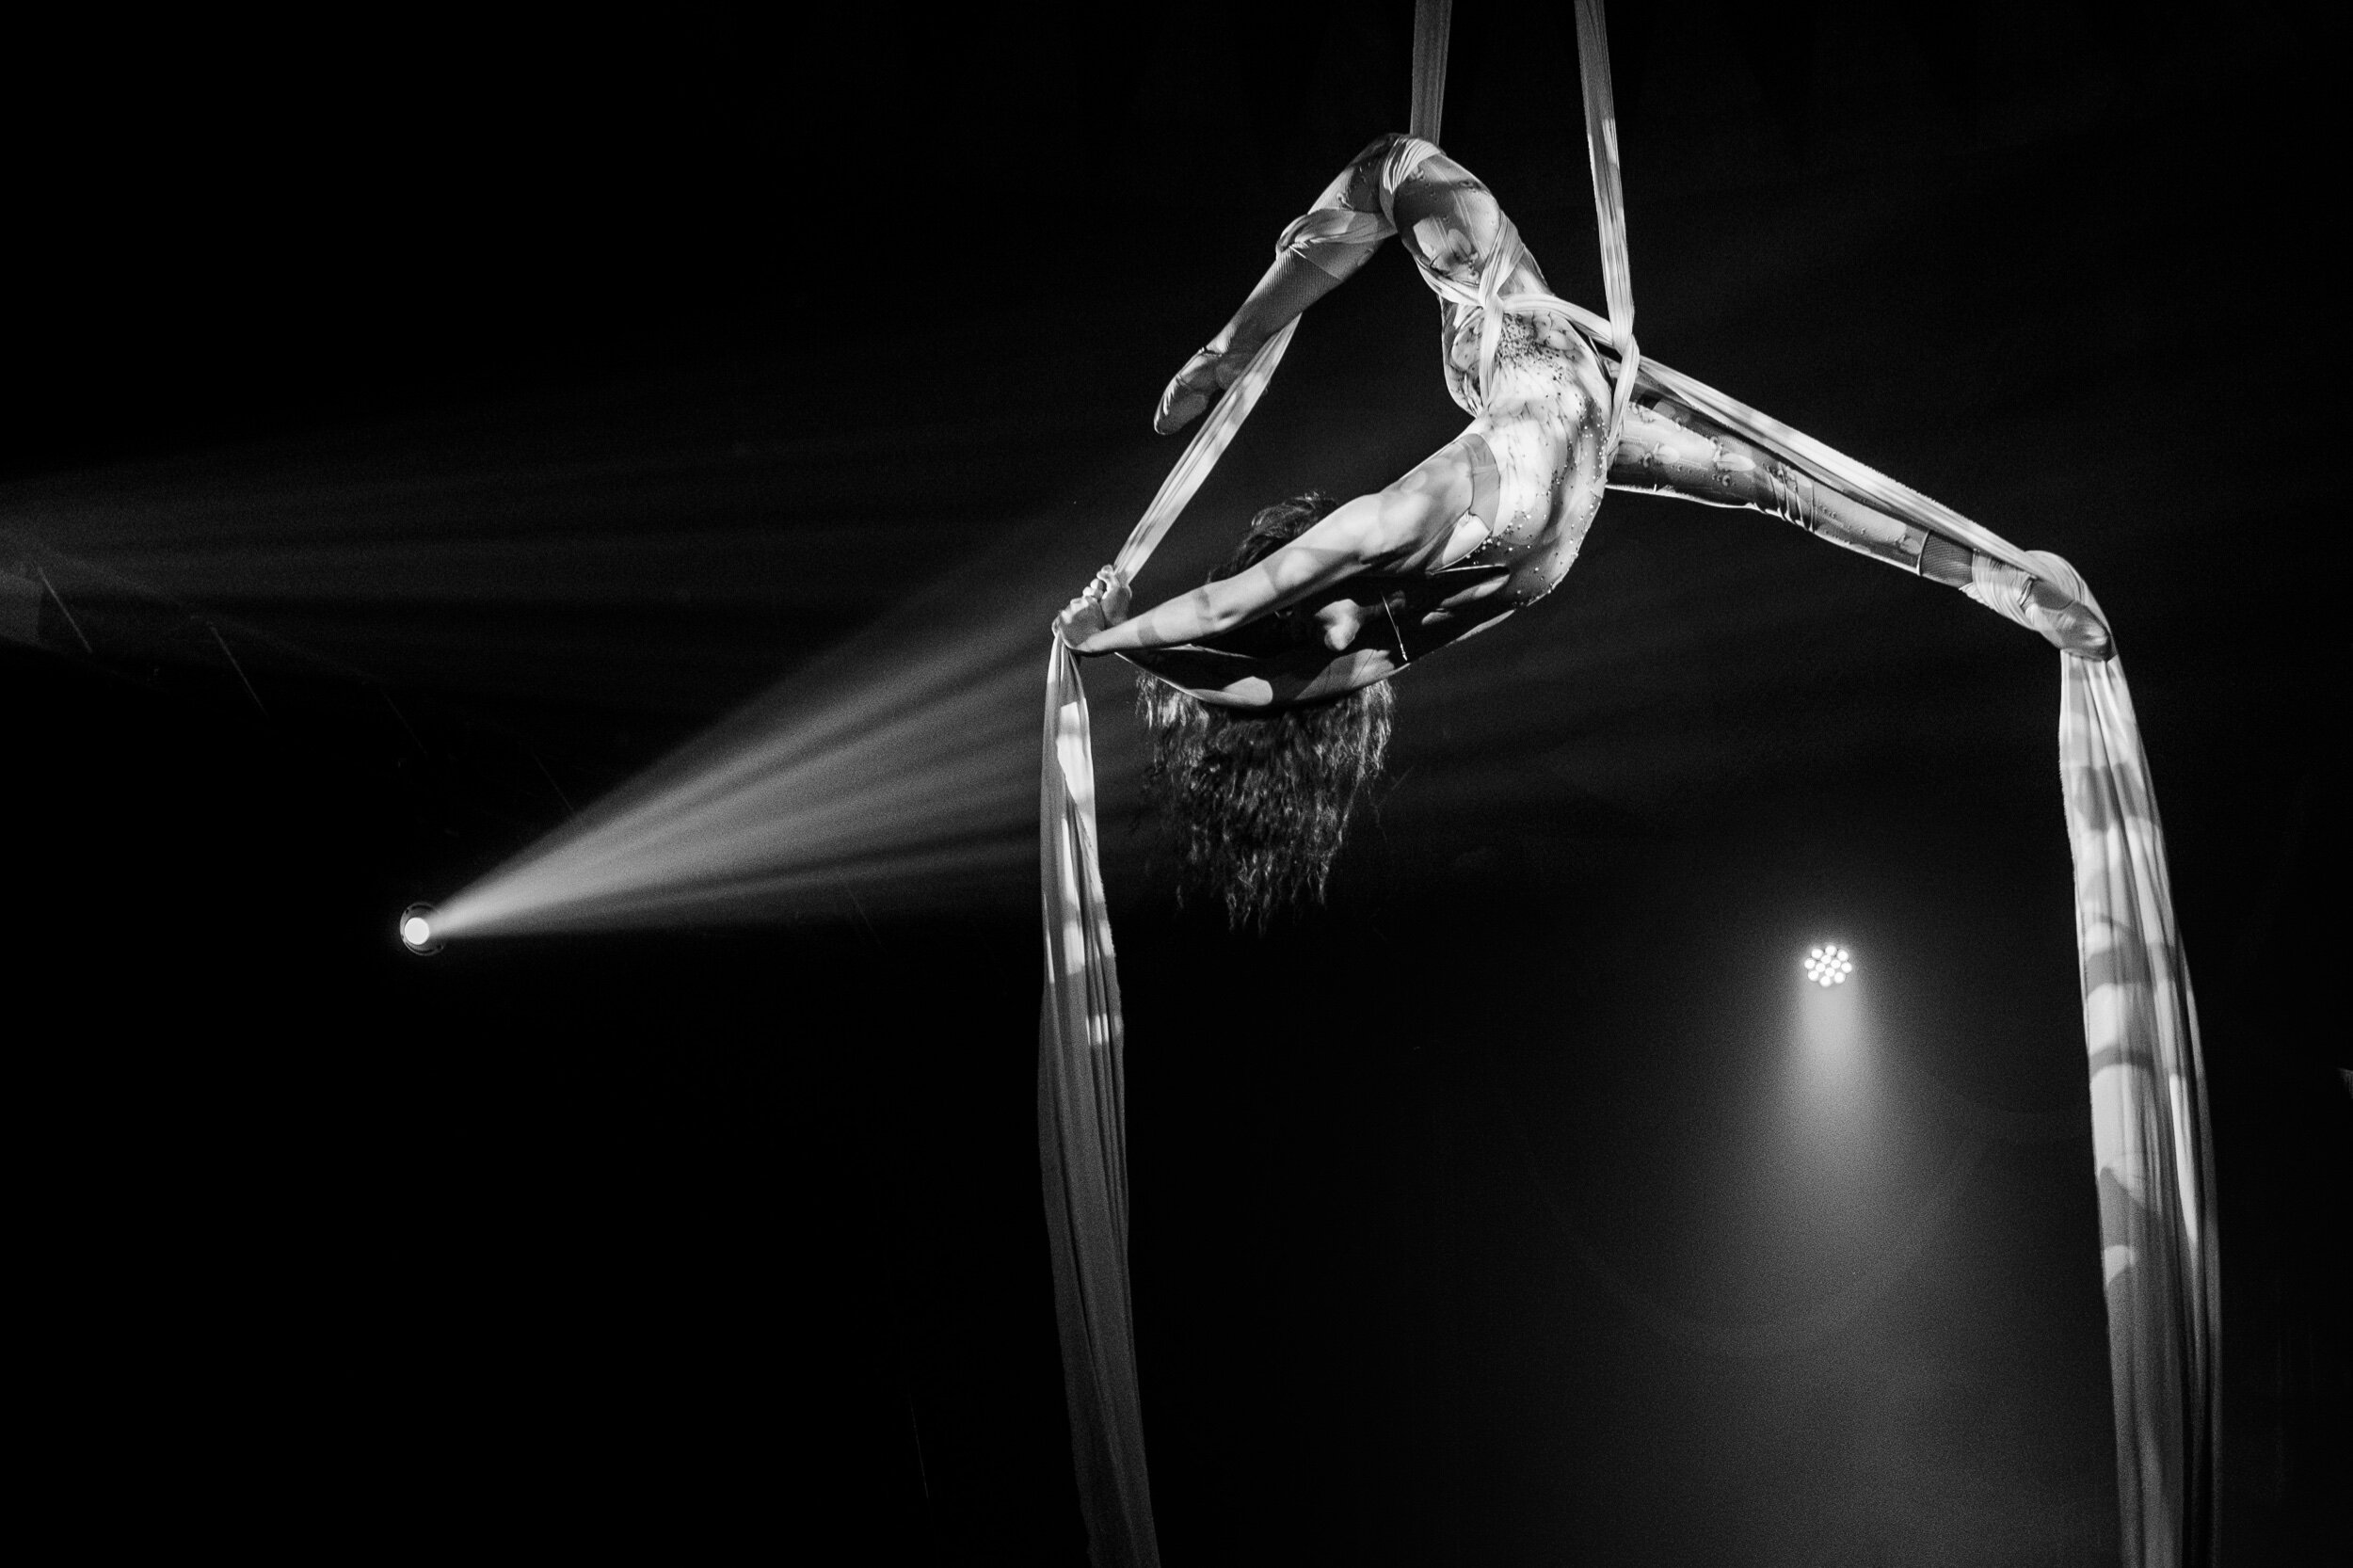
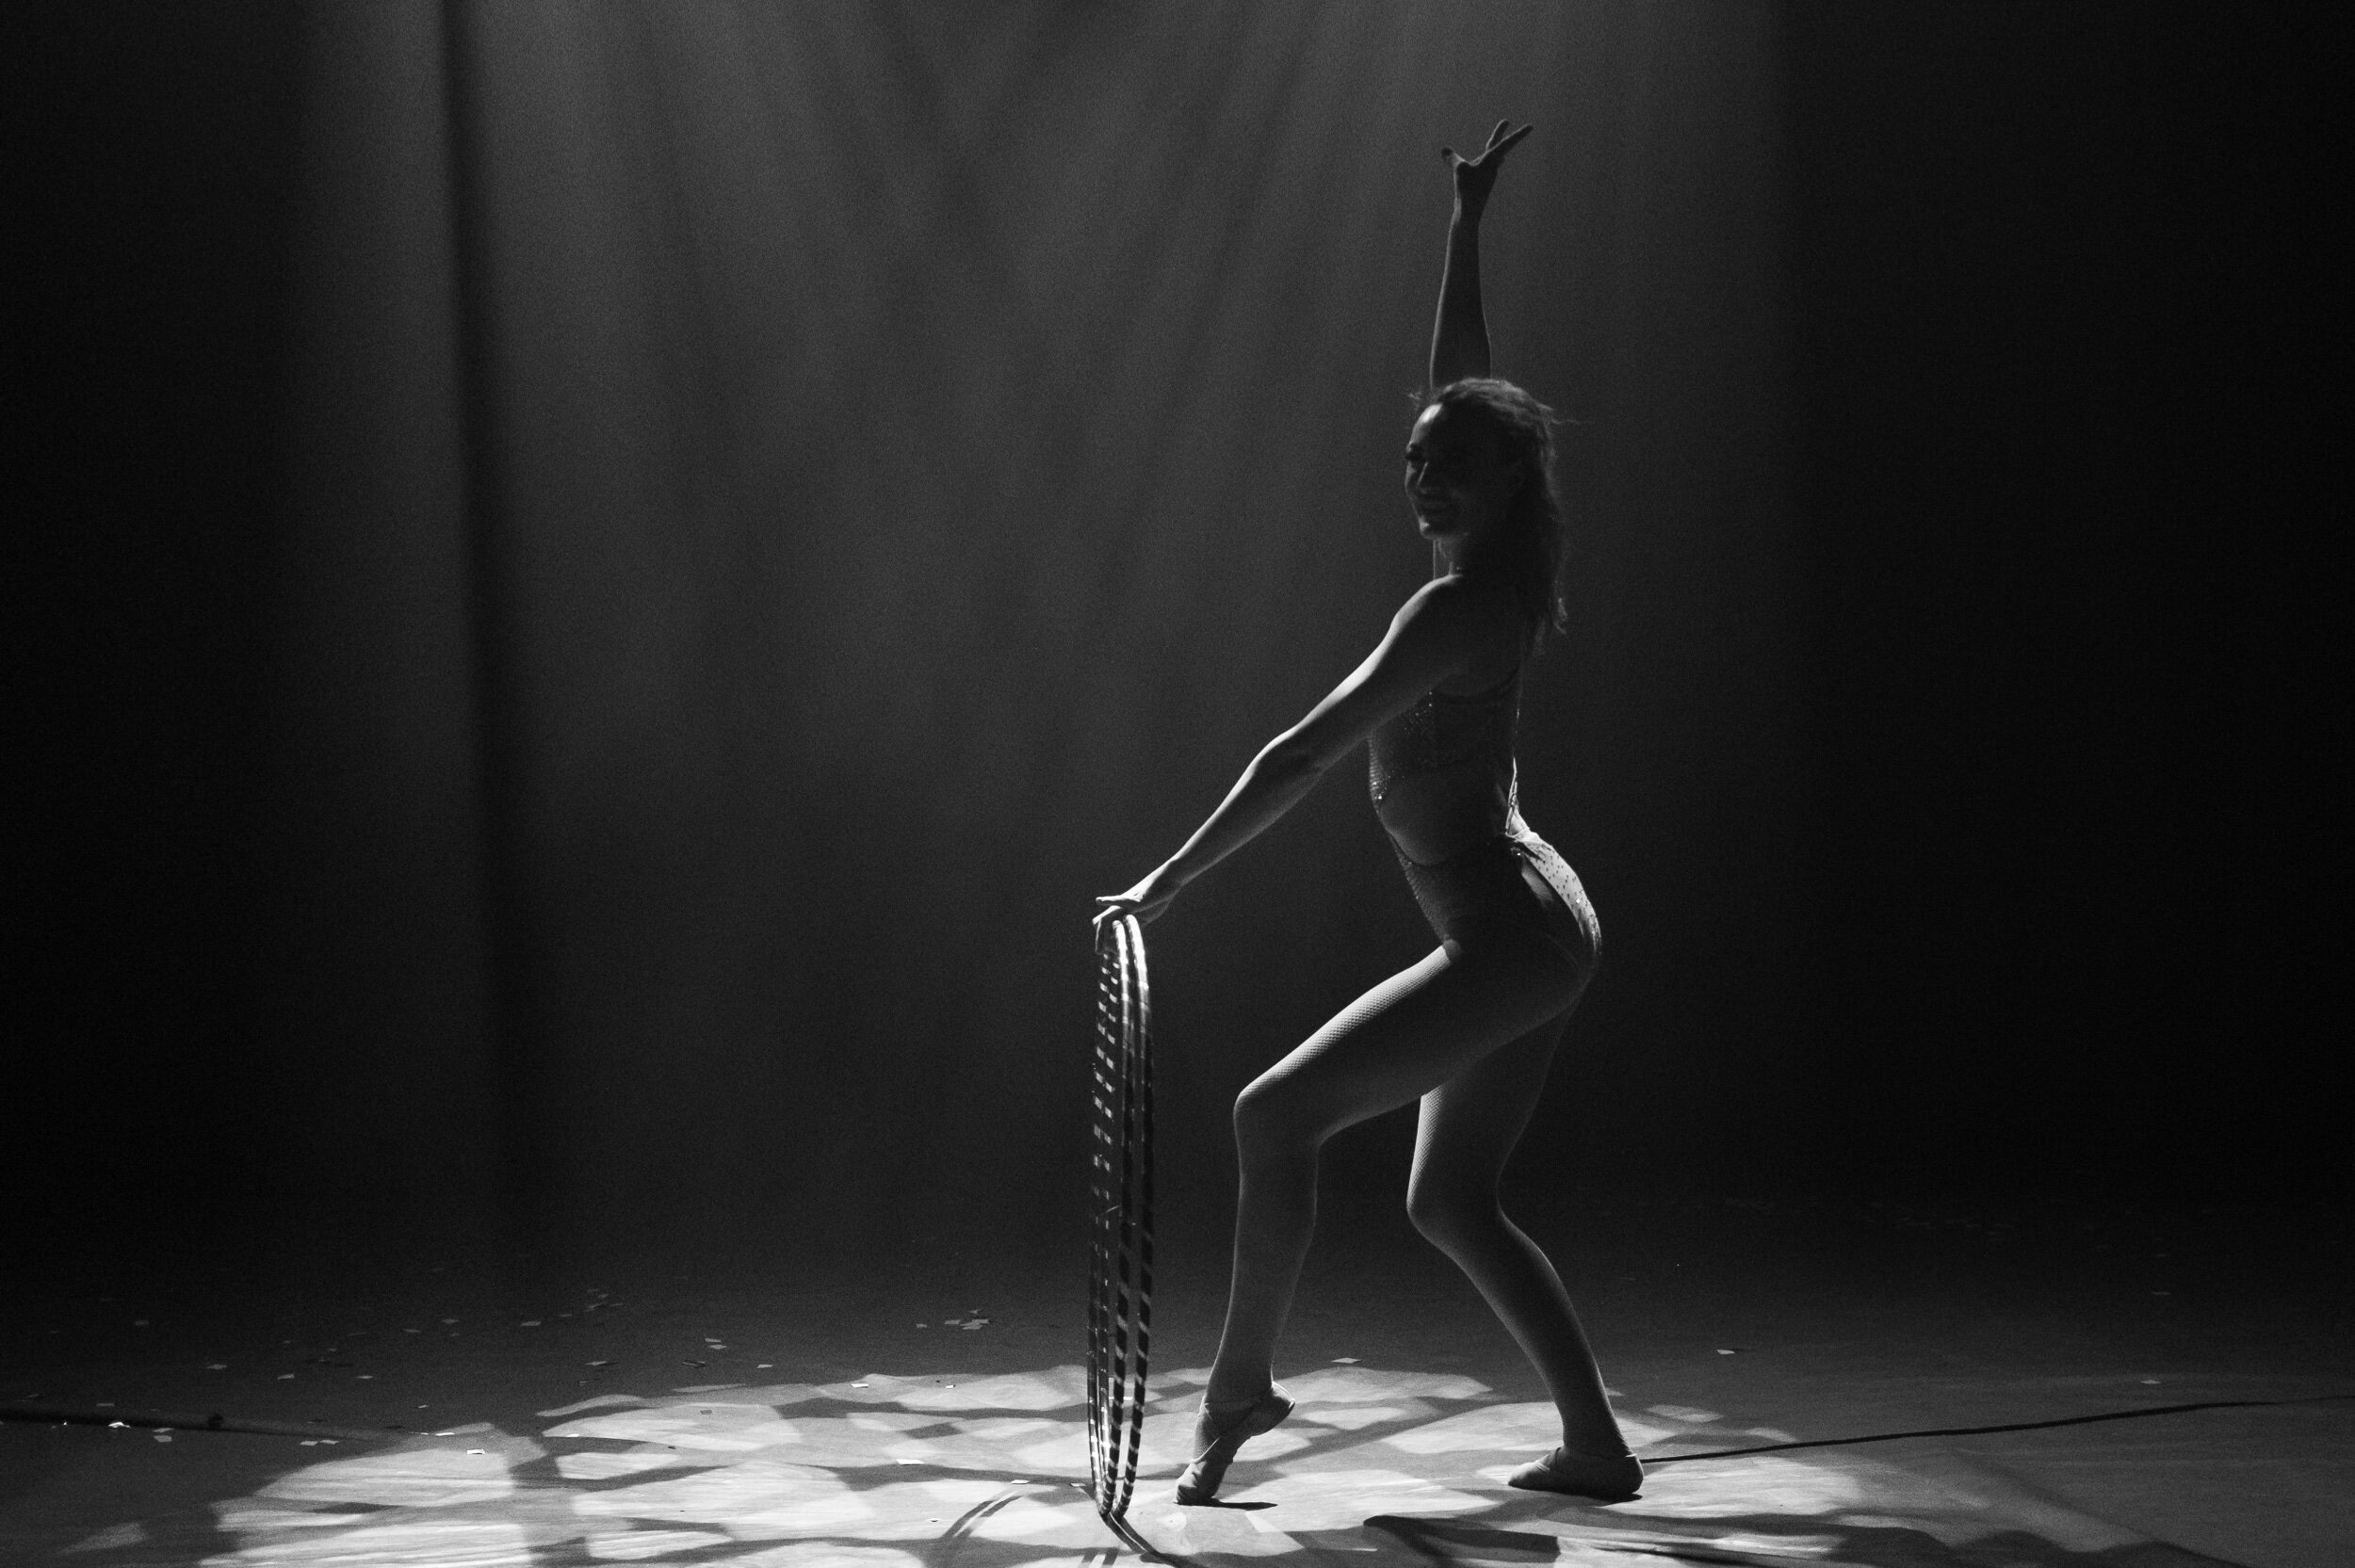
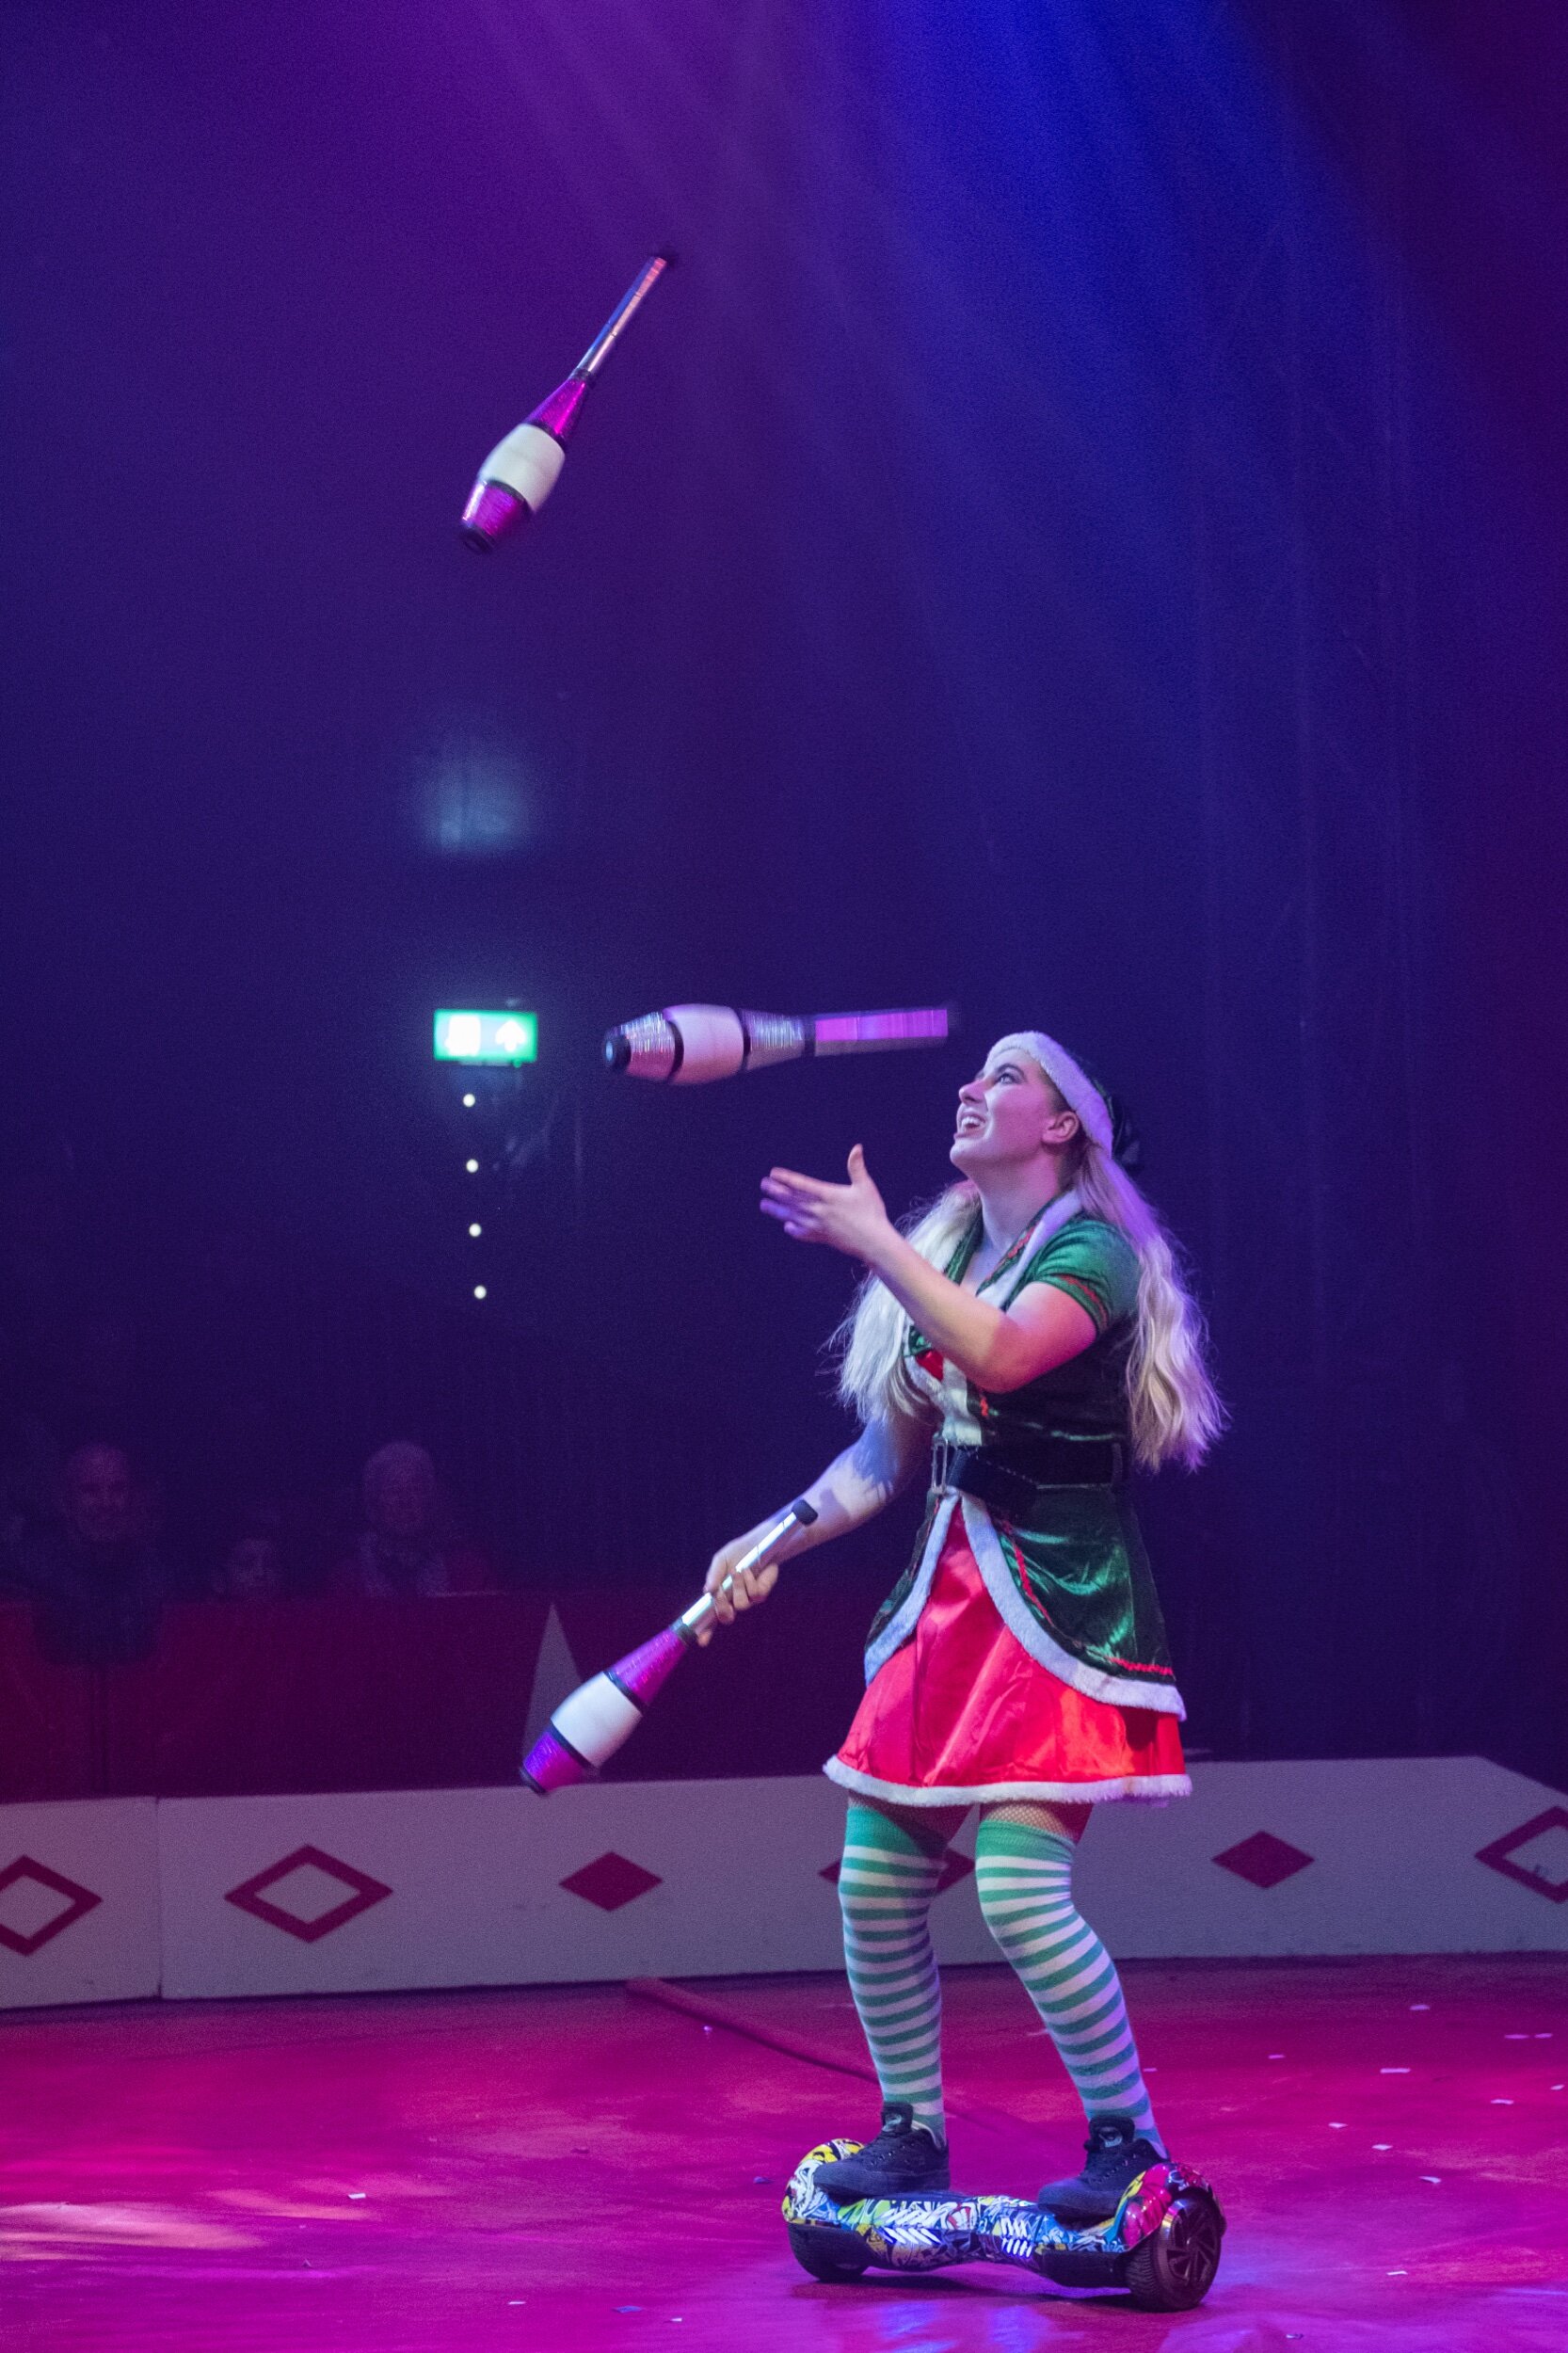
Circus Funtasia
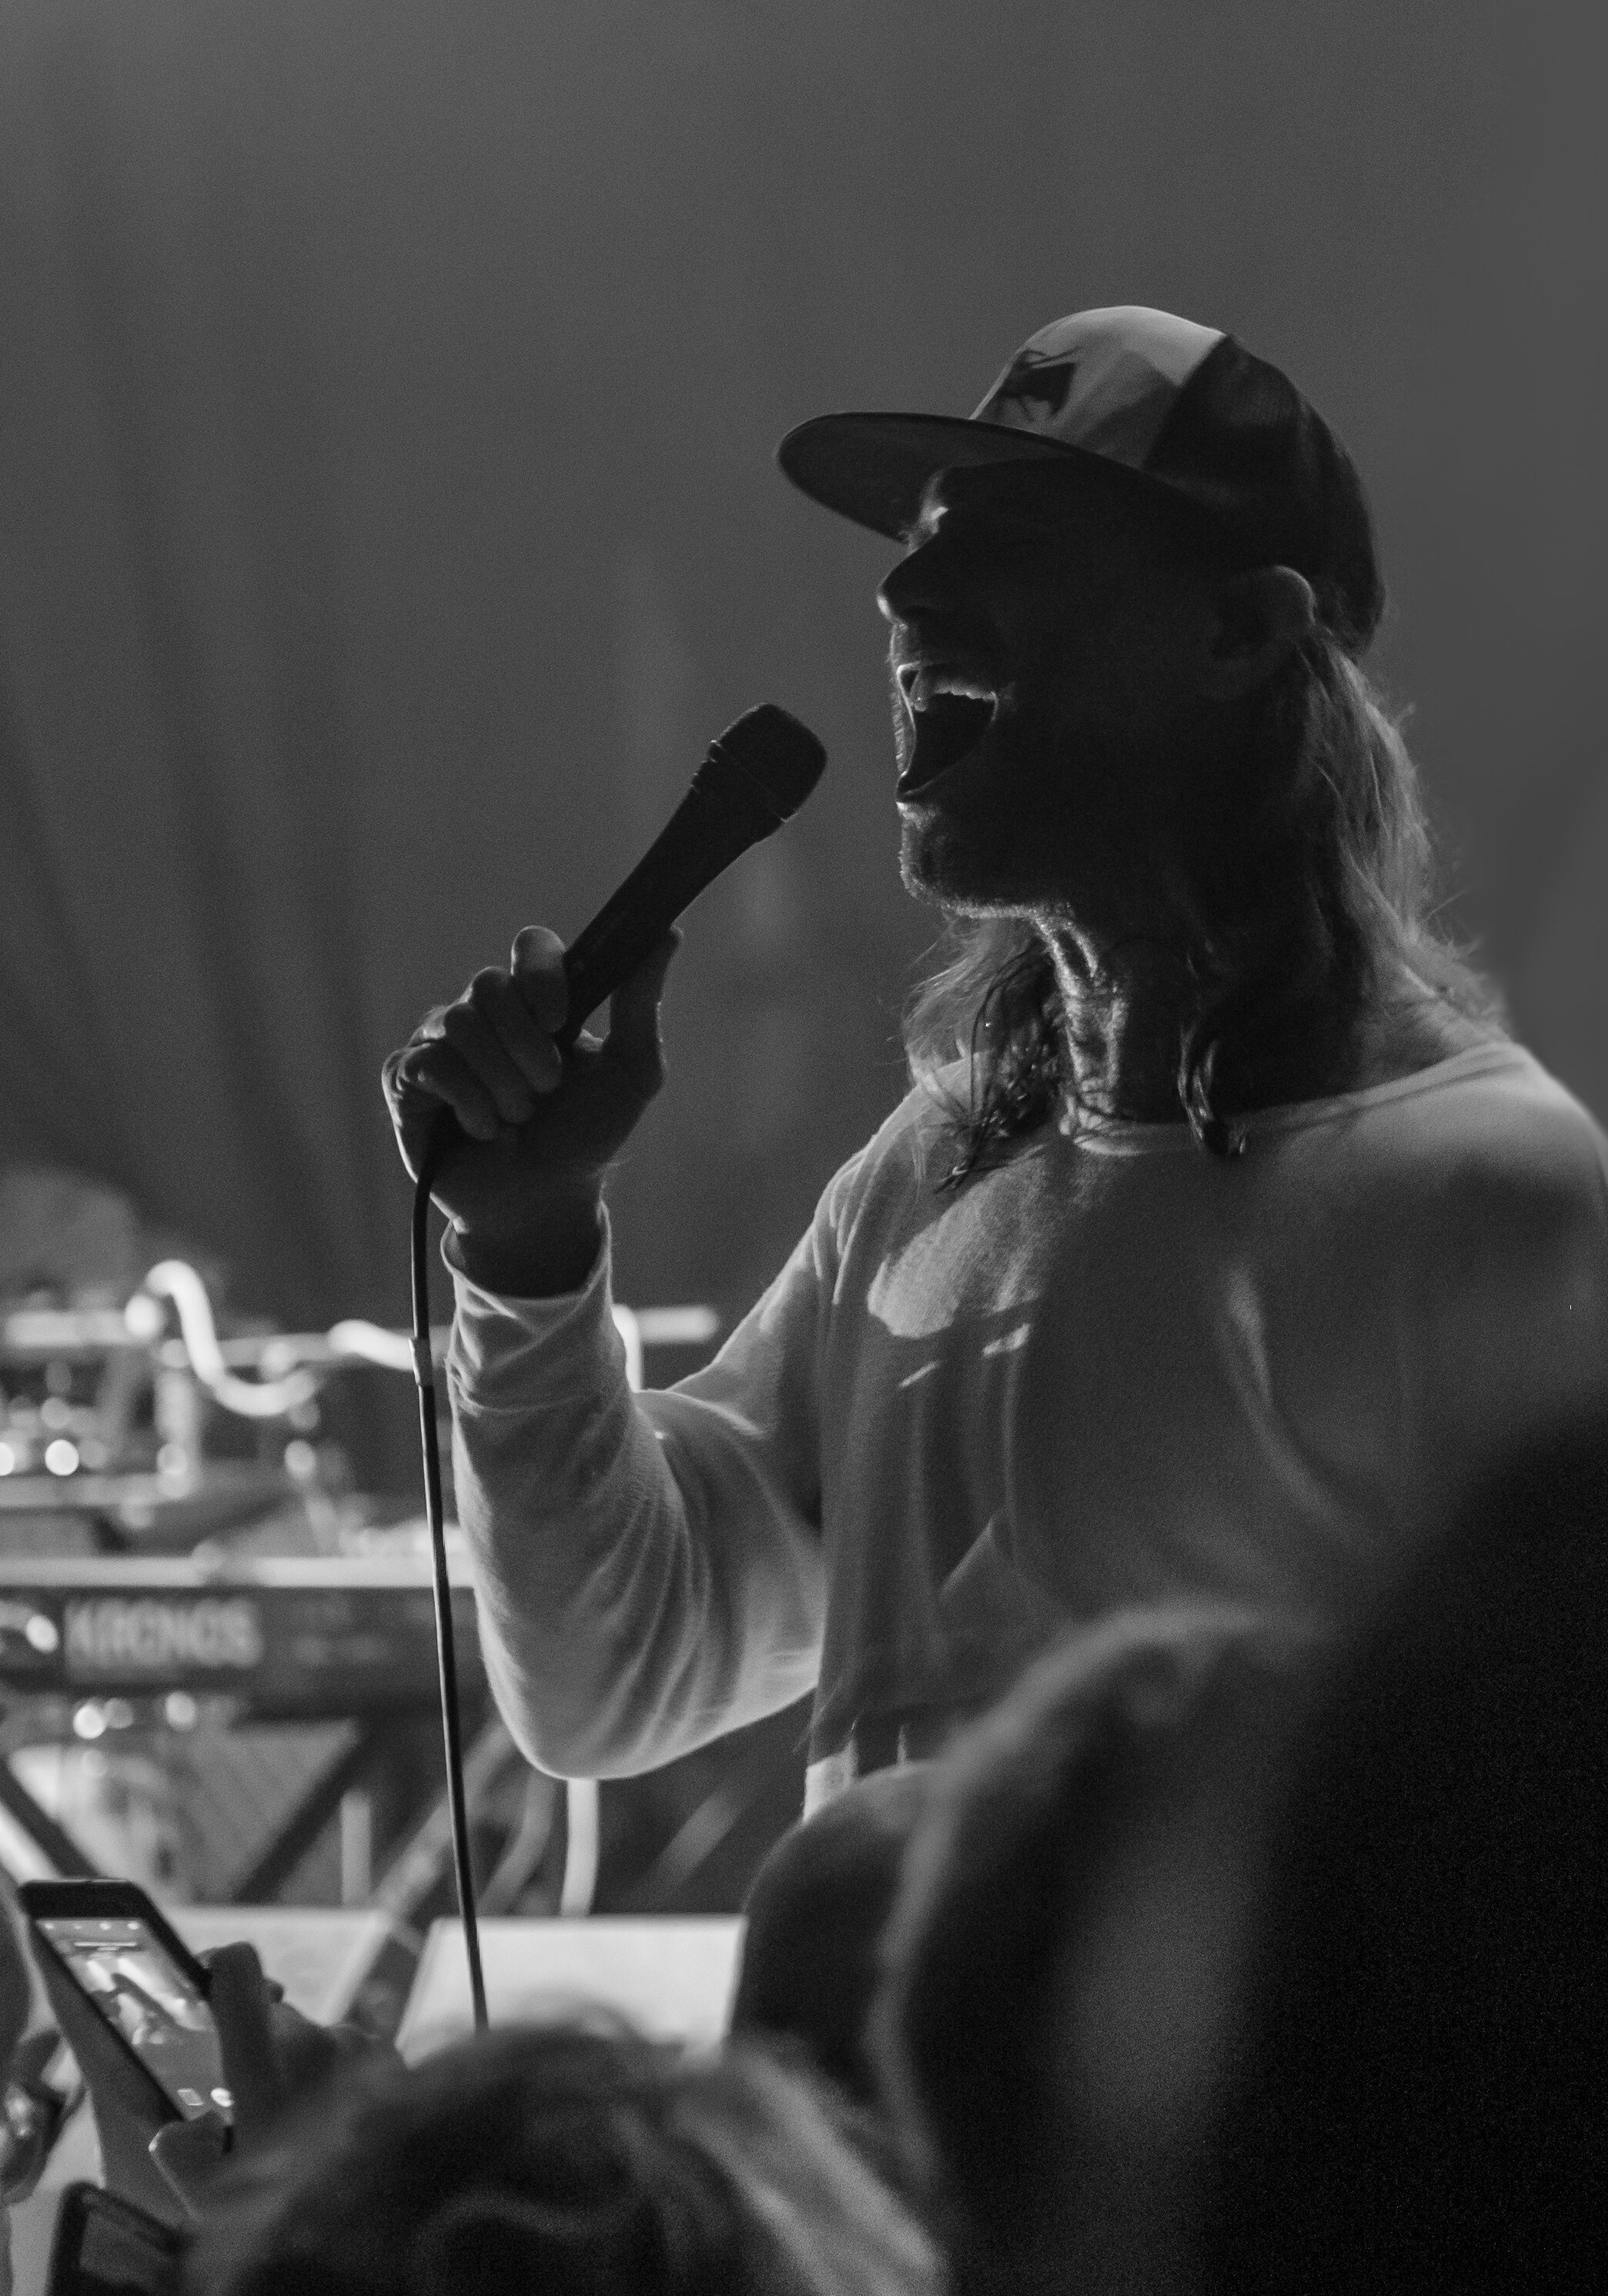
We love photographing weddings, portraits and live events but nothing hones your photographic skills quite like a circus. The lighting is always hard, everyone is moving rapidly and events happen in the blink of an eye, but the sheer exhilaration and the personalities on show make it a unique experience.
For the Christmas period, the team who run Cirque Du Vulgar put on a family friendly spectacle and we were invited to photograph the event for them.


Fuji!
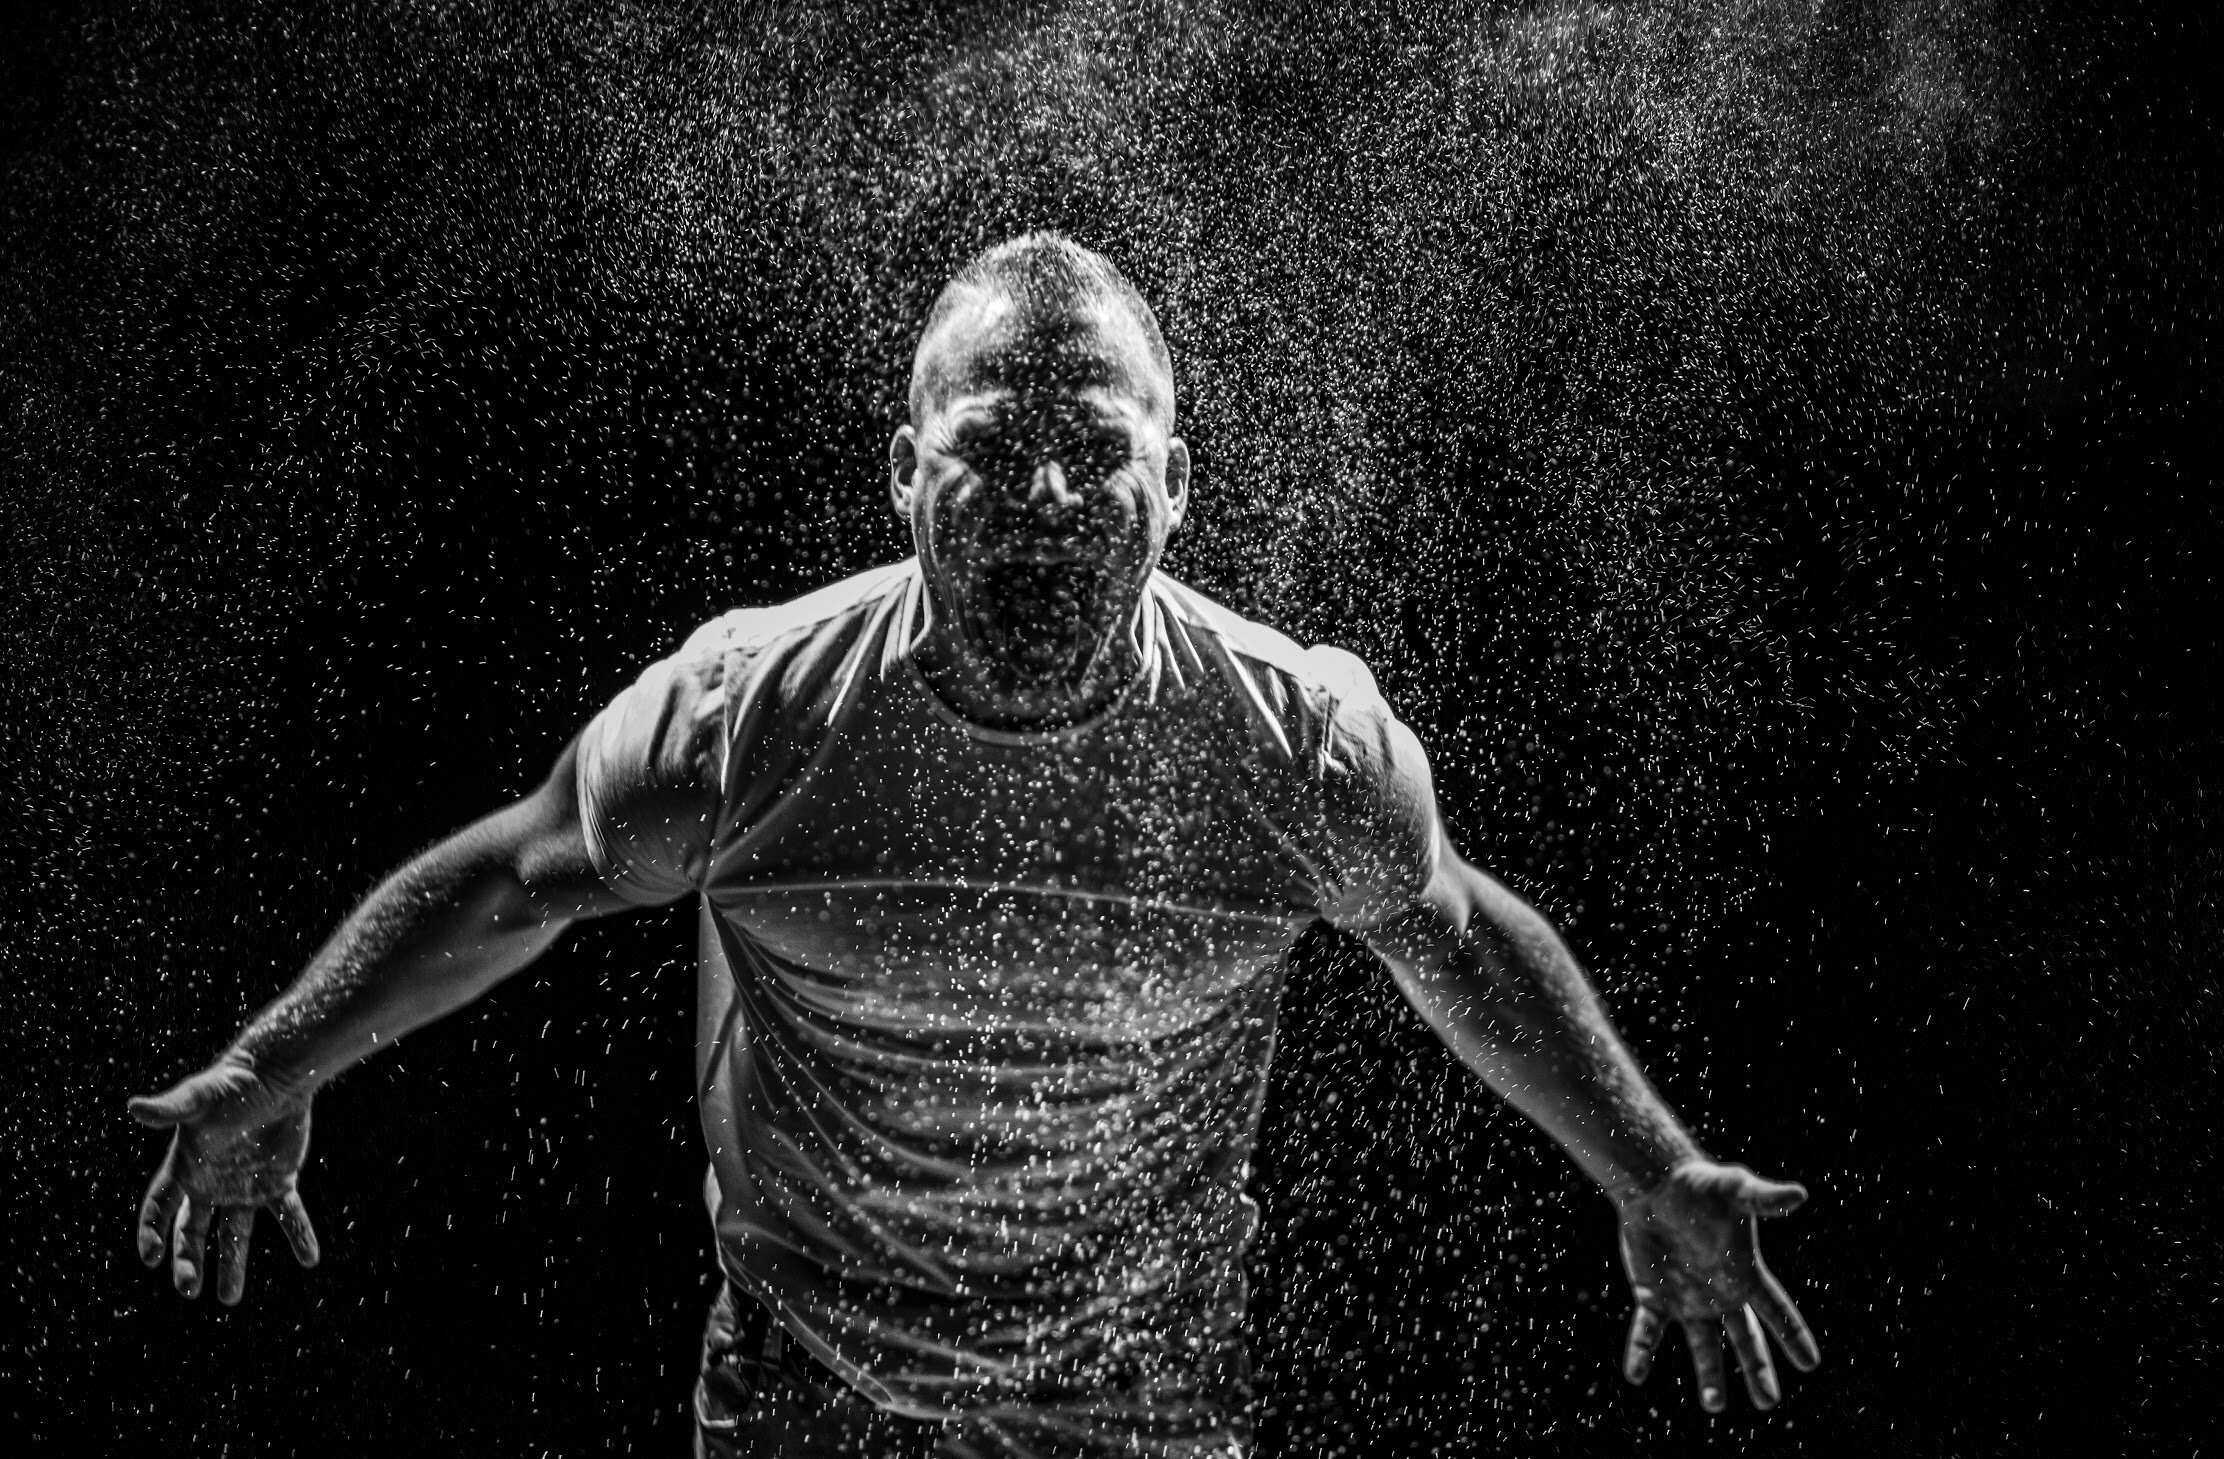
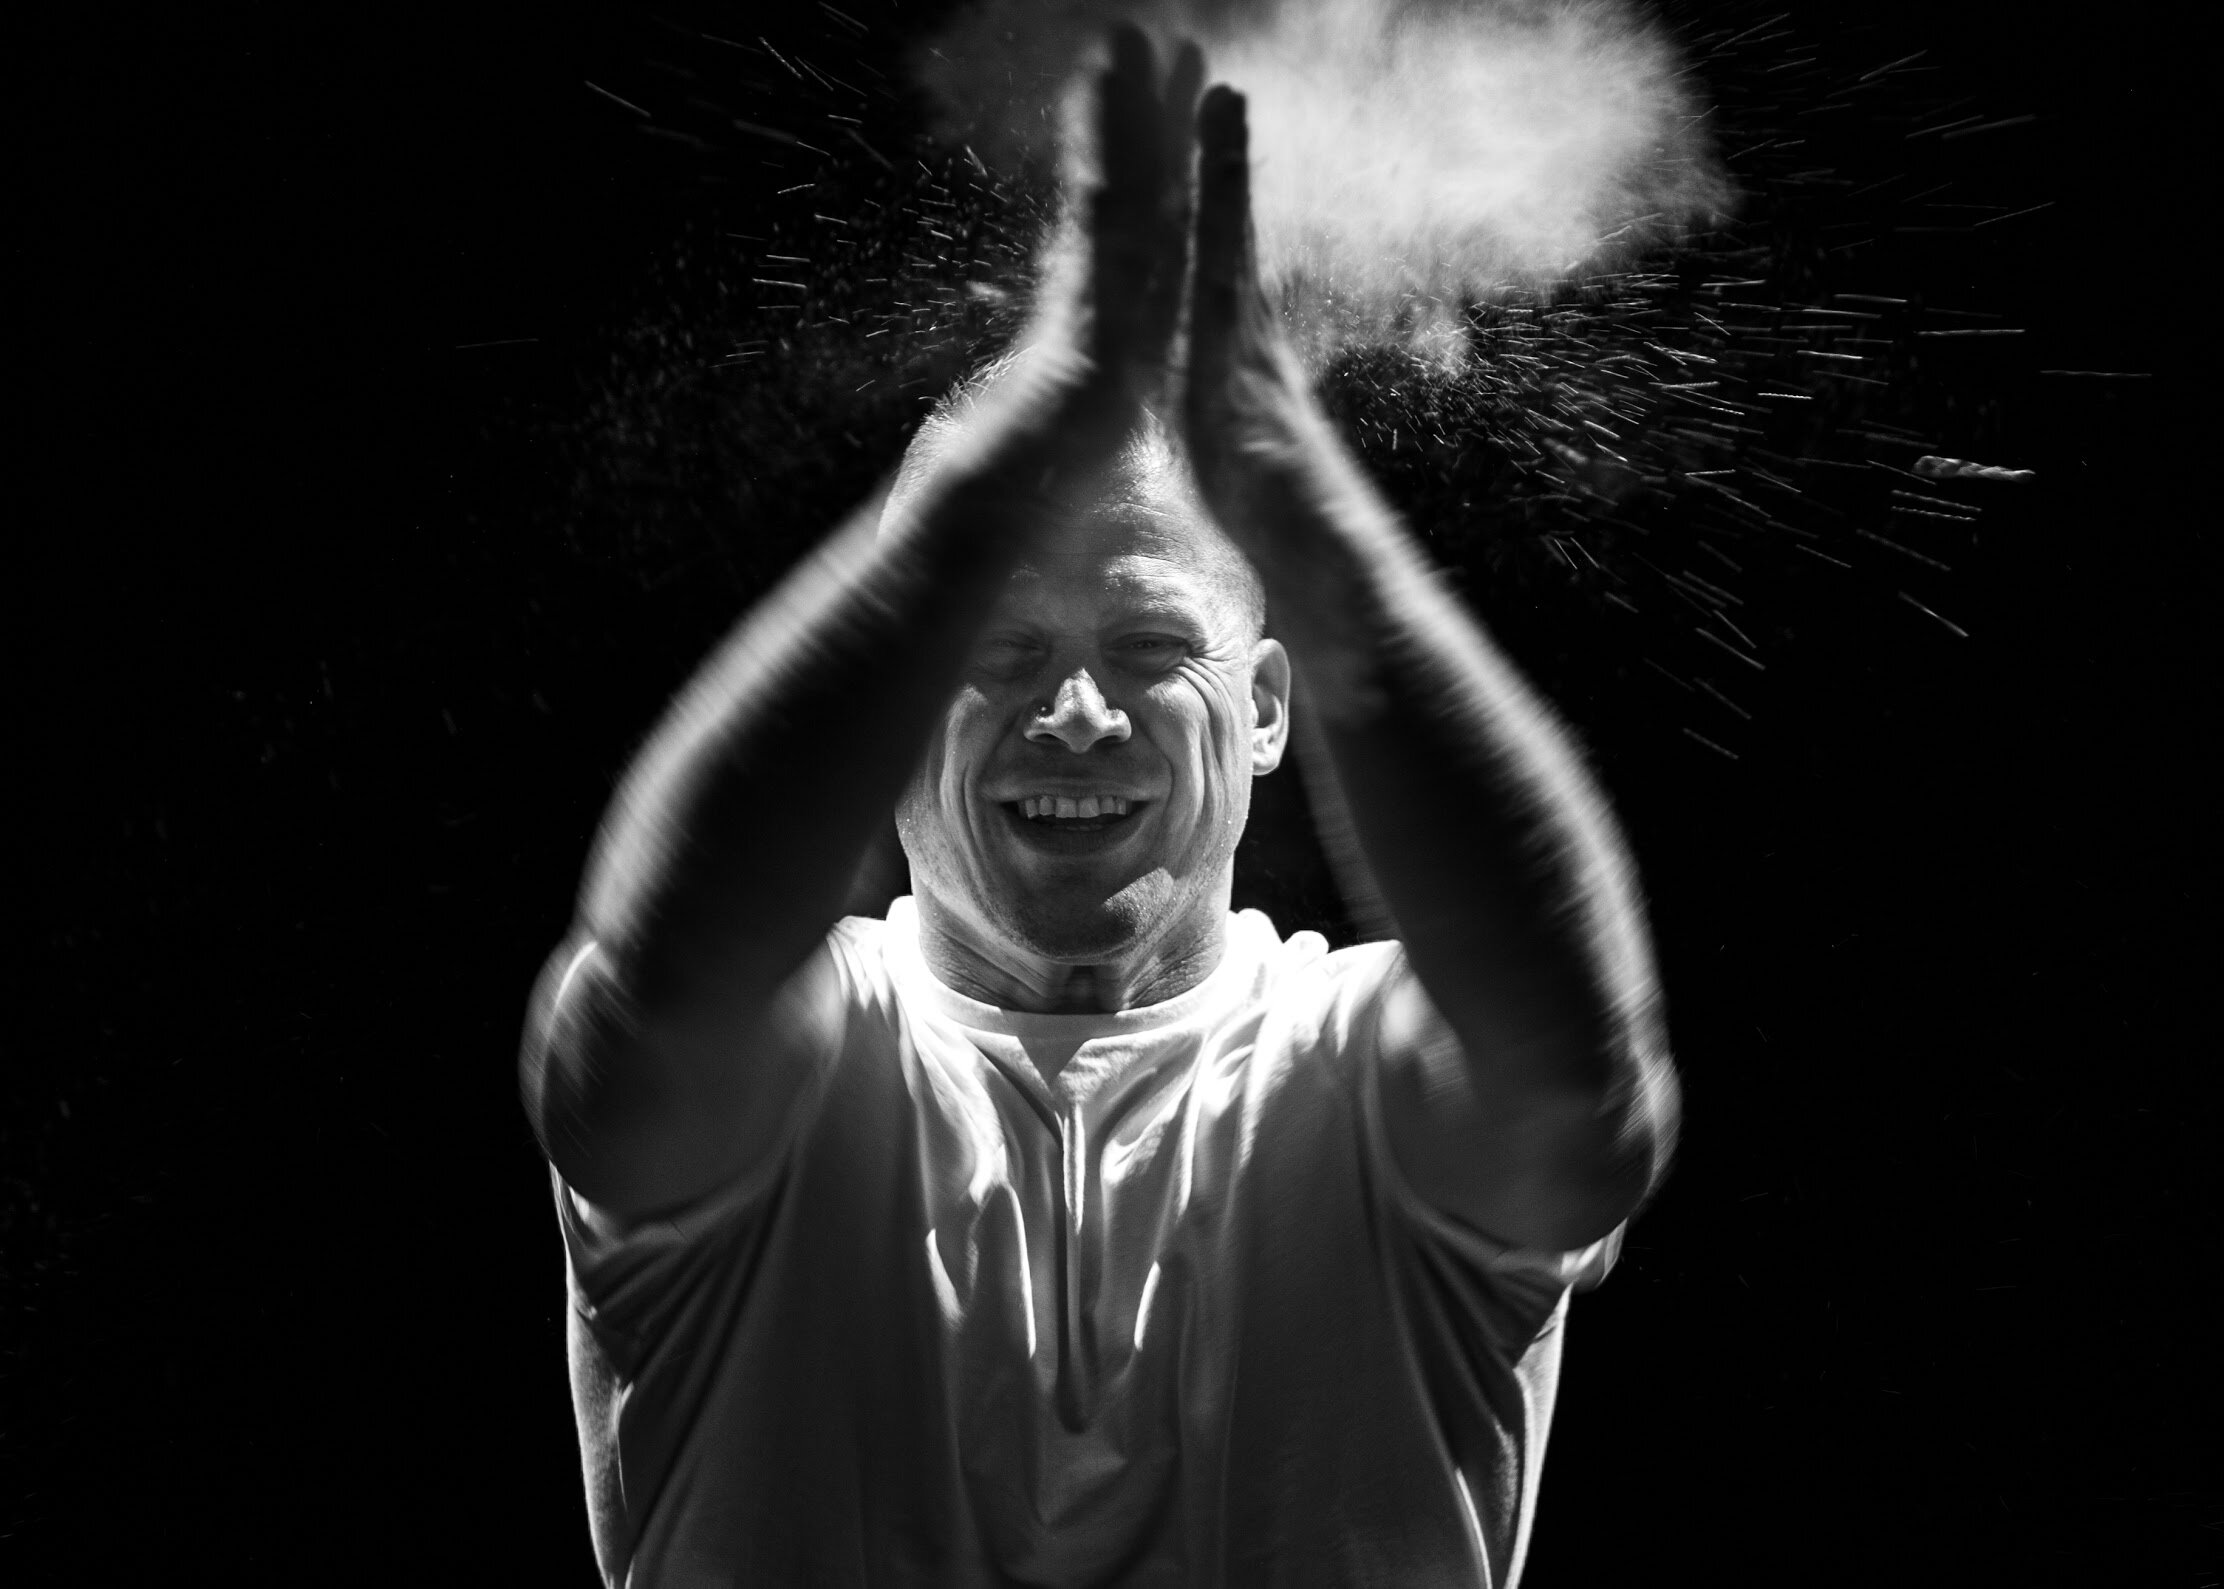
For a long time now, we've been using a range of cameras from a couple of camera systems for our wedding photography - we have used the canon 5DIII, the canon 7D and a pair of Olympus OMDs. We've got quite an extensive range of lenses for both systems...we used the same collection of kit for our event and gig photography too
At the end of last year, we decided that in order to make our workflow a little easier we'd move to a single manufacturer and have matching cameras. Well, it's not quite worked out like that, as I'm very attached to my OMDs and Em still loves her very well worn canon.
But, we do have a pair of spanking new Fujifilm X-H1s that are now our main bodies for all our weddings.
We picked Fuji because their cameras create beautiful images in both colour and mono, while having an extremely well designed interface with all the settings you need immediately available on the camera. It's great to see all the settings immediately without having to delve through menus.
It helps that the cameras are very handsome to look at and have a classic analogue look to them.
We're also very impressed with their lens line-up, which caters to professionals with their xf range, and the set we have are the XF WR R - Fuji love their letters!
The XF range are their premium lenses, the WR stands for water resistant and the R means that the lens has an aperture ring on it. When the lenses are on our X-H1 cameras, you can actually run them under a tap! We've not tried this...
We've been using the system a couple of months now and we're very impressed. We're especially impressed with the quality of the images we're getting.
Things we love about them:
They are quiet. We didn’t realise just how quiet until we shot a wedding with them this month. I’ve previously favoured my Olympus kit during the ceremony as they are much quieter than a traditional SLR but the X-H1 has been designed with a damped shutter mechanism that makes them almost completely unobtrusive while still having a satisfying noise that tells you you’ve taken a picture.
They can shoot in very low light. We shoot in a documentary style, sometimes resorting to flash for the dancing, to add a little excitement to the images.
They’re pretty!

This shot of Frank Turner was taken at the cavern in Exeter last week. The venue is very small with a capacity of about 200, it was dark and crowded with hot spots in the lighting.
We are currently processing the shots from our latest wedding and will post samples when we can.


Gig Photography - Reef
We’ve got quite a large portfolio of gig photographs and we thought it would be interesting to show a collection of our shots from a single gig. On this occasion it was reef at the cheese and grain in Frome.
Some were shot by Em in the pit, and others were shot by us from the audience to give a wider perspective - you generally only get 3 songs in the pit so you don’t block the audience for the whole gig!


Notting Hill

When we set off for a trip to the Tate Modern, we didn’t actually realise that the bank holiday weekend of the 28th of august was the time when London was hosting the craziest and largest street party around. We noticed lots of people dressed in feathers and it slowly dawned on us that we needed to head over to Notting Hill to see what it was all about.
Em had her huge canon camera and I was travelling light with my tiny Ricoh GRII street camera.
I think we managed to capture the mood of the event, although there are no pictures of the terrifying crush we got caught in - we actually feared for our lives; not from any threat of violence, but from the sheer mass of people who at one point stared to panic and push. It was an experience to say the least. Don’t let this put you off going though - it is a truly amazing event but next time we go, we will avoid the mayhem on the bank holiday Monday and perhaps not move into the streams of people.
The following is a sample of pictures from both cameras from that day.


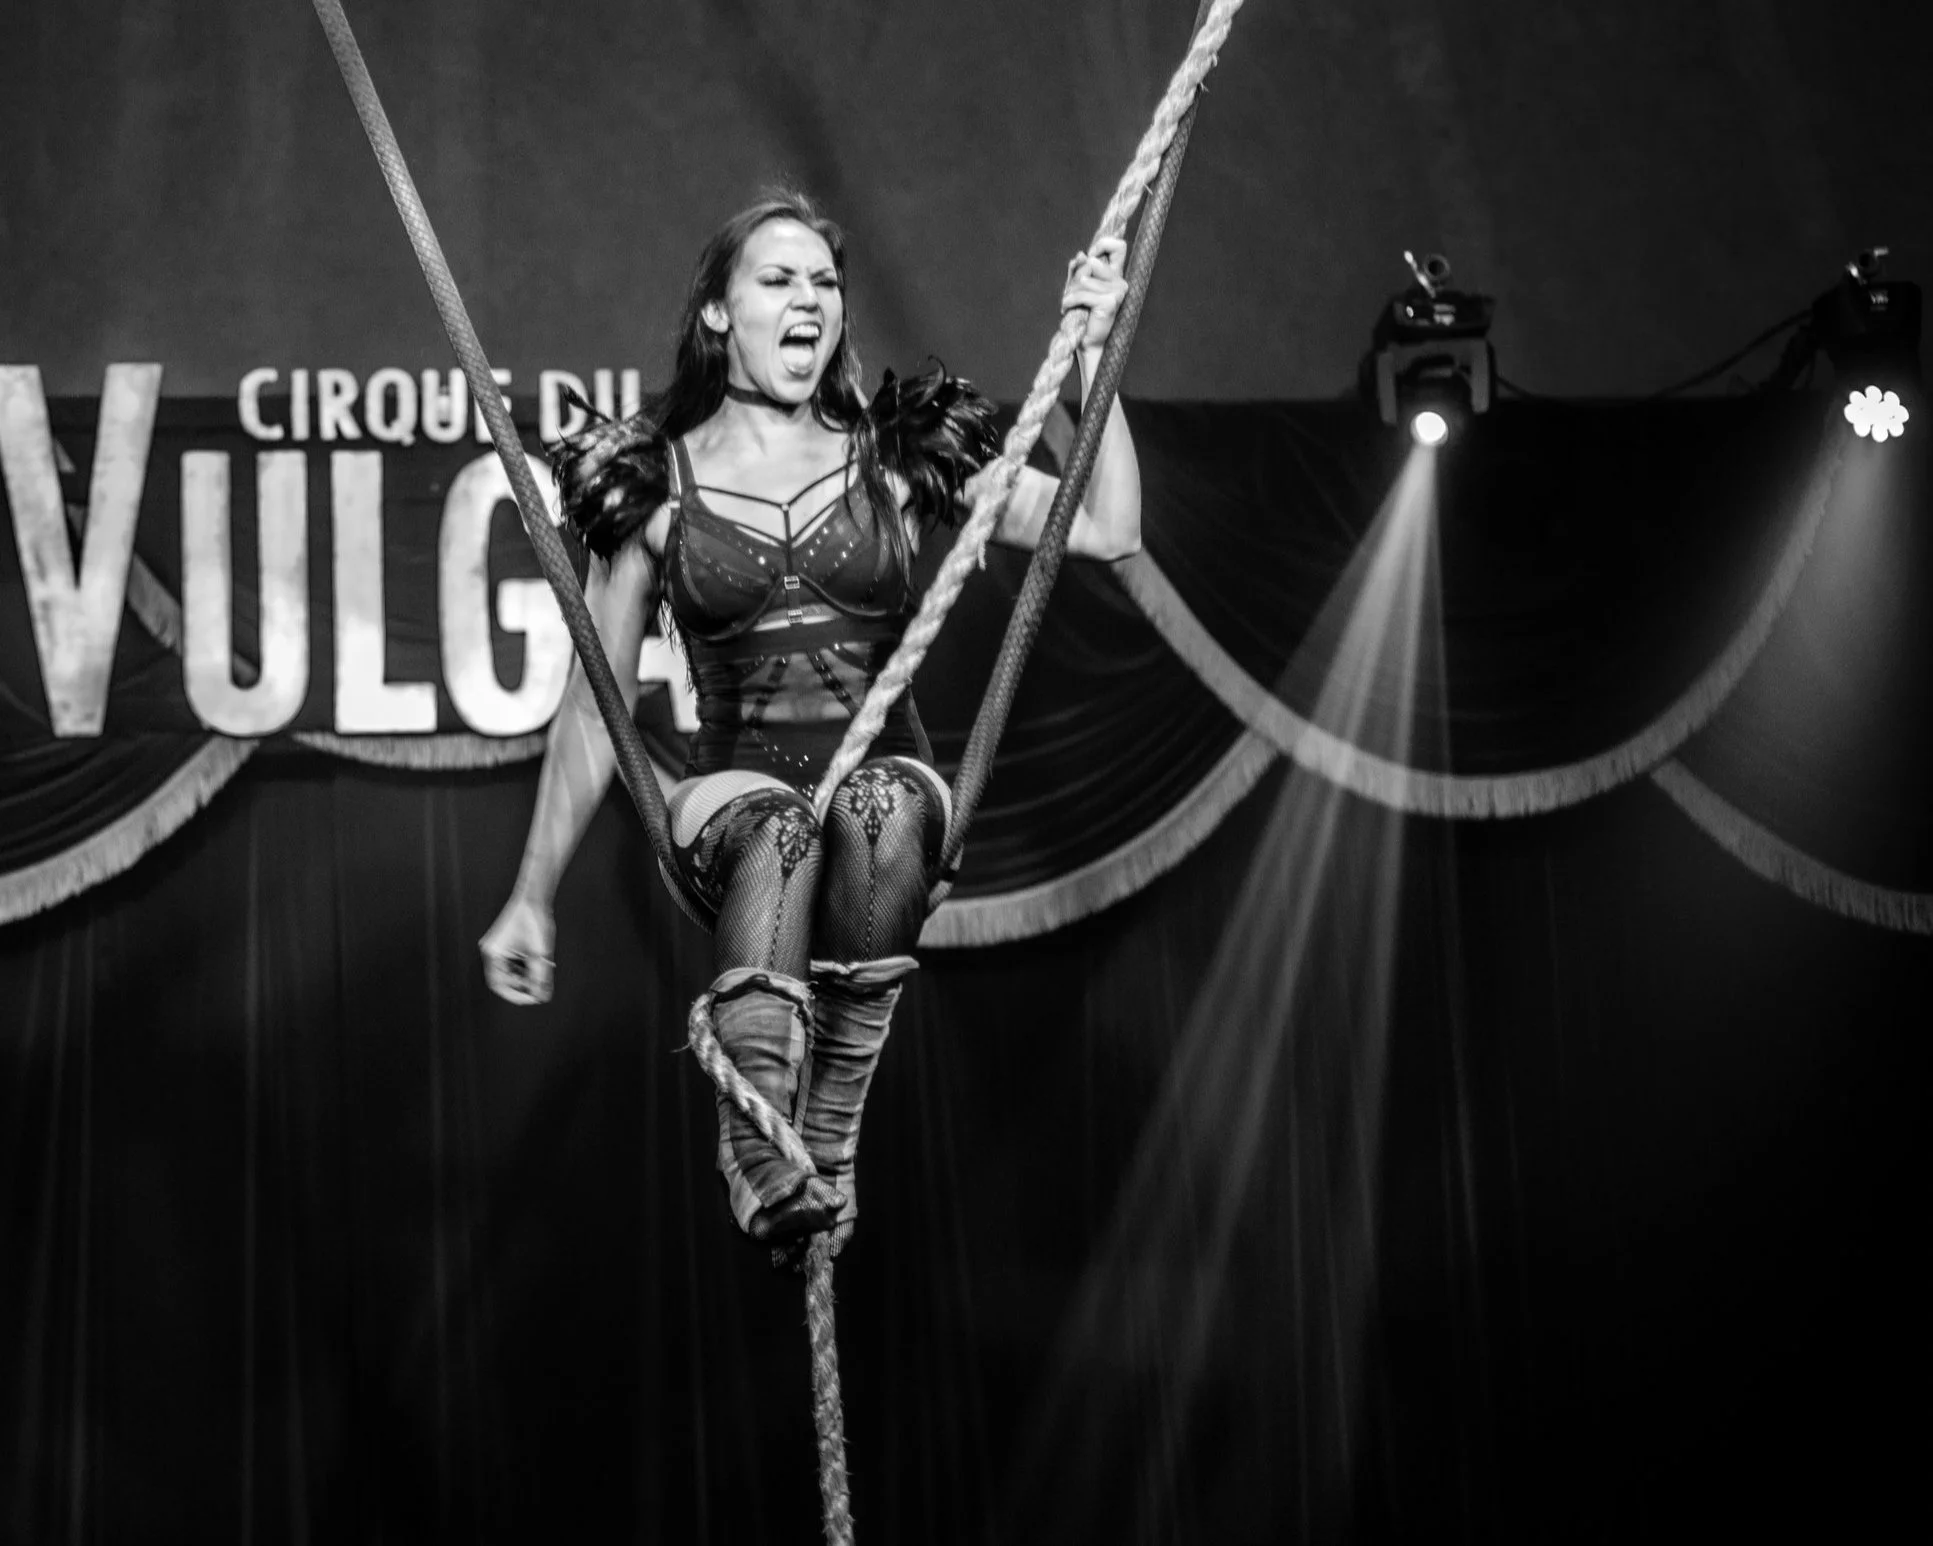
Cirque Du Vulgar
By Em
I have had the privilege of working with Cirque du Vulgar alongside Len Copland on a number of occasions and I jumped at the chance when Len got in contact with me last week and said he had another session booked.
Len shoots for the press, but on this occasion I was shooting for the joy of it, the characters in the troupe are just amazing and so much fun to work with. I hope this comes across in the images I’ve included here.
If you’d like a peek at Len’s work, head over to his site here:
https://lencoplandphotography.blogspot.com


Darkroom kit and chemicals
you can’t process anything without the correct chemicals and in this post we will let you know the basic kit you need to get you started.
the first thing you need is somewhere dark to load the film! when we first started we didn’t have anywhere set up so we used a changing bag that we bought from amazon.
using a changing bag is a bit tricky but you soon learn to put everything in the bag before you start! the first time you forget something and you can see it sitting on the side while your arms are stuck in the bag, you soon make sure you don’t repeat that mistake.
you can see in the first image that we have three different chemicals. i’m sure we will go into more details in another post, but essentially you start with the developer, then place the film into a stop bath to prevent further development, followed by the fixer to ‘fix’ the permanent image.
we’re currently using ilford direct positive paper, which is extremely slow and requires a long exposure time, but it produces an image straight away, similar to a wet plate process.
all of the above were purchased from amazon, including the dinky trays, which we bought to save on chemicals as we’re only processing 4x5 inch images.

medium format photography
by em
The following is an extract from one of my photography projects. The theme was titled ‘Obsession’ and for this I chose to focus on the use of mobile phones.
During my course I have been lucky enough to borrow the college’s Yashica Mat 24 Medium format twin lens reflex camera. I have wanted to experiment with medium format since starting this course and this particular project presented the perfect opportunity.
I have carried it with me to a number of locations on my travels, which is no small feat as it’s quite heavy! I suspect that medium format might be my ideal format – I love processing film and the slowed down process of analogue photography, and medium format gives me the huge high quality SQUARE negative. There’s everything to like about it. And 120 roll film only has 12 square shots to a roll, so I don’t spend ages trying to fill a roll for development.
This first picture is from a trip to Bristol. The other great thing about a TLR is that you don’t look at your subject directly, but stare down in the direction of your feet, which makes you much less intimidating. Even if people do notice you, they are fascinated rather than threatened. This has let me be a little more direct with photos, as this picture shows:
Bristol Pret. F/3.5 60ms
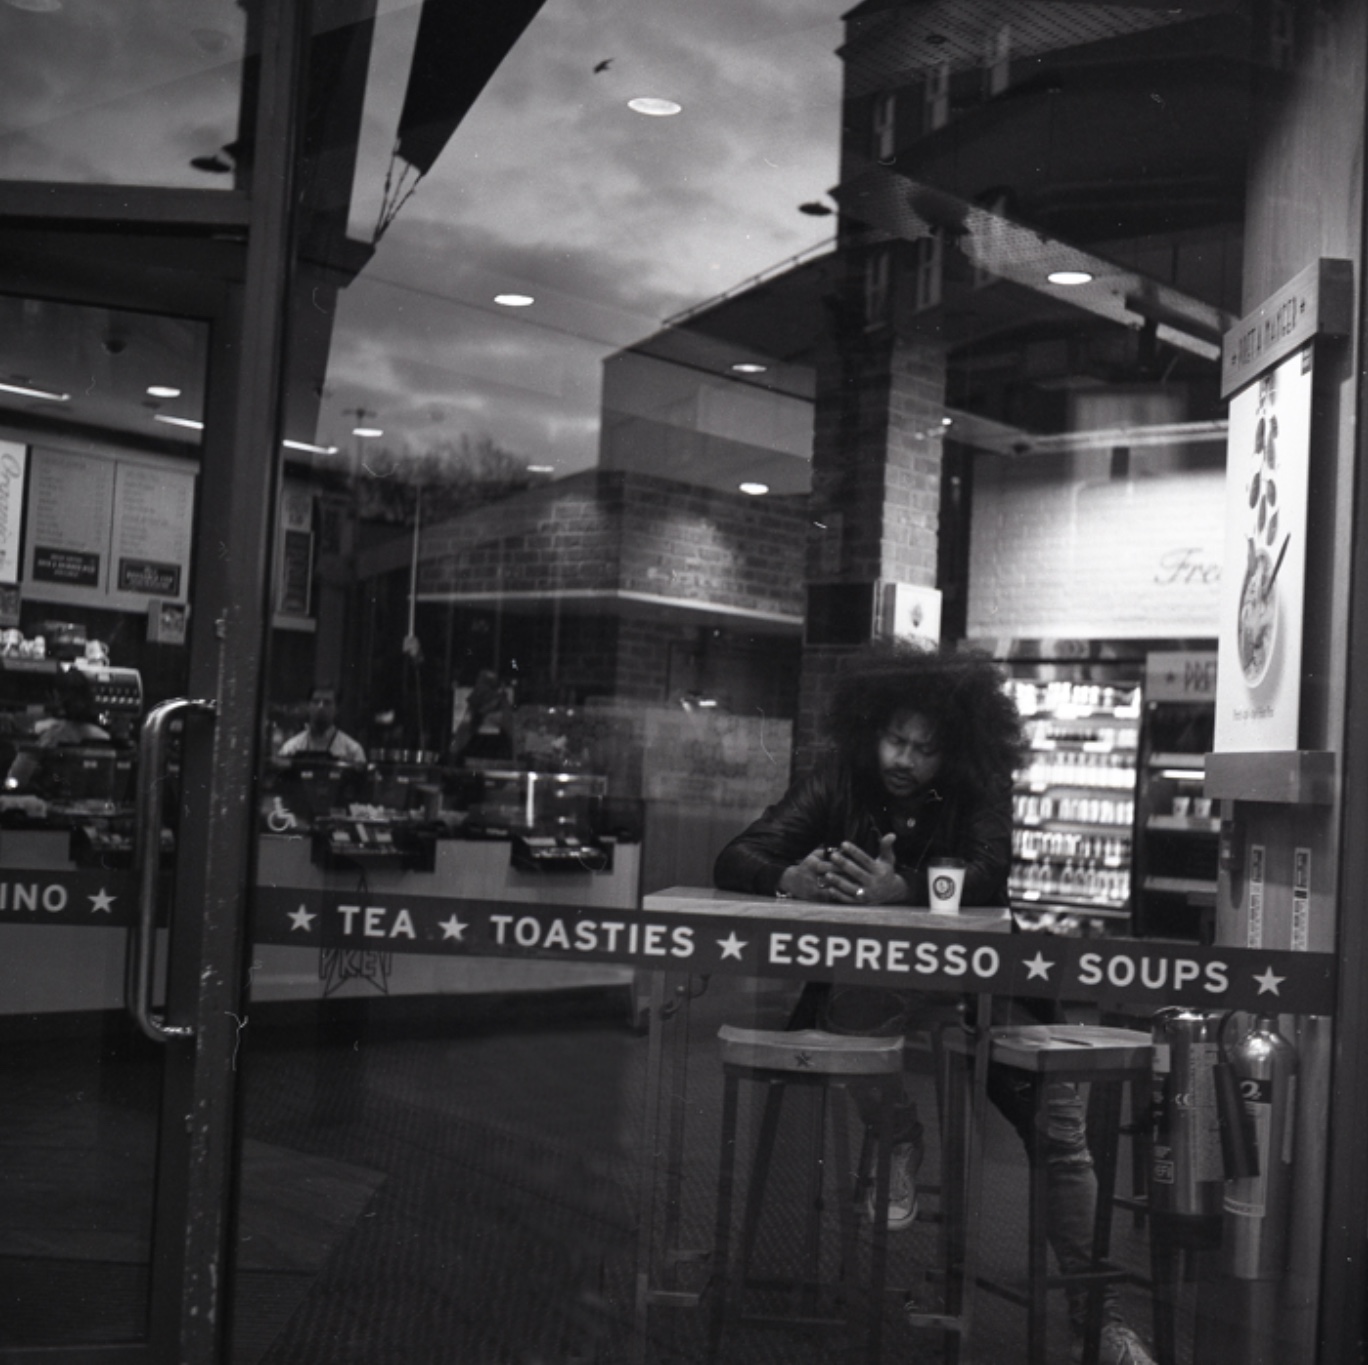
This picture has had some post processing as there was an unsightly bollard in the foreground. I know this goes against the grain for true street photography, but this is my blog and I want to make it pretty!
I was fortunate enough to have the opportunity to use the TLR in a studio situation. The college has an excellent studio and Adam was kind enough to lend me one of the college’s Speedlites and help me to set it up.
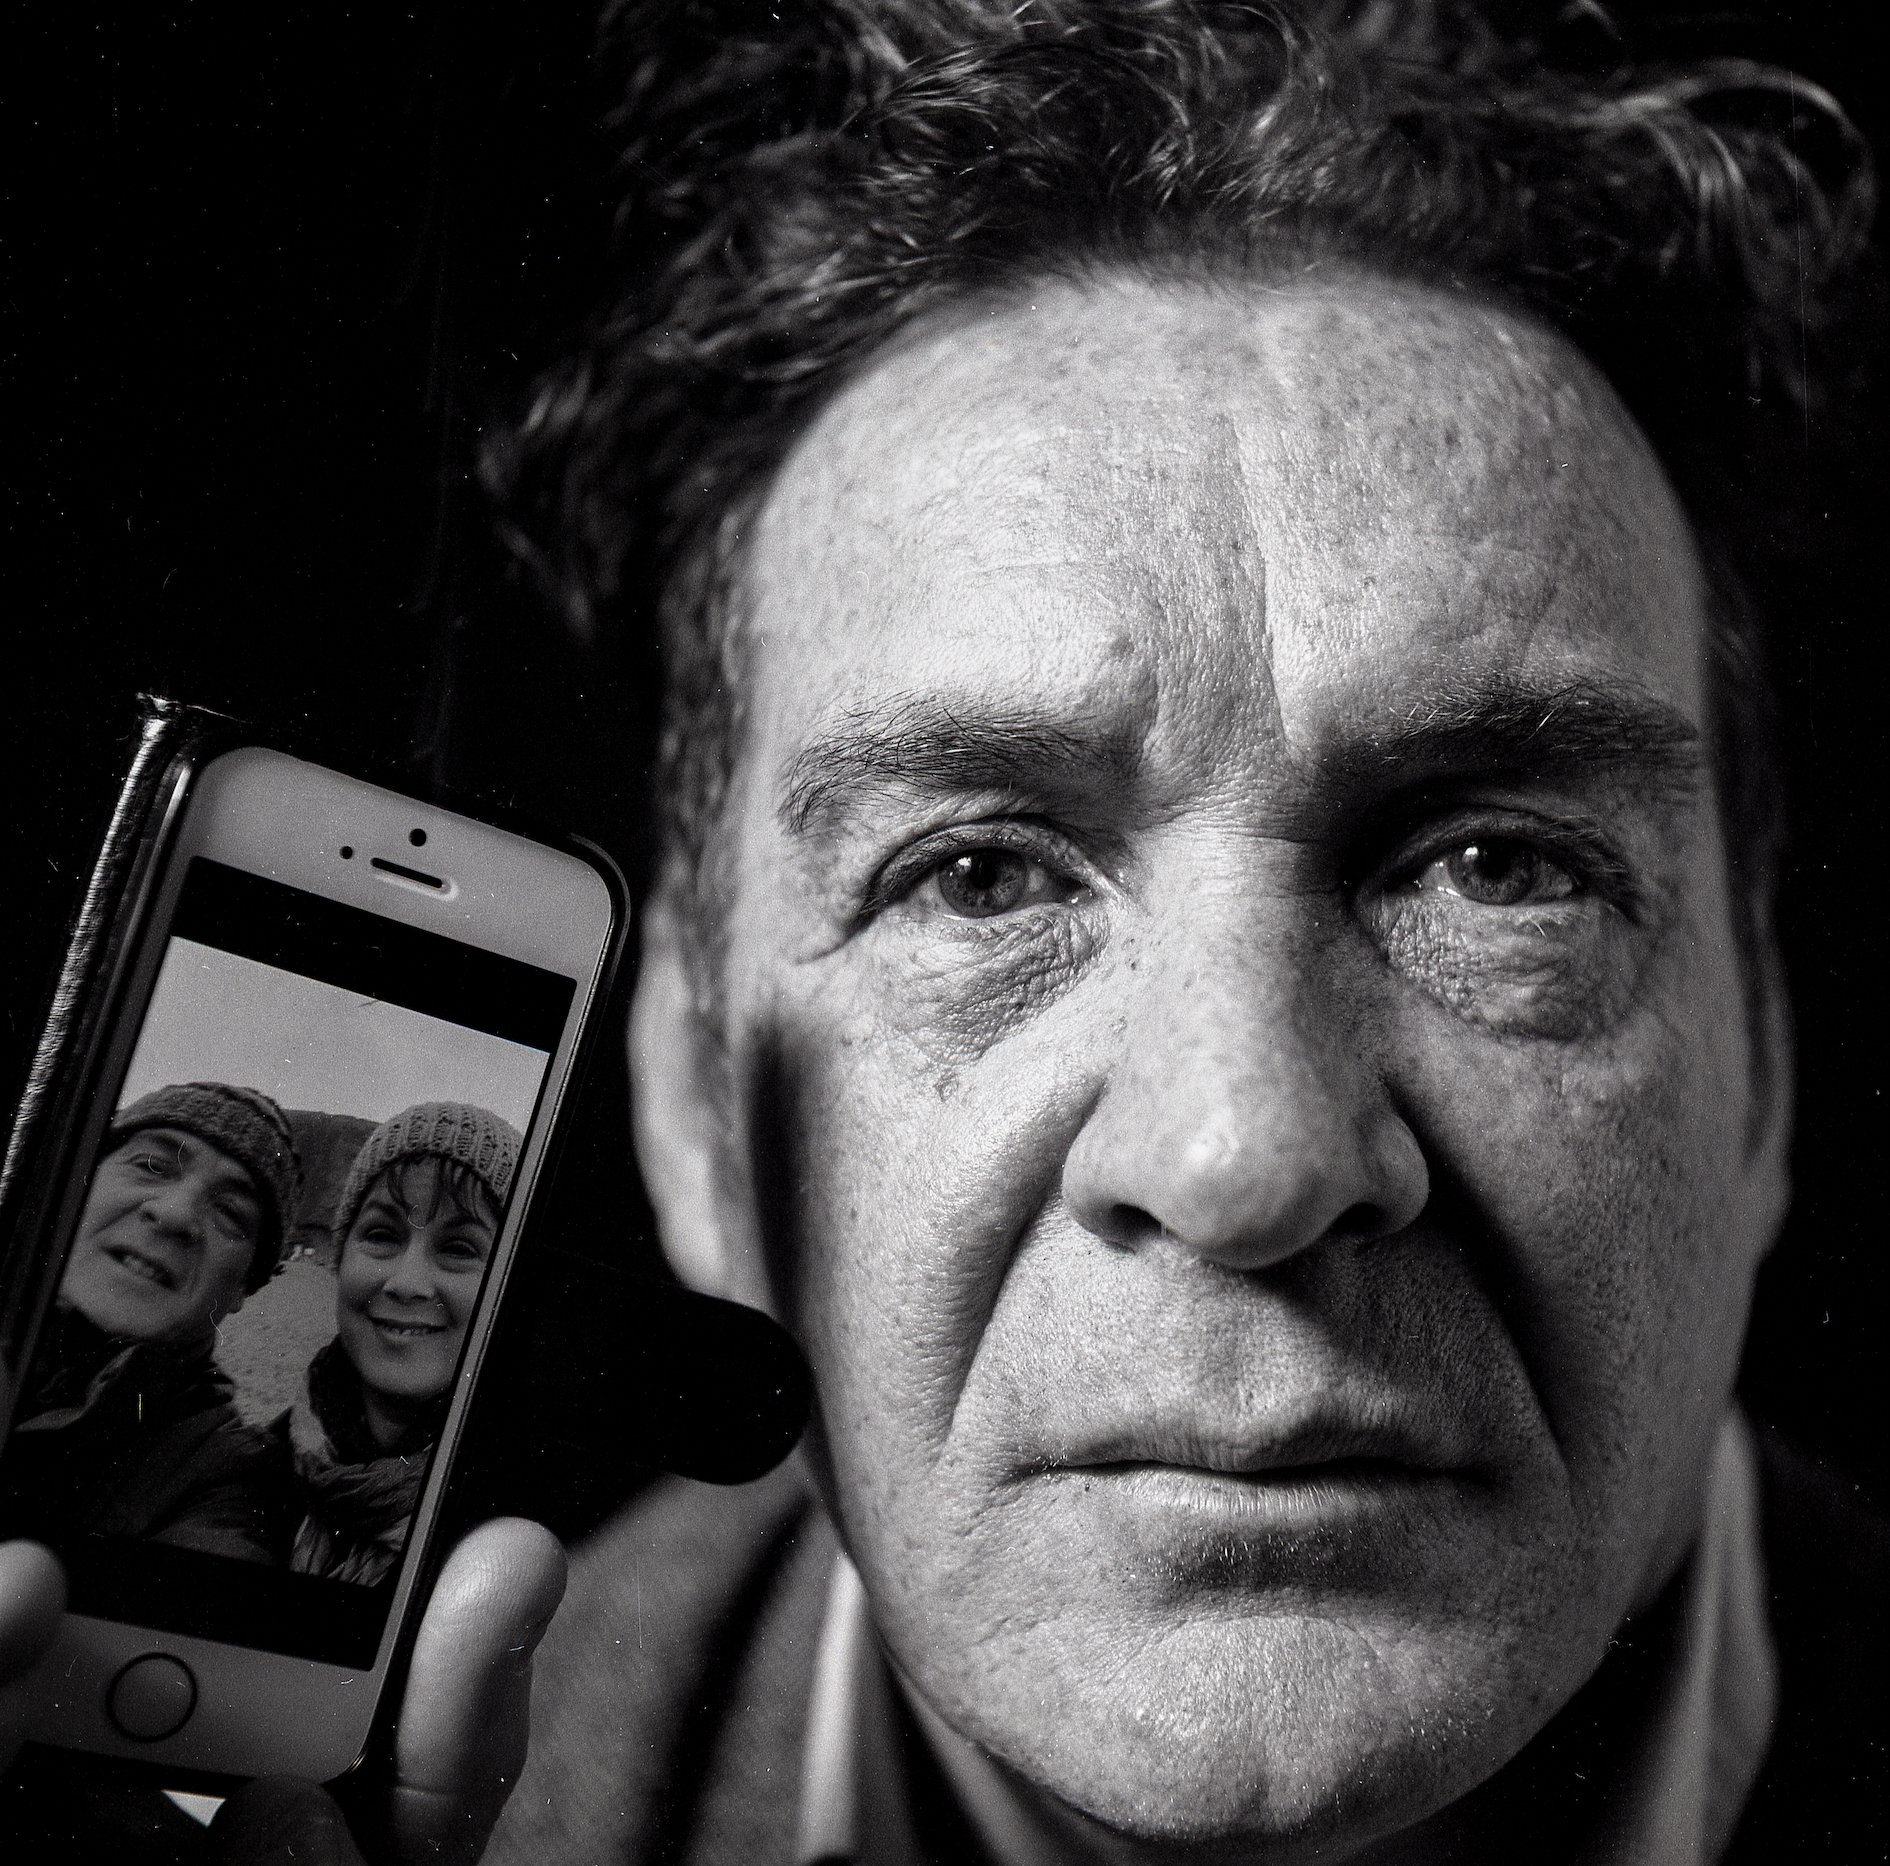
I am extremely excited to present these images of Len, who was kind enough to pose for me. These are the first medium format studio portraits I have ever taken and from a roll of 12 pictures I have managed to get 4 good quality street photos and 4 studio portraits. I love this camera!
Len. F/4 125ms

This is one of 4 shots I took of Len. I used a light meter on Len’s cheek to measure the ambient light for both of the included studio shots. The flash unfortunately failed to fire on two, and I only have the light from the screen of his phone, so they are unusable, but it’s all a learning process.
I love the eye contact in this picture. On one of the failed images I had removed his lanyard, which made the image slightly more timeless, but given the context and the mobile phone, I don’t think this is too much of a problem. I have cleaned up some dust from the image in Lightroom. I need to remember that this size of negative appears to be very good at collection detritus from the darkroom!
Len’s Phone. F/5.6 125ms
For this image, we attached a good quality close up lens to the camera and I got in real close. I find this image really engaging and love the tones on his face. I am pleased with the detail that the camera can achieve, even with a close up attachment on the front.
Since completing the project I now have a Bronica medium format slr camera, with a couple of lenses which I use to shoot personal work.

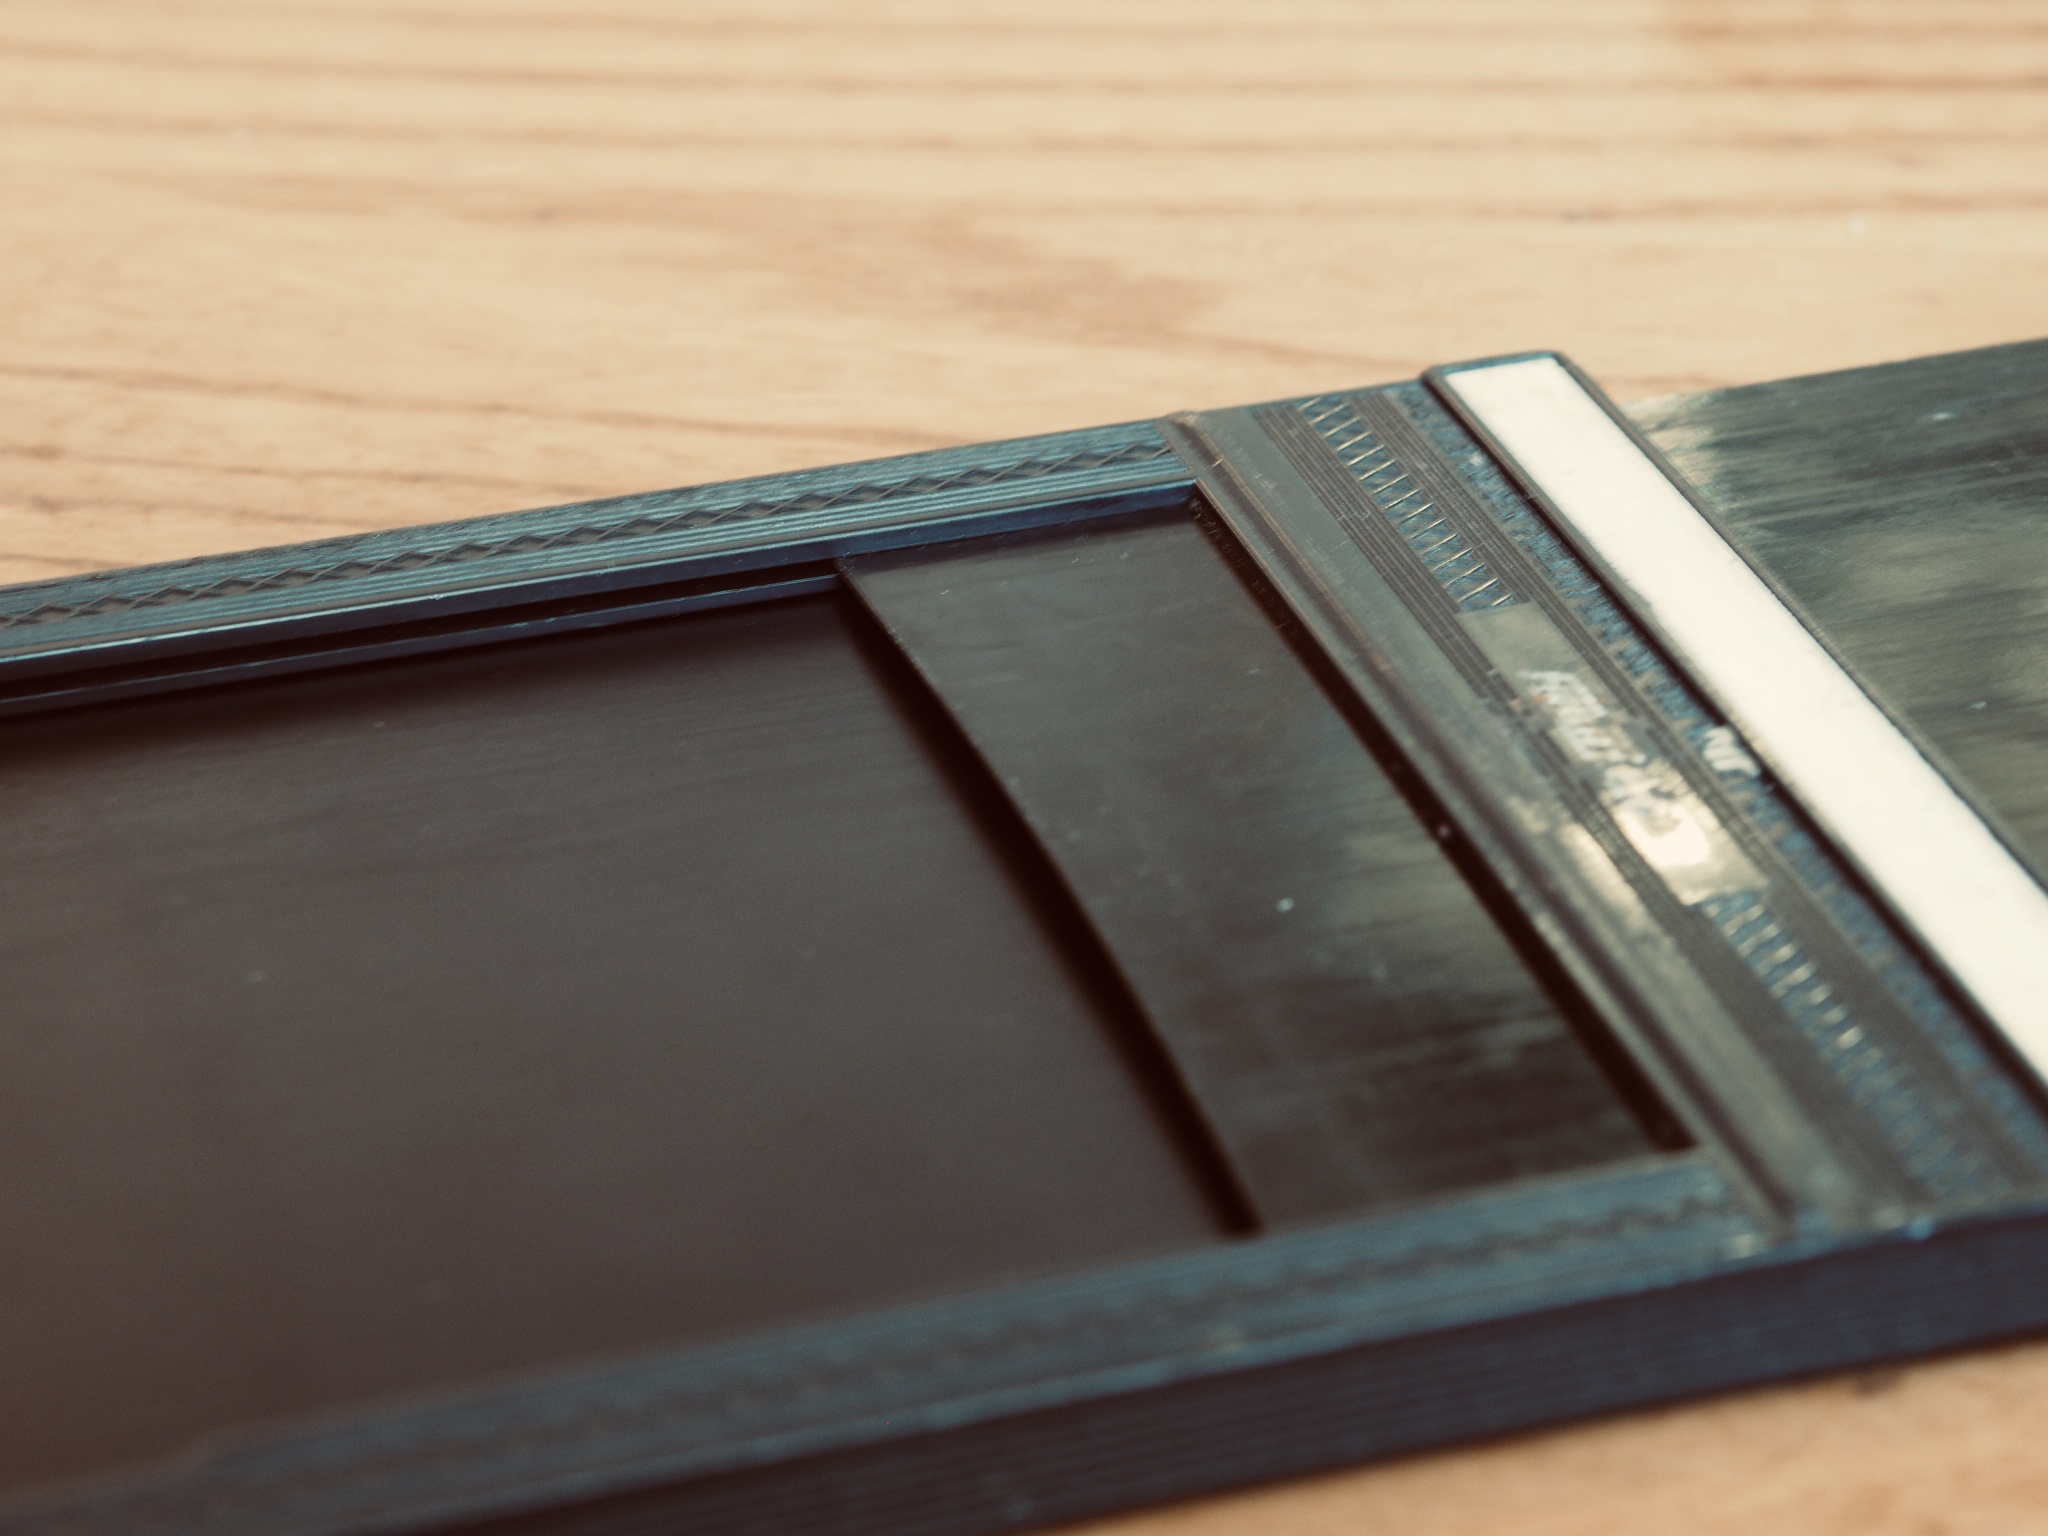
film holders
film holders attach to the back of the camera body and hold the sheets of film. their purpose is to stop light getting to the film until you’re ready, to keep it perfectly flat, and to let you take more than one picture at a sitting. to help with this last point, each of the film holders we show here can take a sheet of film to a side.
you have far less flexibility with wet plate photography as each plate is simply a treated piece of metal (or glass) which has to be shot and processed within a matter of minutes…but we’re not there yet!
the film holders pictured are relatively cheap and from ebay - they’re well used but work perfectly fine. in the second image you can see the dark slide pulled back to show the slot where the film is held. the dark slide prevents any light from hitting the film until it is removed.
more about the Intrepid camera
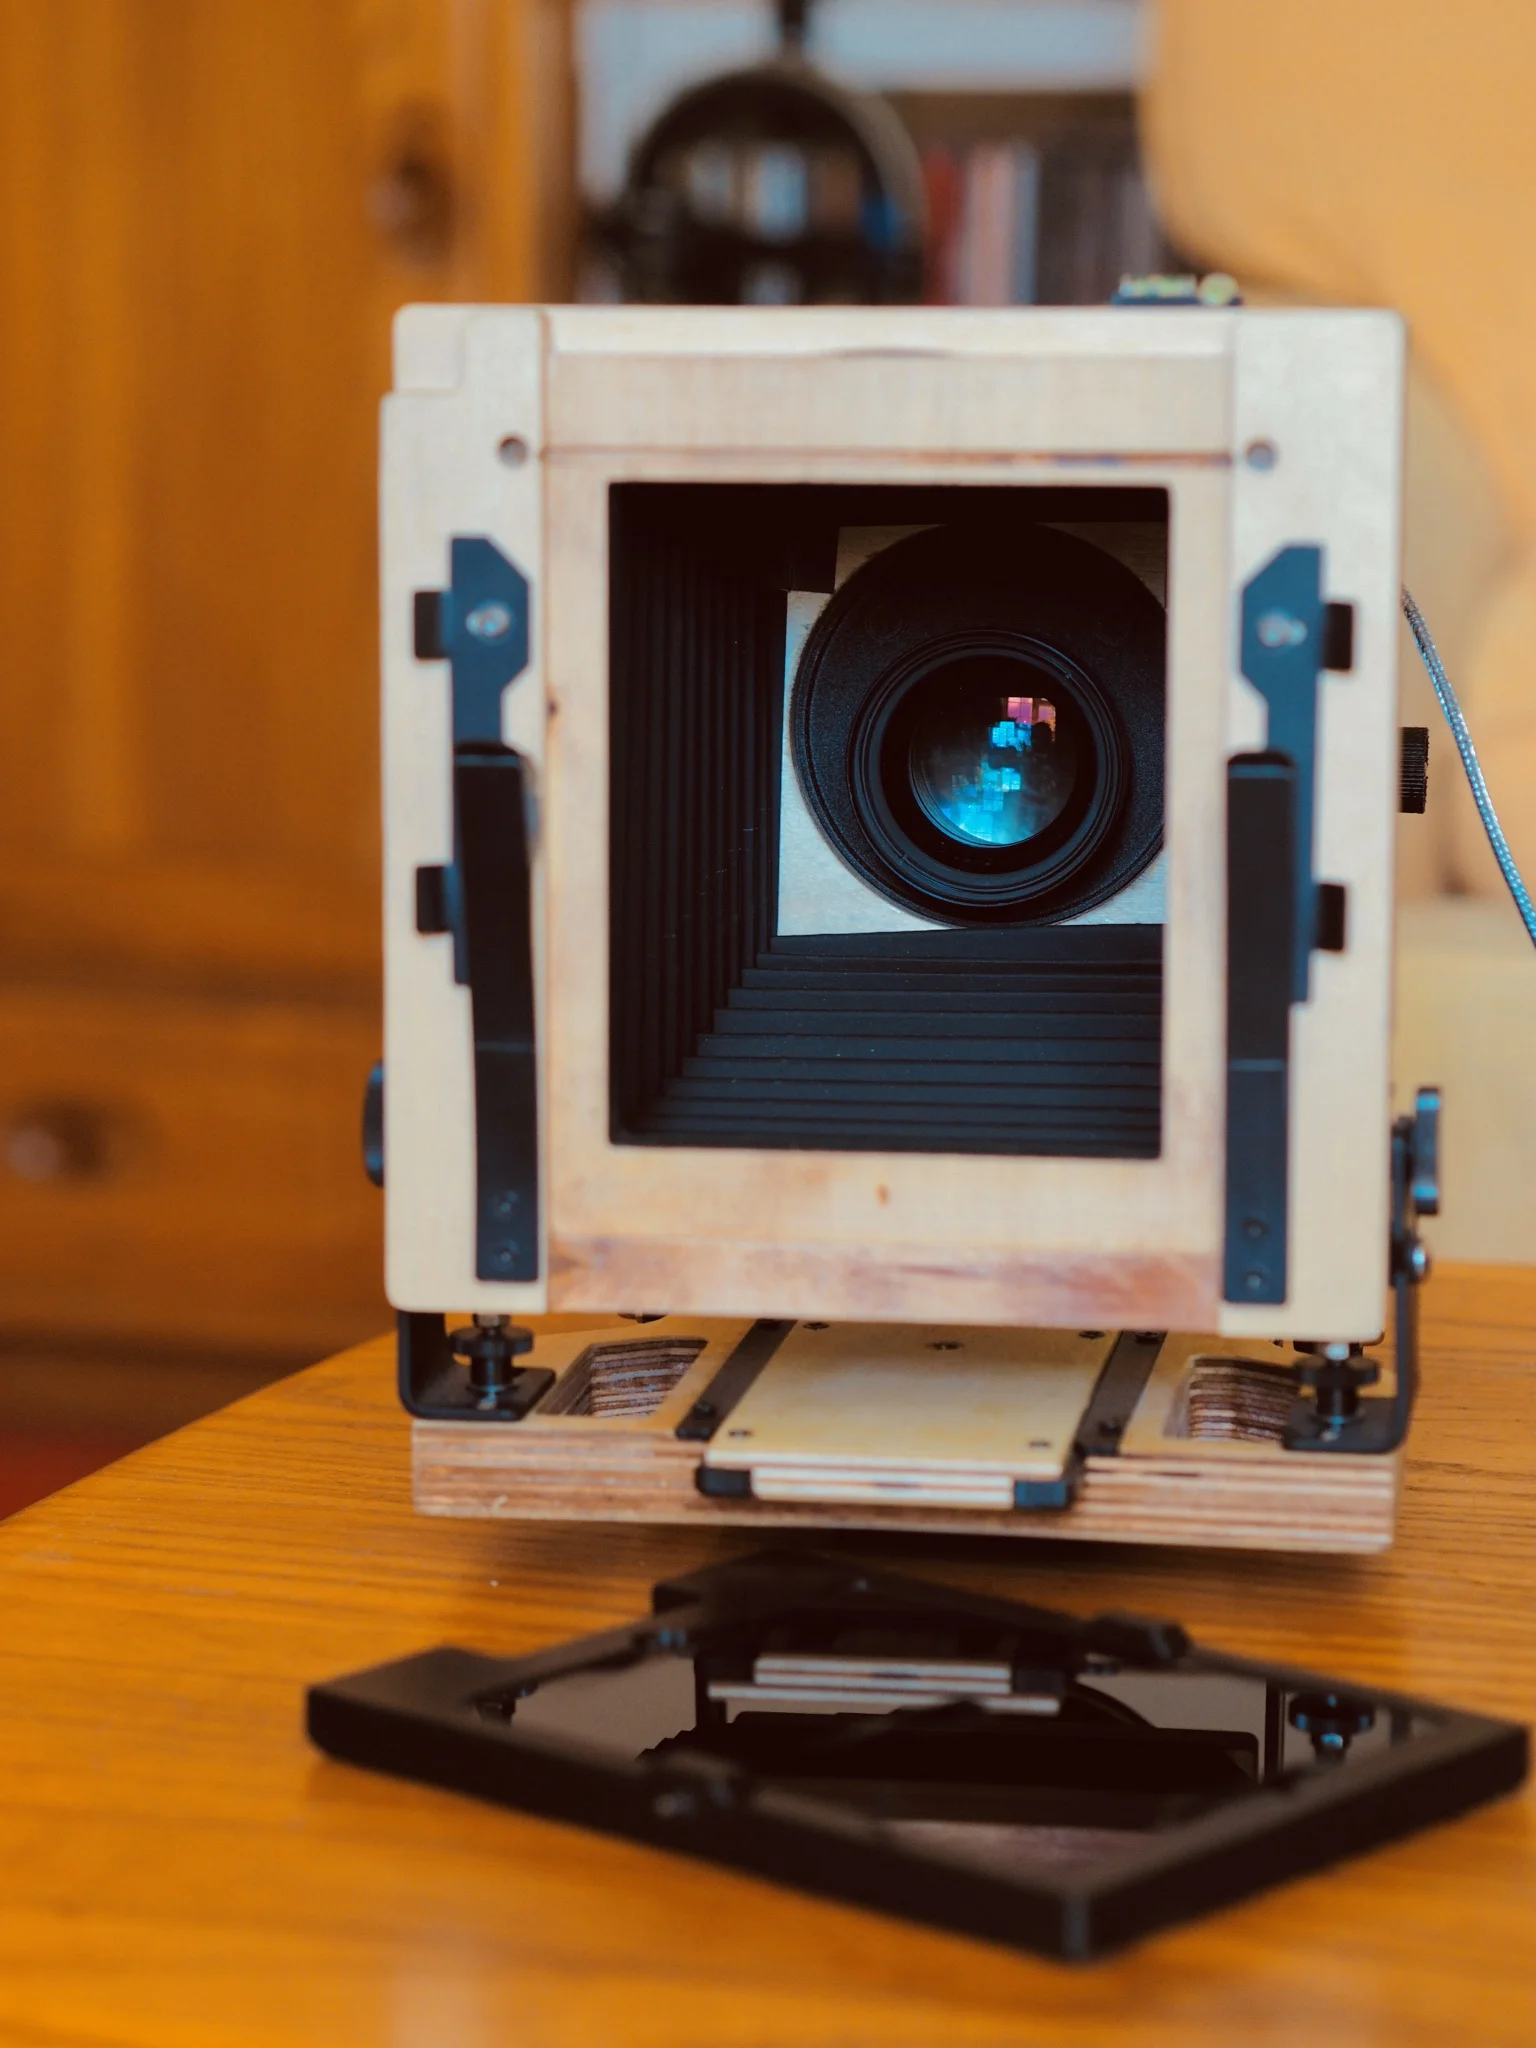
film cameras are essentially a light-proof box with a lens on one end and film at the other. the distance between the two is what causes the image projected by the lens to be in focus on the film.
nowhere is this more obvious than with large format photography. in the case of the Intrepid camera, the distance between the film and the lens is controlled by bellows and a simple rail system. the main camera body is laminated wood and there’s little else to it.
here are a couple of images of our camera, with the film holder and ground glass removed from the back so that you can see right through to the lens.


the next thing that a camera needs to do is control the amount of light that hits the film. this is controlled by the lens and shutter, and we’ll talk a bit about that later.

wet plate
the idea to embark on this insane experiment in artisanal photography came from when i was working on a module for my degree and the wonderful Adam Clark at Yeovil College decided to show us the new camera he had just purchased. it was actually the same model that we are now working with at something borrowed, from Intrepid Cameras. there’s a portrait I took of Adam in the set below.
at the moment we are working with more traditional film chemicals that you could have bought in boots the chemist a decade ago, but wet plate is an entirely different animal and we will be posting mode details and history of that process in the future.
in the meantime, here are some of the plates that we produced in our first faltering steps towards the previous millennium.


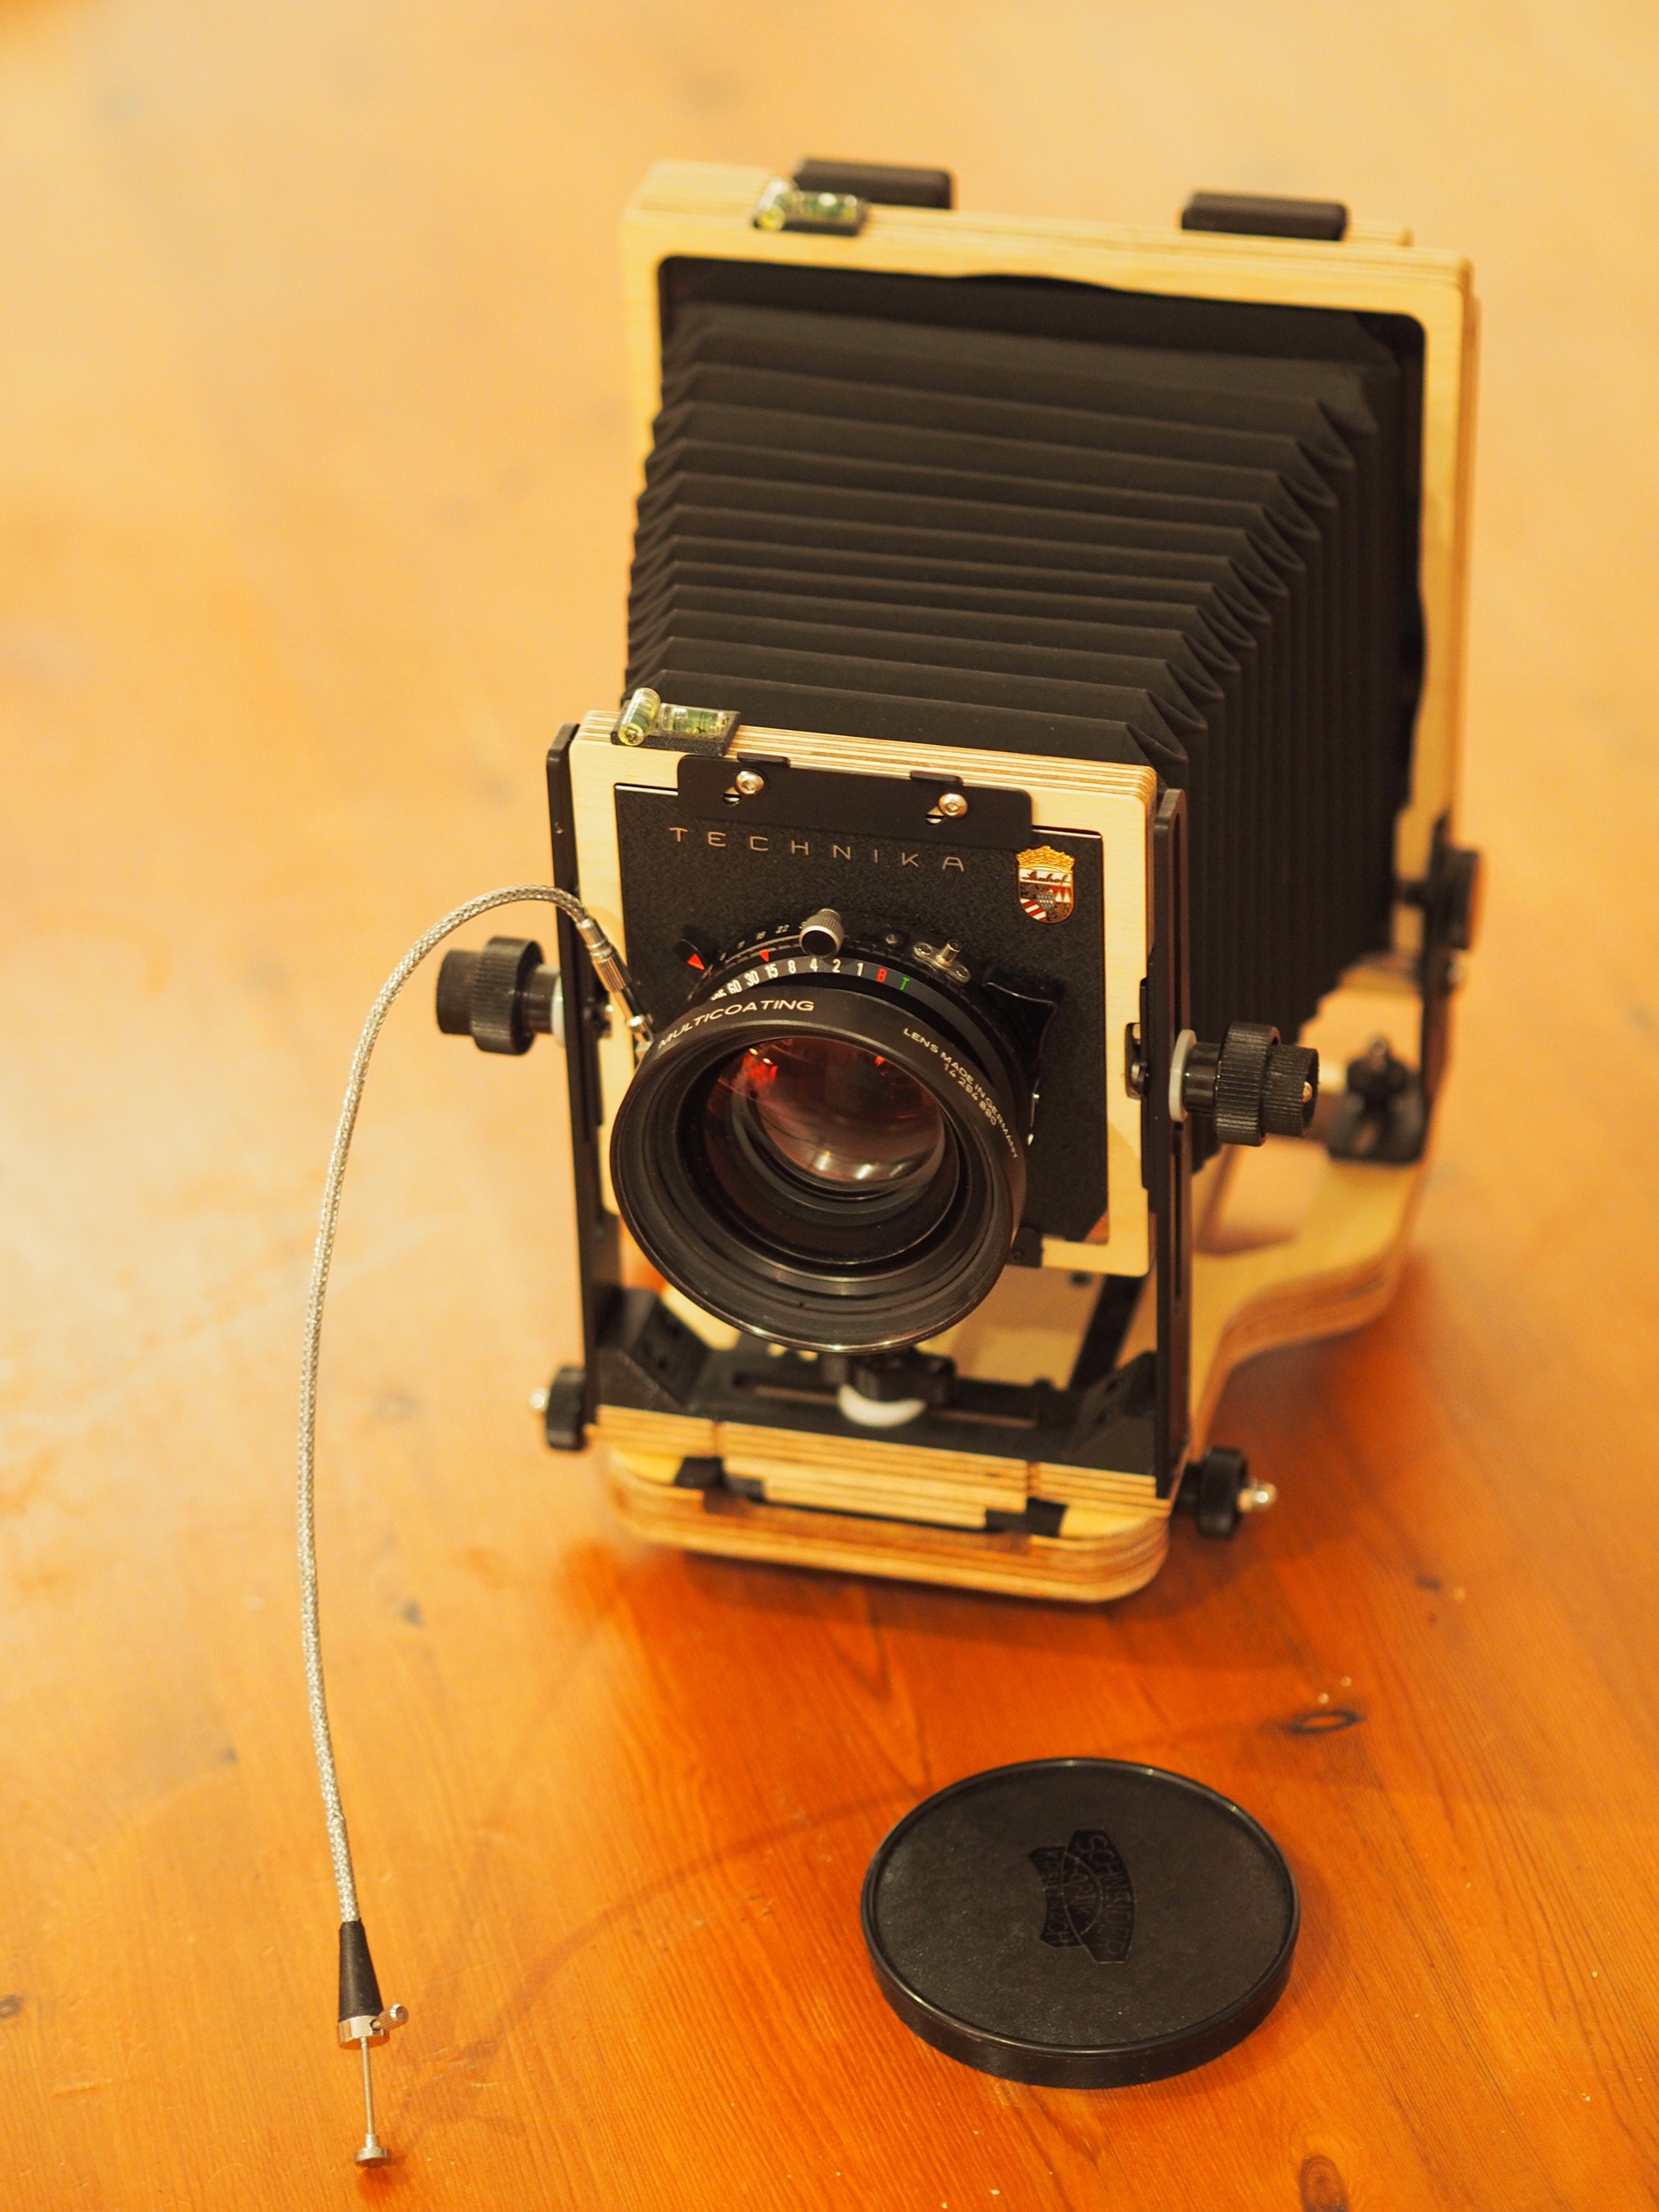
The Intrepid Camera
As we mentioned in the first post, we have purchased an Intrepid Camera and lens. Typically, mere days after we had taken delivery, Intrepid announced an updated version of the camera! Having had a good look at the new model it doesn’t offer anything we desperately need so it’s not too distressing.
The camera
The camera itself is essentially a light-proof box with a hole at one end for the lens (which must be mounted on a lens board) and a hole at the other end for the ground glass screen and (once focussed) the film plate. The bellows allows you to move the two ends so that the lens is correctly focussed. And that’s really it!
Here’s the view from the back.

When you see pictures of people using these cameras in the field, they have a black cloth over their head - the cloth isn’t actually attached to the camera (which is what I thought) but just draped over themselves to block the light from outside as the image you see above on the screen is actually very pale and hard to see in daylight. Once the picture’s focussed, you pull the glass plate out and replace it with a film plate…more on that in another post!.
a new venture
This year we have embarked on a new adventure in photography - we’re learning large format analogue!
We’ve purchased an Intrepid camera ( https://intrepidcamera.co.uk/ ) and found a lens that fits it, bought all the chemicals and tanks and built a dark room.
It’s early days and it’s going to be a steep learning curve, but we’re determined to learn this process.