
Your Custom Text Here

Instant Large Format Flower Studies
It’s that quiet time of year just after Christmas when not much is going on and the light is only around for short parts of the day. So it seemed like a good time to break out the Intrepid Large Format camera and spend some quality time with a bunch of flowers.
As you can see from the following photos , the setup was very simple with just my trusty black velvet offcut draped over a clothes horse and table in front of a bright window. The Intrepid sat on my old and very solid Manfrotto tripod and I used a blanket to cover my head (as my velvet offcut was in use for the background!). And yes, you do need to hide under a cloth to focus the image on the rear ground glass of the camera - the picture is faint and barely visble in sunlight. The third image shows the view you get on the back of the camera - it’s inverted and upside down - you can imagine how hard that makes it to compose your image.
The following three images are some of the Instax Wide instant film images I took with the Intrepid and the LomoGraflok instant back. I hope that you can see that the pictures have a slightly dreamy quality and although the instant film can’t catch anywhere near the sharpness you can get from the camera with transparent film, the pictures have something about them that makes the process worthwhile. Also, they’re a unique ‘thing’ you can hold and look at within a few minutes of taking the picture, which is something special in the days of digital!
The final three images are digital photos taken in the same session, which I’ve processed in Lightroom. Whether these are ‘better’ or just differnet is really up to the viewer!


Instant Large Format Photography
What seems a very long time ago, I spotted a curious little thing that Lomo were offering that would fit on the back of our Intrepid Large Format Camera: a Polaroid style back for instant film!
I thought it might be fun to be able to get instant results from photoshoots, so joined the kickstarter and waited.
Then the pandemic hit, so I waited some more!
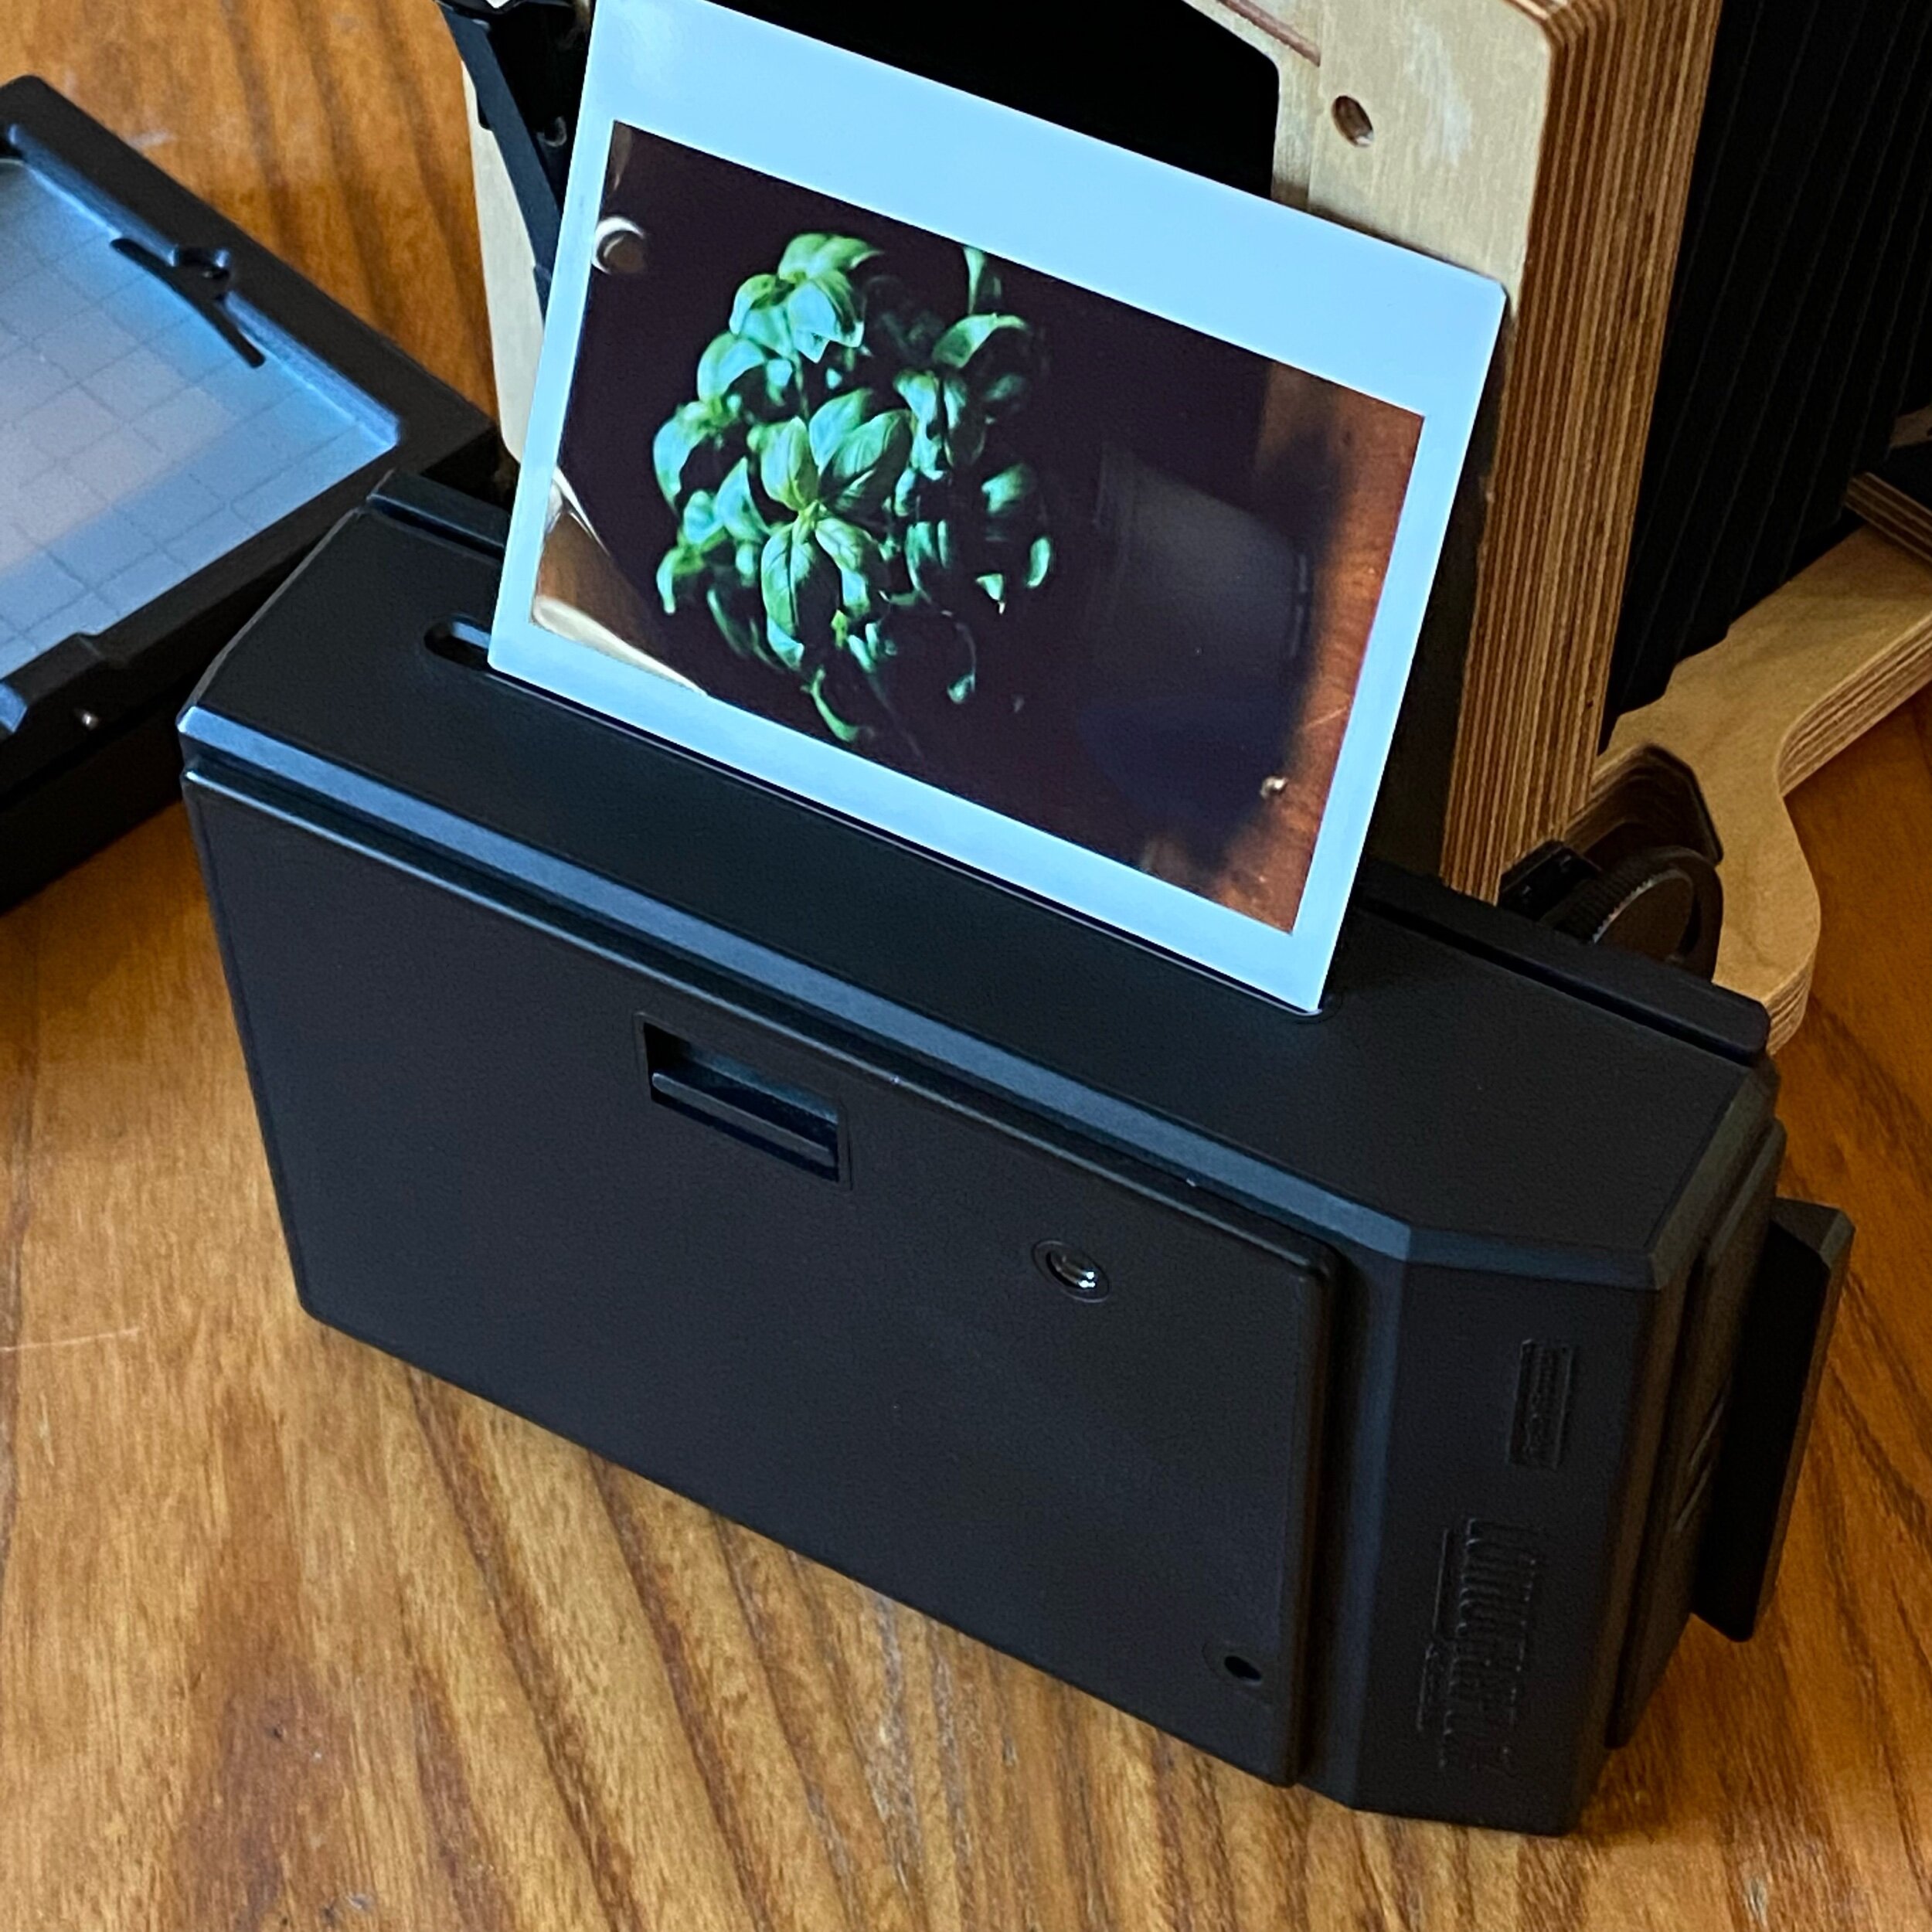
Finally, just recently we received a package containing a nondescript black plastic box, shown here attached to the camera:

The process of taking a photo is even more of a faff than the film process we’ve documented previously on this blog! Once you have the camera set up and focussed, you place the back on the camera and then take the photo.
You then have to remove the back (I think this is an Intrepid thing - if you leave it on the back, the clip you can see in the picture scratches the photo as it ejects) and press the button to eject the photo:
We tried this out on a recent maternity shoot and it’s great fun and helped get us all in to the right mood for the digital shots. It’s really lovely to all gather round and watch the picture appear as if by magic.
The pictures you get from this system can be very charming, but they are nowhere near the quality you can get from film in this camera or from our Fuji digital kit, but they are a unique instant memento and have a very different look to them. We’ll definitely be using it lots in the future.
Scanning Large Format Negatives

A new scan of one of our earlier shoots
A big part of creating analogue images is producing a final usable result.
When working with large format, this is further complicated because the equipment for mechanically enlarging the negatives is harder to find, more expensive, and harder to accommodate.
We’ve been looking into doing contact prints, which would give us a physical copy made entirely using the old methods, but this would be limited to prints of 4x5 inch size.
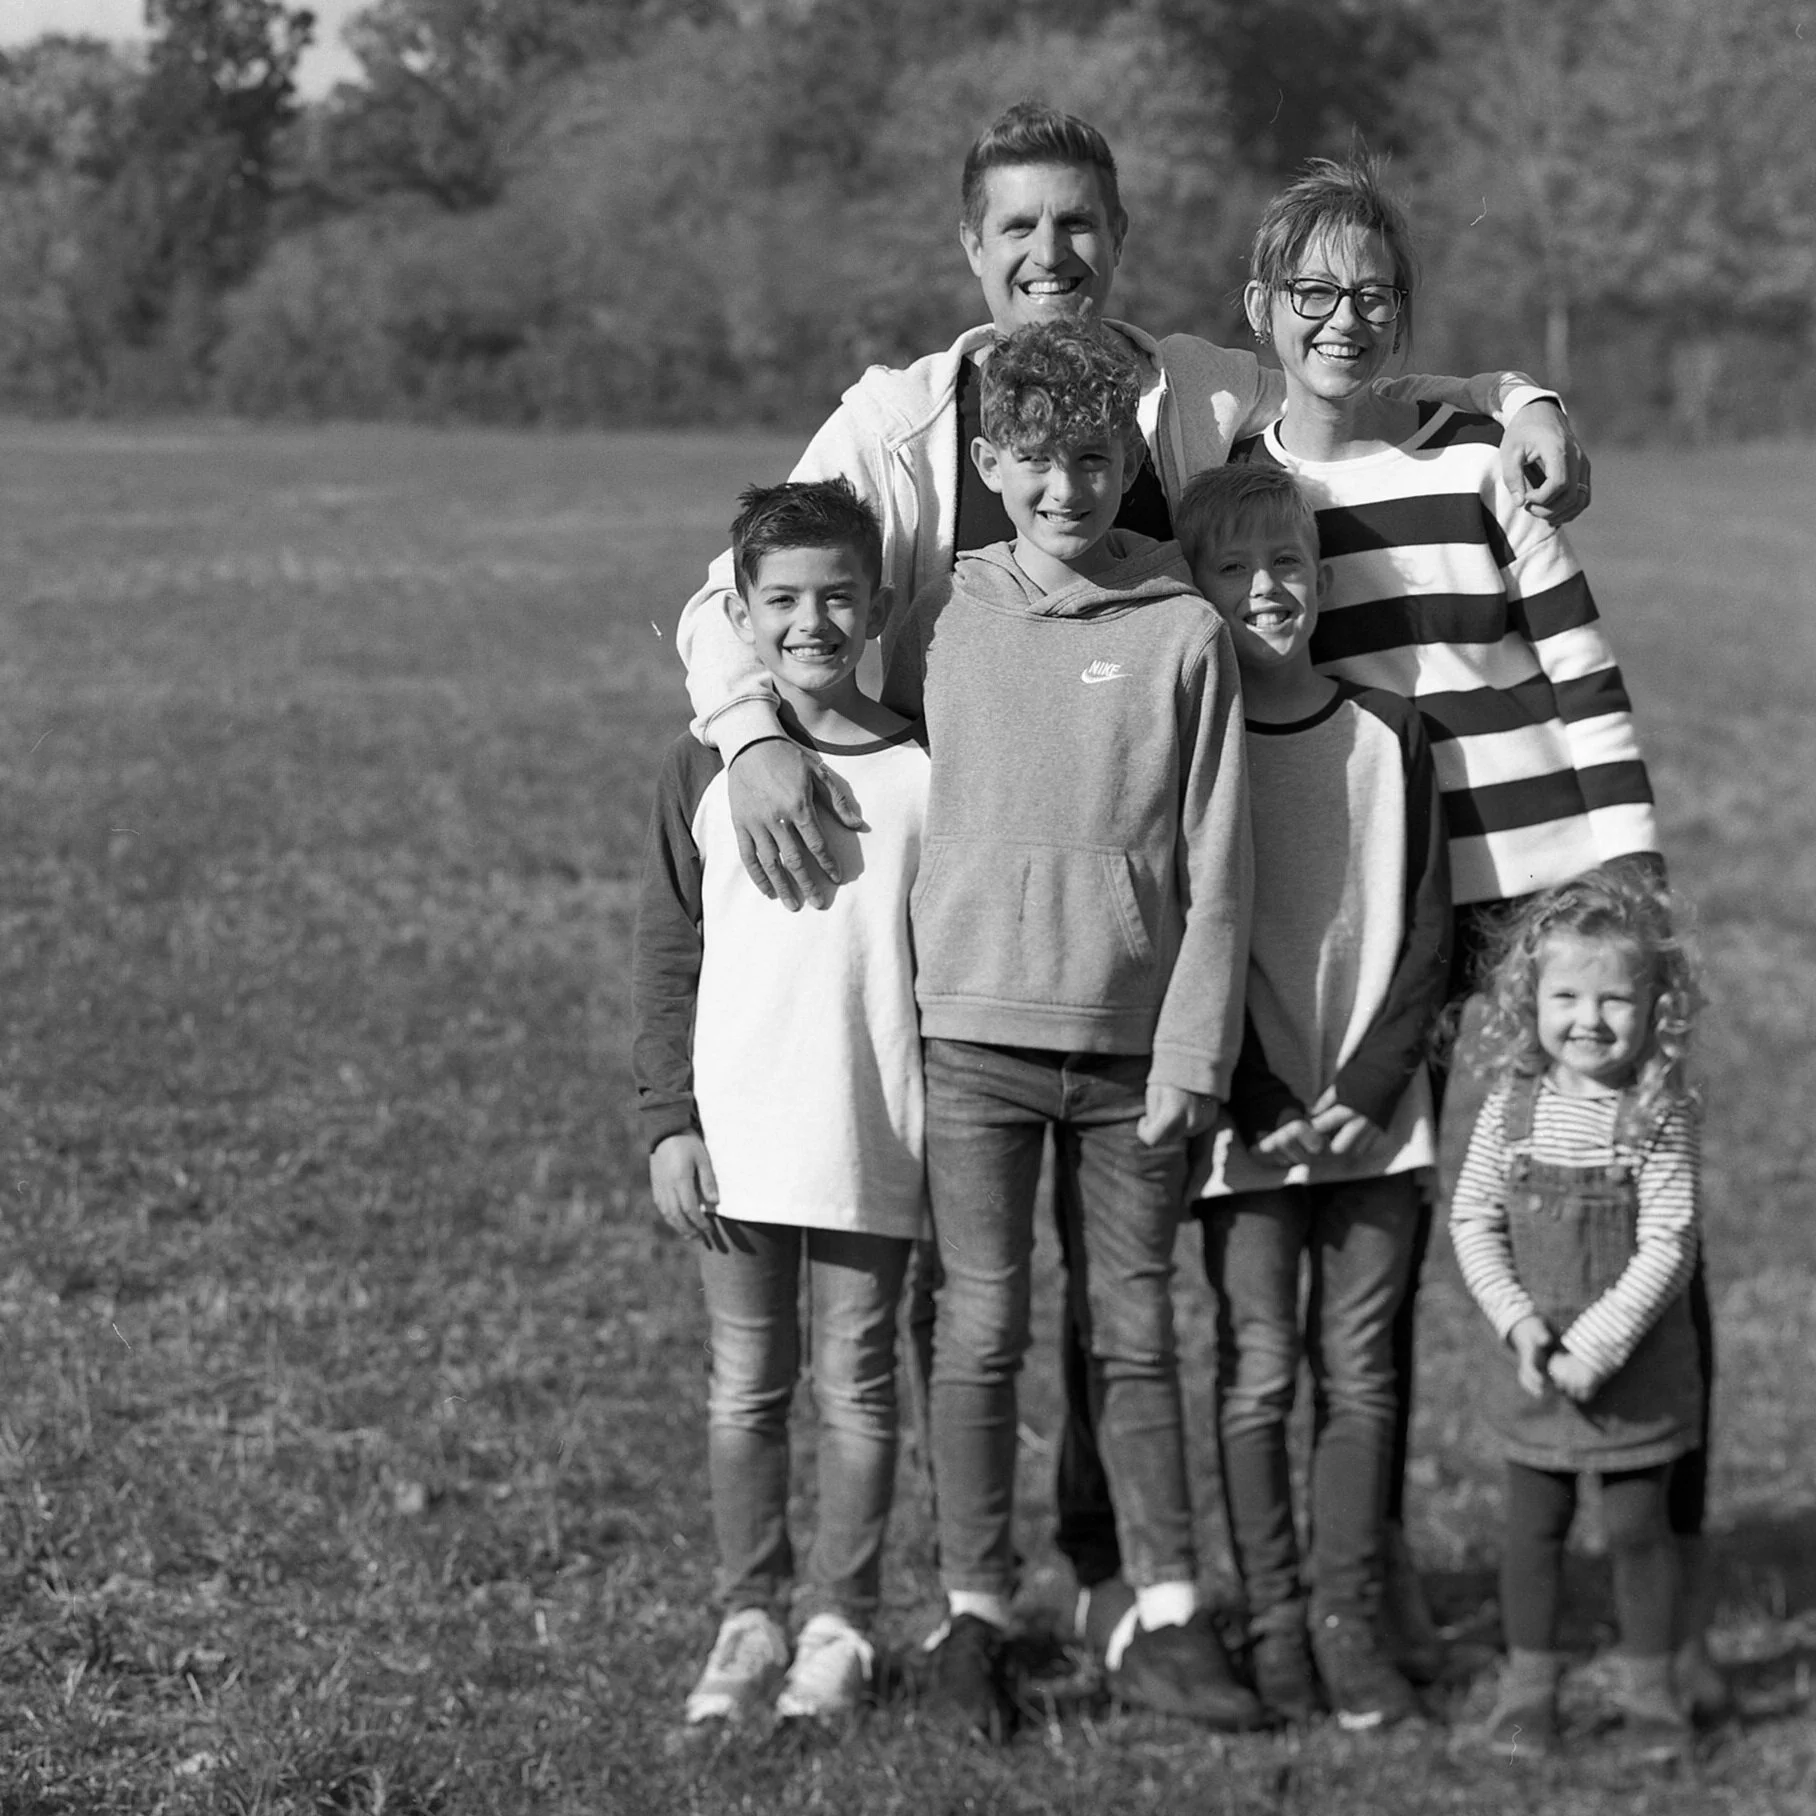
So, we also need to scan the negatives so that we can print them digitally. Our first attempts at this process involved using a flat-bed scanner and then reversing them in software to produce a positive image.
We thought the results were passable, but blamed our analogue process for the quality of the results:

Initial attempts at scanning were less than perfect!
Although this method captured the essence of the old process, it really doesn’t reflect the quality that is possible from a large format camera.
So…we kept looking.
Our scanner can scan 35mm negatives as well as medium format, but there’s no option for large format…but photoshop can stitch images together, so we thought we’d try that.
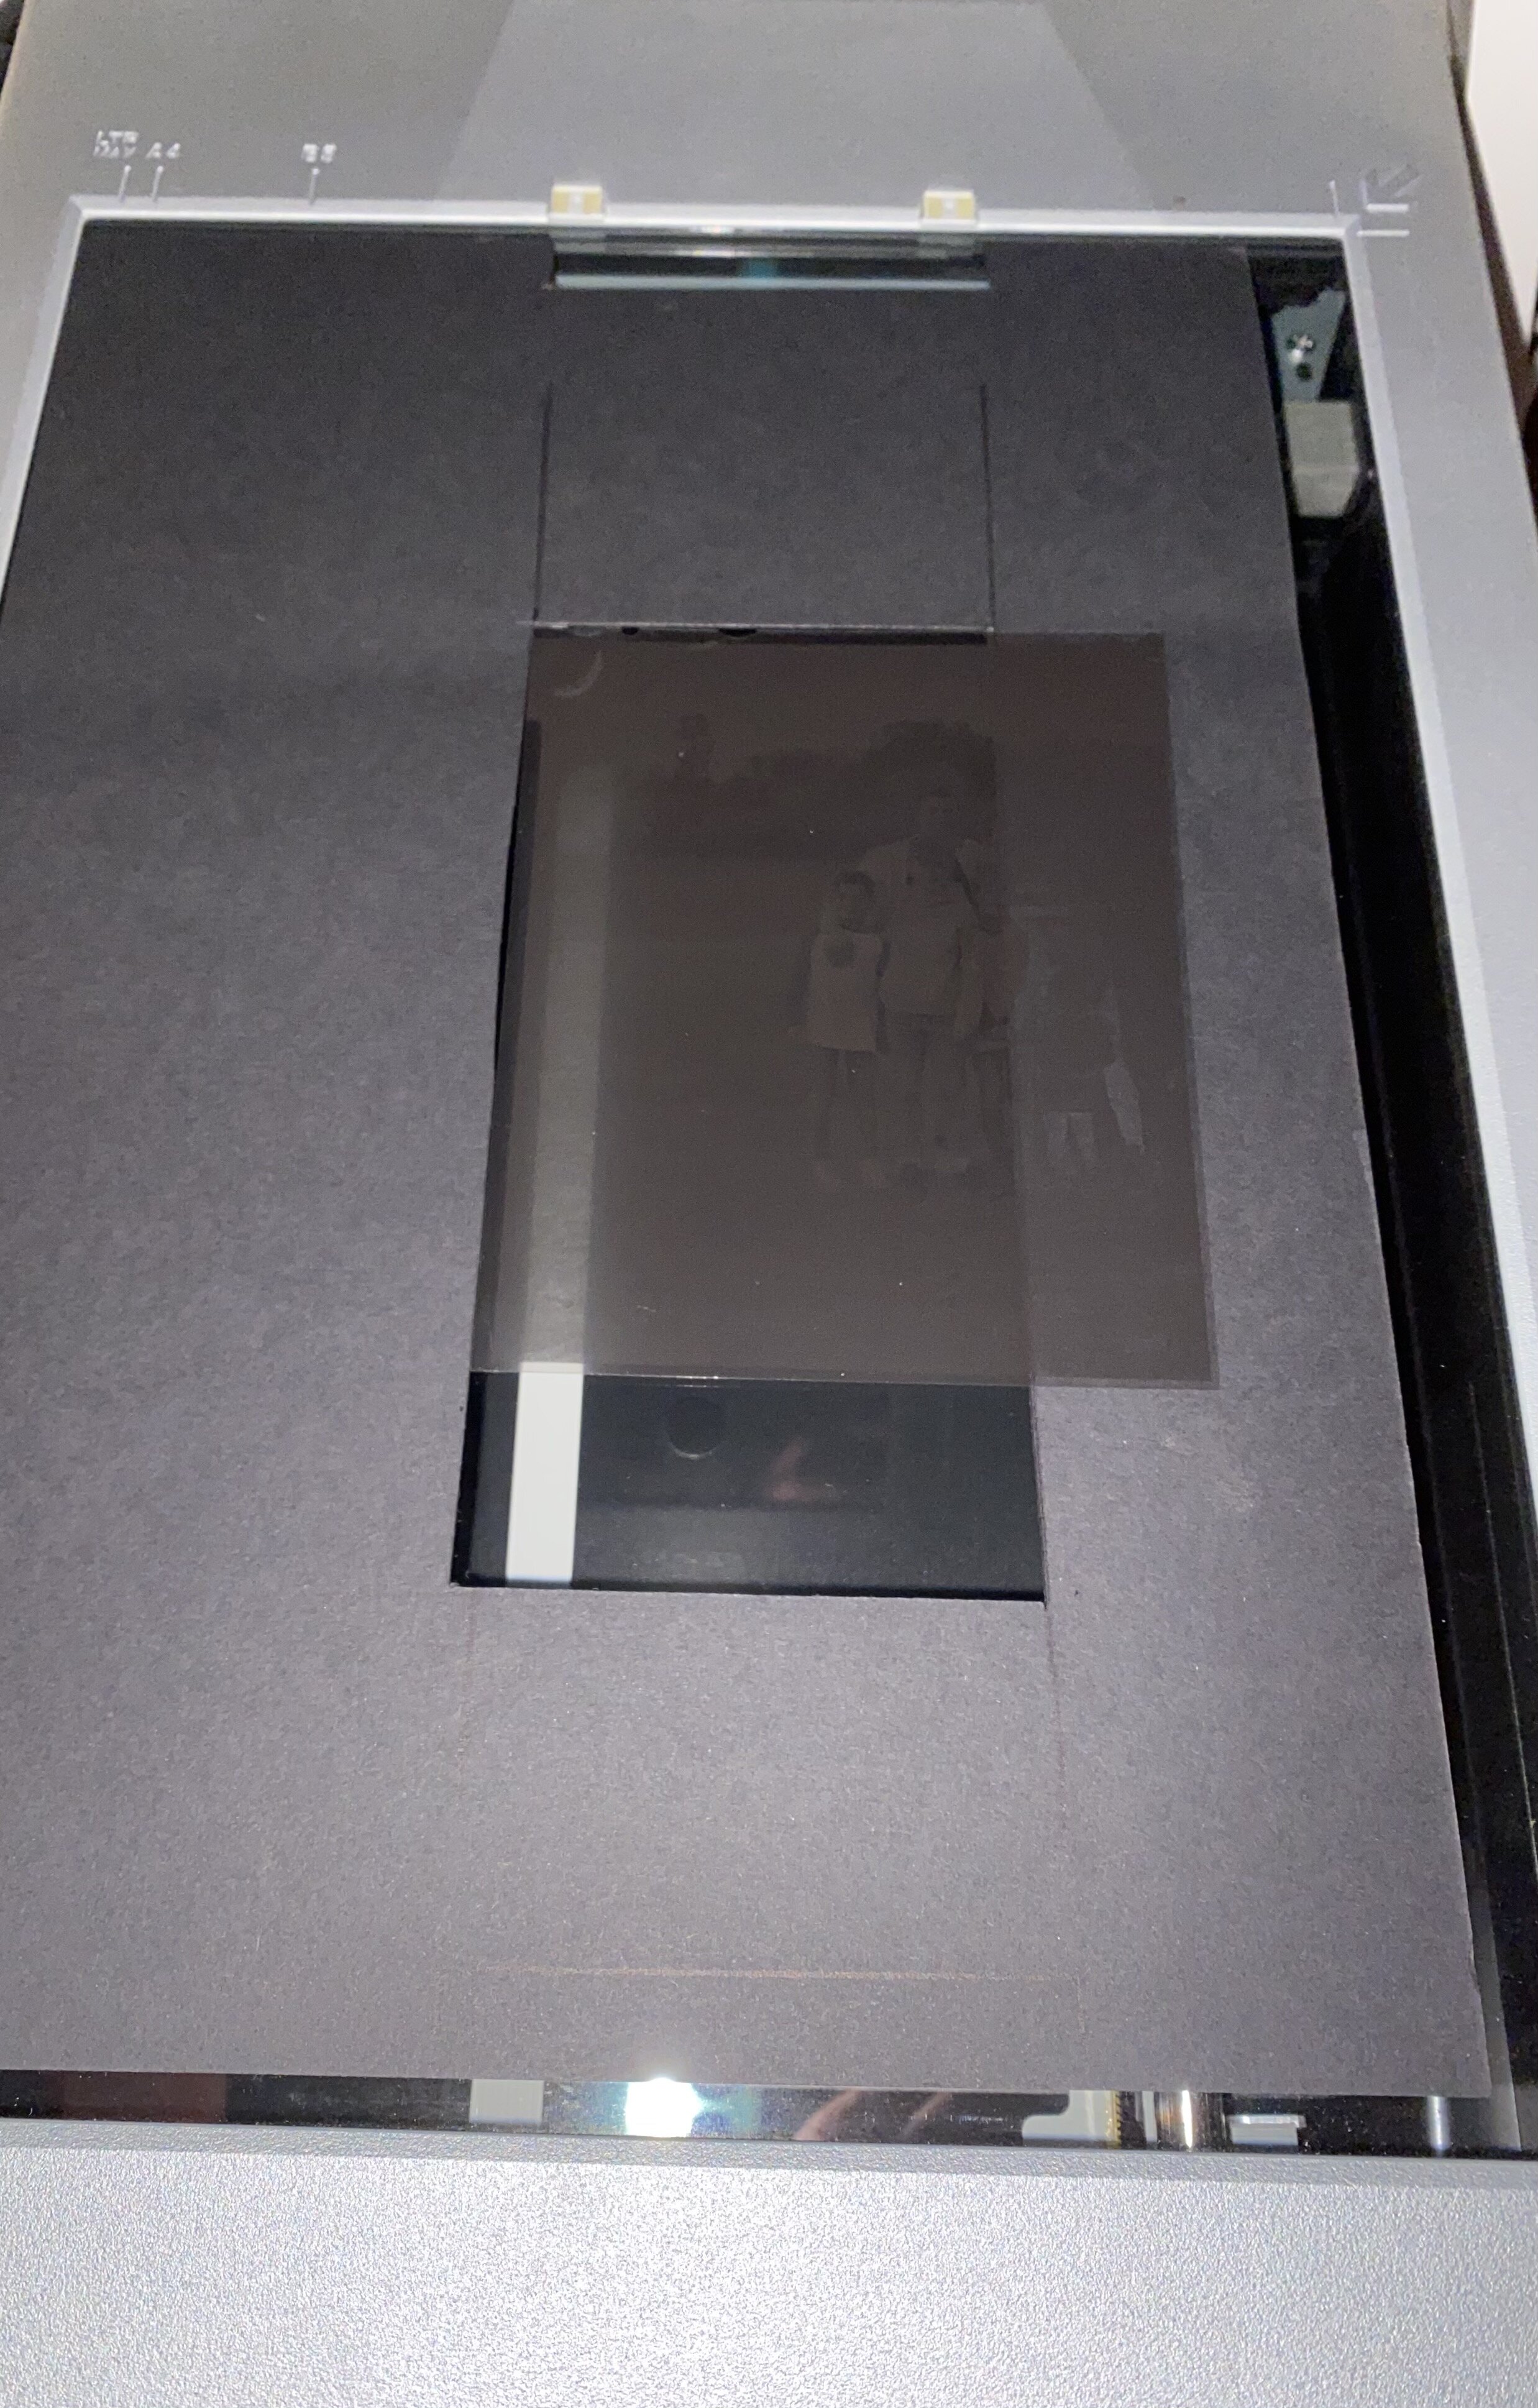
The mask is just a big piece of black card, roughly cut to shape
And it works!
I had to make a mask to put on the glass of the scanner, and we have to move the negative twice for each scan then feed the two images into photoshop.
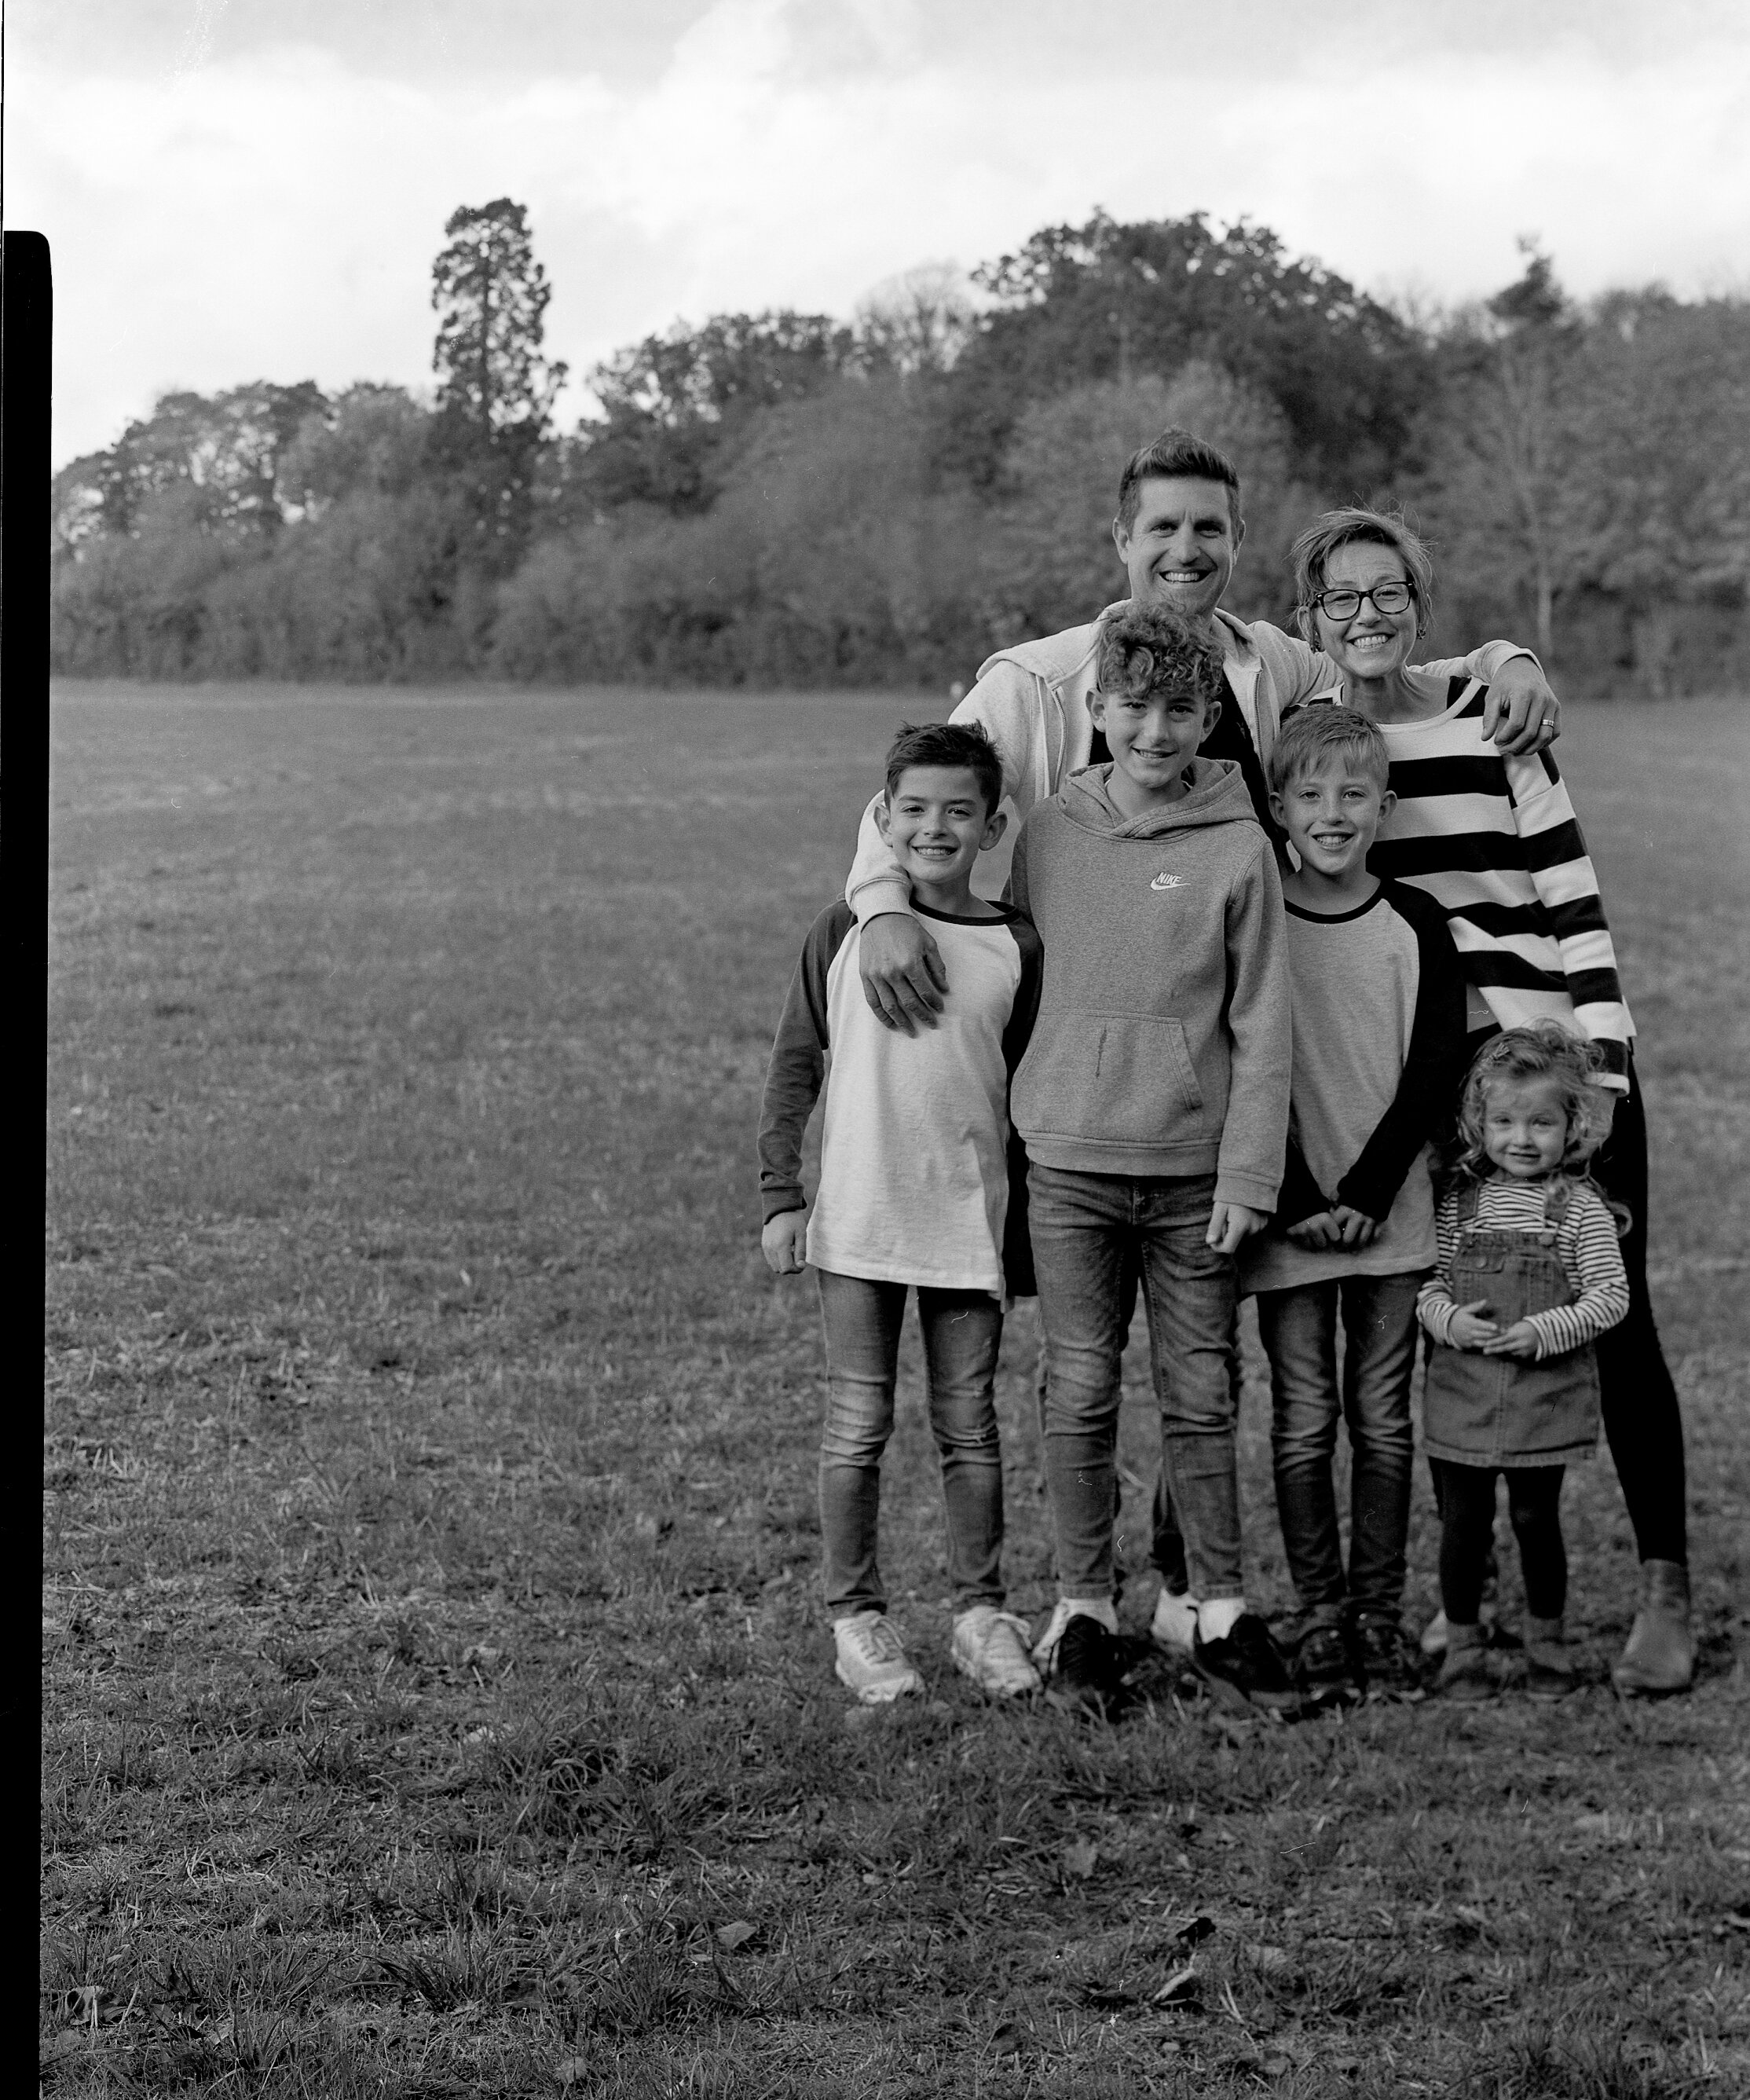
The results are night and day between the two methods (the new scans are shown after the old ones):


Large Format Photography
Lockdown has given us some time to perfect our large format photography process - we were able to shoot a few during our most recent wedding, and we’ve shot some portraiture at home using each other as subjects.

Woz, shot by Em.
We’re using the Intrepid 4x5 as shown in previous posts and using sheet film, in this case Ilford HP5.

The film has changed what we can photograph. Previously working with paper negatives meant we needed so much light, and such long exposures that the process wasn’t really practical, especially in winter.
The film allows us to even take pictures indoors with windowlight.
Pictured with the film is the processing system we’re using - an SP-445 from stearmanpress.com
This is what’s enabled us to shoot film - as film is far more sensitive to light, it’s much harder to process in a darkened room as even a tiny amount would fog the image.
This is what it looks like with the lid off:

It’s essentially a light proof bottle that allows you to pour and mix the chemicals in daylight, meaning that you don’t need a darkroom to process the negatives.
That said, it’s still a long process, needing a sink and lots of different bottles. Calling it a processing system makes it sound a lot more automatic than it is!

Woz, shot by Em.
This and the above portrait were both shot in window light, with a single reflector being used to create some fill. Without this, one side of my face would be in very dark shadow. The reflector was hung from a light fitting in the kitchen! Not exactly a studio, but it does show that we could do this anywhere where there’s enough light.
Even in my little cottage with small windows, the exposure times aren’t too bad - these were at 1/15s, which means we won’t be shooting any indoor sports or even vague movement!
I’ll write in another post about the trials and tribulations of actually using large format in a wedding situation, which offers many more challenges!
Intrepid Camera family shoot
We had a family shoot towards the end of October and as we were preparing to finish we asked if they would be happy to pose long enough for us to try out our Intrepid large format camera. They were very keen! When the camera emerged from the car they were all extremely curious and wanted to get under the dark cloth and have a look at the screen to see what we saw.
The image you get on the back, as you’re focussing the camera, is upside down and reversed, which makes framing the image quite interesting!
When you add that you can’t just ‘click a button’ and get a picture, the whole thing becomes much more of an event than using a digital camera.
Here’s the rough process, to give you an idea of the time it all takes:
Arrange everyone in the frame. There’s no zoom and everything is cumbersome and on a tripod, so this involves moving people and camera around a lot…which you’ll see we didn’t quite get right!
Get under the dark cloth and focus the image.
Get a meter reading (we cheated and used one of our Fuji cameras)
Set the Aperture and shutter speed.
Realise people have moved, so refocus the image.
Notice a cloud has covered the sun, so take another meter reading and change the settings!
Manually cock the shutter - this is priming a spring that will open and close the shutter for a set time when you eventually get to press it!
Close the shutter - you have to do this manually and if you forget you will expose the film when you remove the dark slide at step 10 and get no picture.
Insert the film holder (you can’t do this before as it goes in front of the focussing screen and blocks your view).
Remove the dark slide.
Get everyone to smile…while noticing the cloud has moved so the light has changed!
Press the shutter button.
Replace the dark slide.
Remove the film holder.
This process happens for each shot, and takes a while! Weirdly though, it’s such a performance that the family posed really well and it’s about the only time we got them all to hold still and smile at the same time!
Of course, we had no idea if we’d managed to actually capture anything on our 4 shots, so off we went to process the film.
Result!

Of the four shots, we got one dud, which we think was because the shutter was cocked but not closed, and two that are a bit too contrasty because the light changed before we took the picture.
Overall though, we’re happy with the results on this first trial. Next time, we’ll definitely spend more time posing and hopefully less time in the process of taking the image!


David Bailey, David Hurn & Martin Parr
“It takes a lot of imagination to be a good photographer. You need less imagination to be a painter because you can invent things. But in photography everything is so ordinary; it takes a lot of looking before you learn to see the extraordinary.”
David Bailey
As massive fans of photography, we love to visit The Martin Parr Foundation at Bristol Paintworks. Being regulars, we sometimes get to hear about events before they get a chance to sell out, and one such time was when the one and only David Bailey was booked to give a talk alongside David Hurn and Parr himself.
If you are into photography whether it’s a hobby of yours or you photograph as a profession, there is no way that the name David Bailey has escaped you. Bailey along with Terence Donovan and Brian Duffy captured and assisted in creating the 'Swinging London’ of the 1960s with a culture of fashion and celebrity chic. The three photographers socialised with actors, musicians and royalty, and found themselves elevated to celebrity status.
I’ll be honest with you I wasn’t entirely sure what to make of Bailey initially as his whole demeanour gives a grumpy disposition but as soon as he started talking he had a very dry wit, was incredibly entertaining and funny. He doesn’t hold back and says how it is (I admire that!) and sure has a tale to tell having spent sixty years as a photographer!
You know when you really admire someone and you try to act ‘cool’ and ‘normal’ when you’re around them?! well that was me when I took his photo using my Olympus OM-n1 camera. Now obviously using a 40 year old film camera is always a bit risky when it comes to taking photos but as you can see it still works a treat! Bailey was very gracious in having his photograph taken and was very patient in signing all my books!
David Bailey (taken on Olympus OM-1n 35mm)
“The most important piece of equipment after the camera is a good pair of shoes”
David Hurn
David Hurn is a self-taught photographer who began his career in 1955 working as an assistant at the Reflex Photo Agency. He has a longstanding international reputation as one of Britain’s most influential reportage photographers and gained his reputation as a photojournalist for his documentation of the Hungarian revolution in 1956. Hurn eventually turned away from coverage of current affairs preferring to take a more personal approach to photography and became an associate member of Magnum in 1965 and a full member in 1967. He is a big supporter of the Martin Parr Foundation and we’ve had the pleasure to meet him on a few occasions when we’ve been visiting the Paintworks for talks.

David Hurn (taken on Olympus OM-1n 35mm)
“I am what I photograph”
Martin Parr
Martin Parr is a British documentary photographer and photojournalist who has a very distinctive and garish style, consisting of busy frames and often bold colours, which are down to the film stock and digital processes he uses. Recently he has been using amateur film such as Fuji 400 Superior, and Agfa Ultra or Fuji 100 asa film for the ring flash and macro lens. The combination with the flash gives a high colour saturation therefore no photoshop required. His photographs offer the public an opportunity to see the world from his unique perspective.
Parr has been researching leisure, consumption and communication on his worldwide travels over several decades. He enables us to see things that seem familiar to us in a completely new way and creates his own image of society. He presents and publishes the same photographs in the context of art photography, in exhibitions and in art books. Parr is now a member of Magnum and his instantly recognisable style has gathered him many admirers.

Martin Parr (taken on Olympus OM-1n 35mm)

David Hurn, David Bailey & Martin Parr

medium format photography
by em
The following is an extract from one of my photography projects. The theme was titled ‘Obsession’ and for this I chose to focus on the use of mobile phones.
During my course I have been lucky enough to borrow the college’s Yashica Mat 24 Medium format twin lens reflex camera. I have wanted to experiment with medium format since starting this course and this particular project presented the perfect opportunity.
I have carried it with me to a number of locations on my travels, which is no small feat as it’s quite heavy! I suspect that medium format might be my ideal format – I love processing film and the slowed down process of analogue photography, and medium format gives me the huge high quality SQUARE negative. There’s everything to like about it. And 120 roll film only has 12 square shots to a roll, so I don’t spend ages trying to fill a roll for development.
This first picture is from a trip to Bristol. The other great thing about a TLR is that you don’t look at your subject directly, but stare down in the direction of your feet, which makes you much less intimidating. Even if people do notice you, they are fascinated rather than threatened. This has let me be a little more direct with photos, as this picture shows:
Bristol Pret. F/3.5 60ms
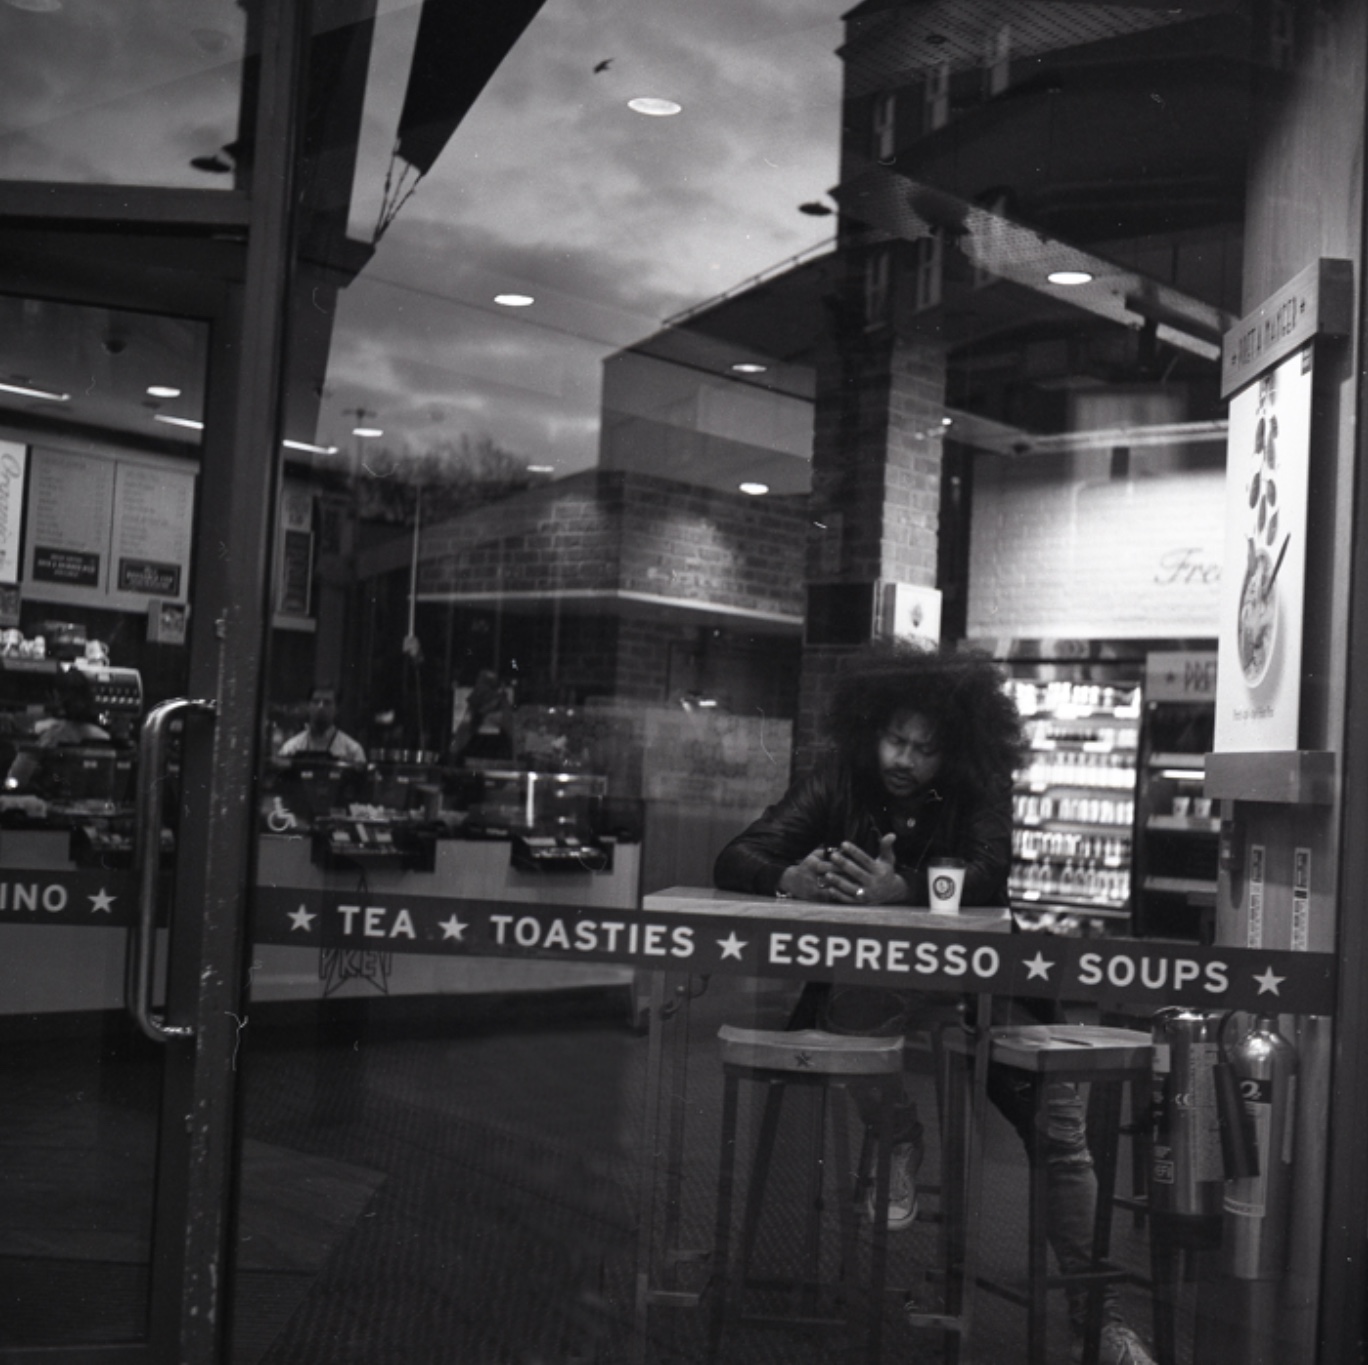
This picture has had some post processing as there was an unsightly bollard in the foreground. I know this goes against the grain for true street photography, but this is my blog and I want to make it pretty!
I was fortunate enough to have the opportunity to use the TLR in a studio situation. The college has an excellent studio and Adam was kind enough to lend me one of the college’s Speedlites and help me to set it up.
I am extremely excited to present these images of Len, who was kind enough to pose for me. These are the first medium format studio portraits I have ever taken and from a roll of 12 pictures I have managed to get 4 good quality street photos and 4 studio portraits. I love this camera!
Len. F/4 125ms

This is one of 4 shots I took of Len. I used a light meter on Len’s cheek to measure the ambient light for both of the included studio shots. The flash unfortunately failed to fire on two, and I only have the light from the screen of his phone, so they are unusable, but it’s all a learning process.
I love the eye contact in this picture. On one of the failed images I had removed his lanyard, which made the image slightly more timeless, but given the context and the mobile phone, I don’t think this is too much of a problem. I have cleaned up some dust from the image in Lightroom. I need to remember that this size of negative appears to be very good at collection detritus from the darkroom!
Len’s Phone. F/5.6 125ms
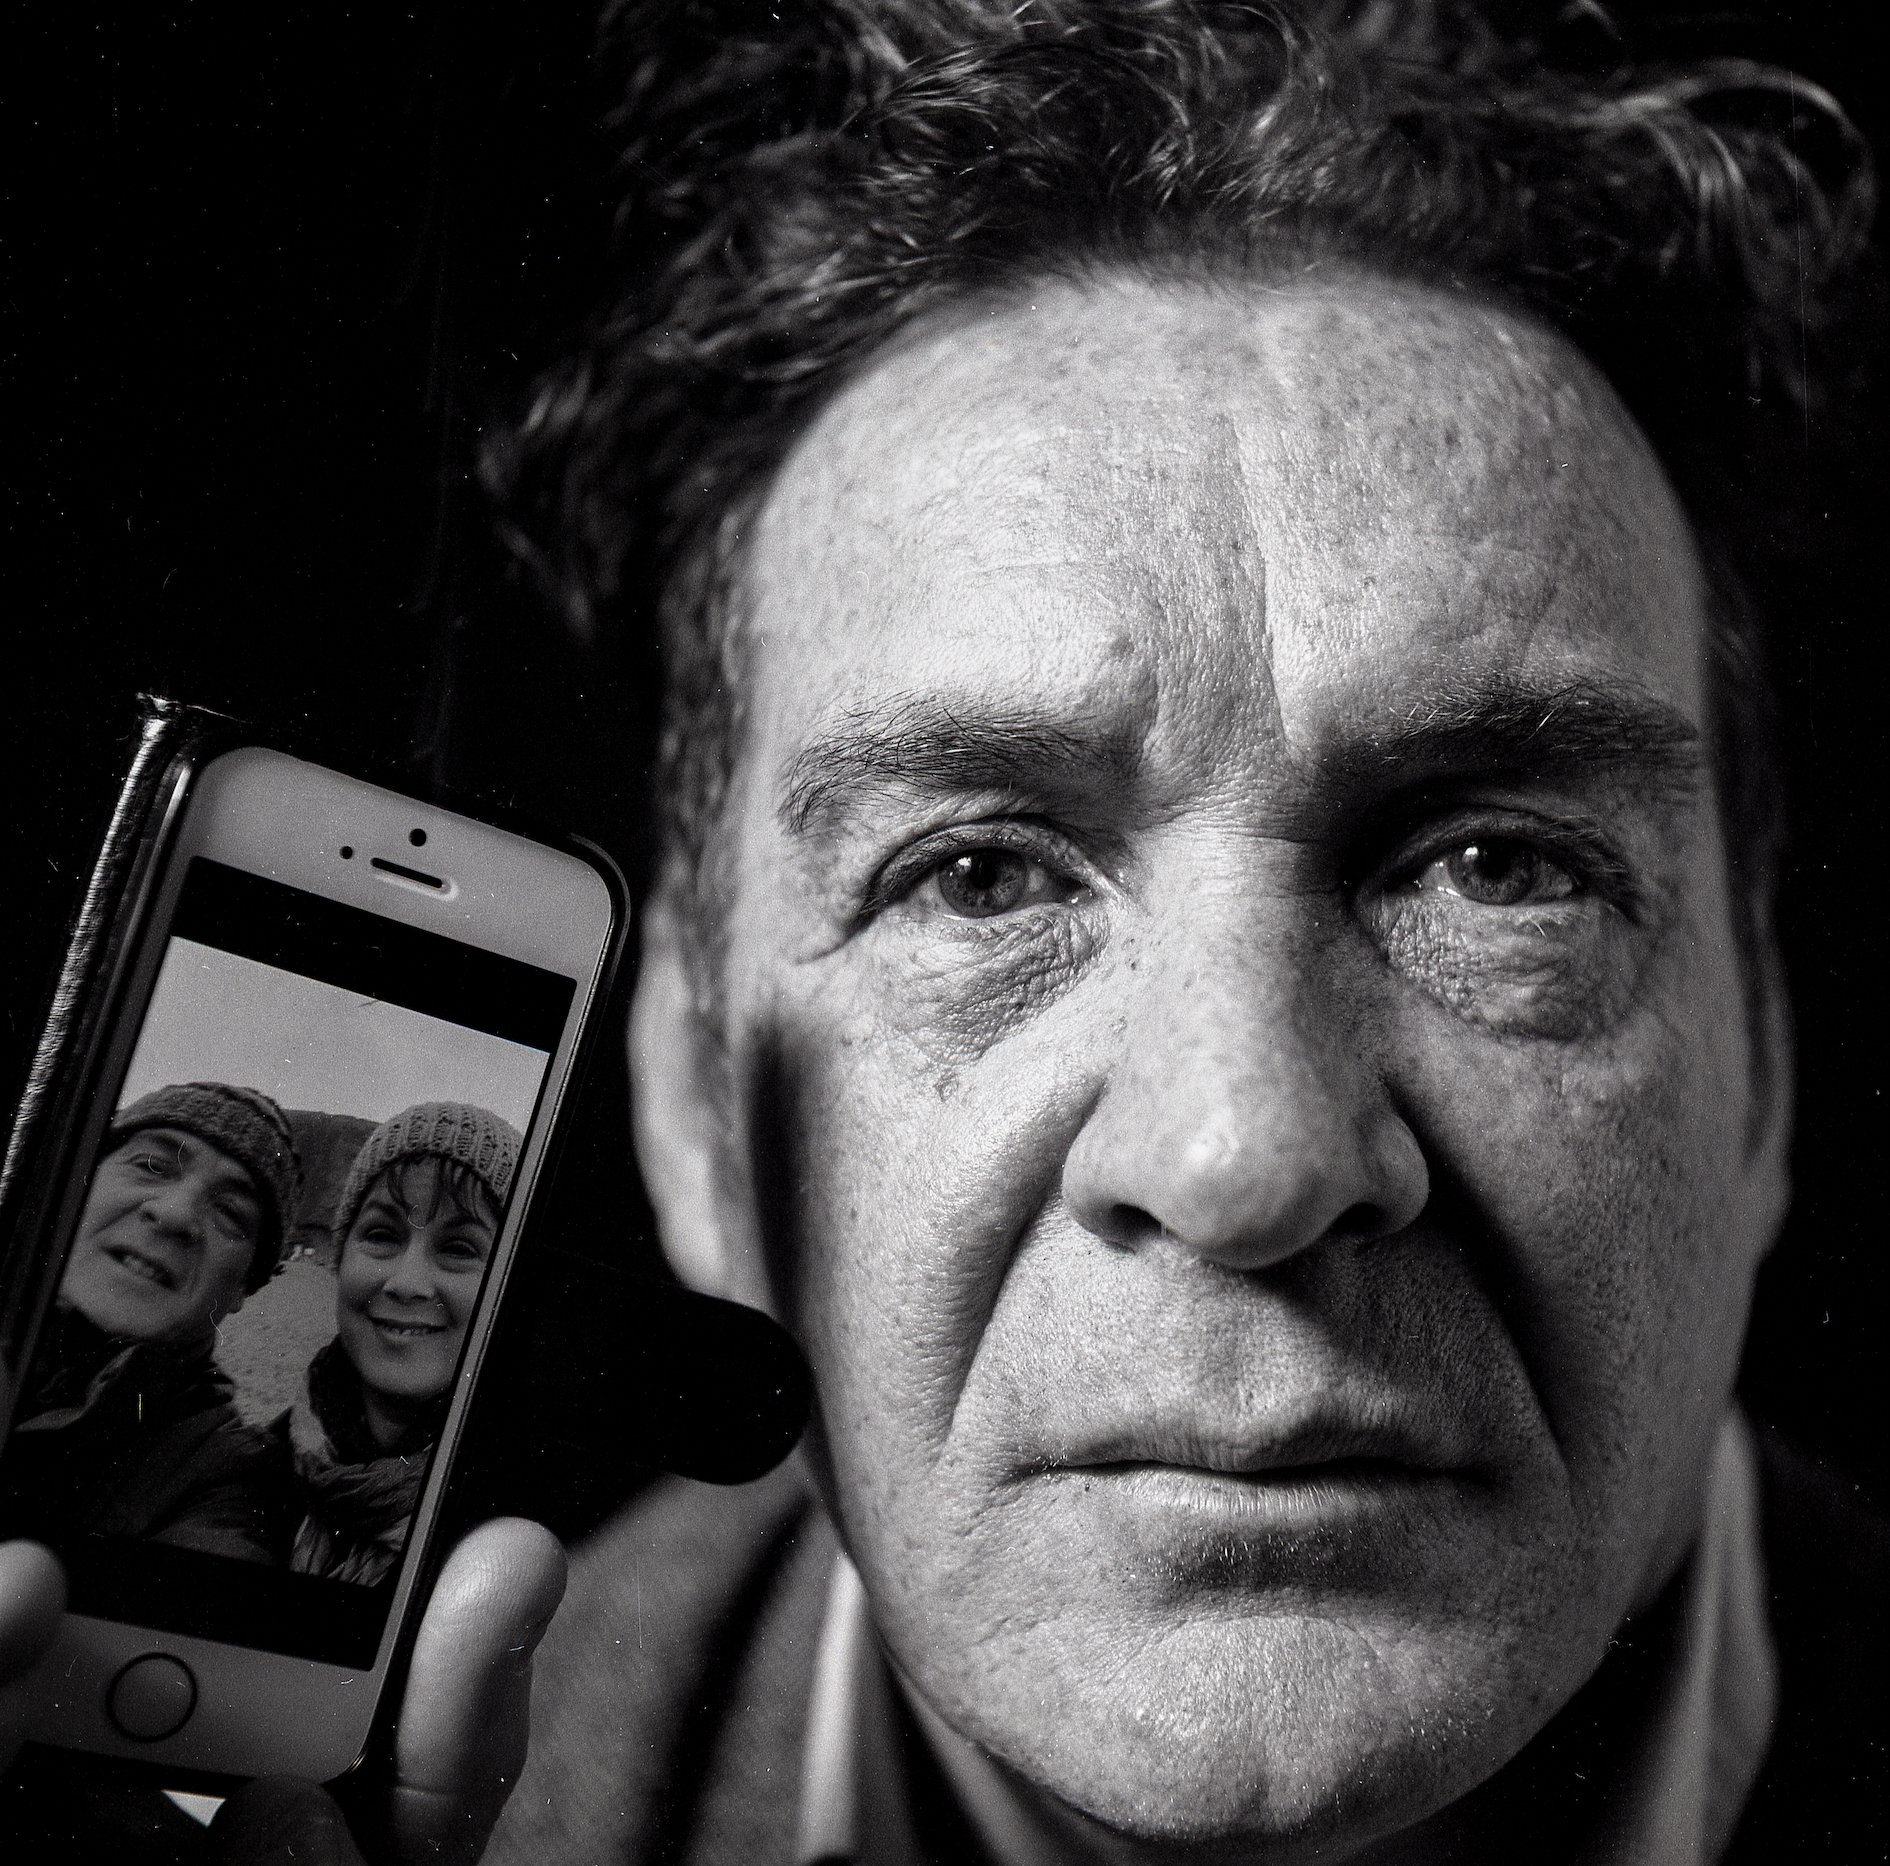
For this image, we attached a good quality close up lens to the camera and I got in real close. I find this image really engaging and love the tones on his face. I am pleased with the detail that the camera can achieve, even with a close up attachment on the front.
Since completing the project I now have a Bronica medium format slr camera, with a couple of lenses which I use to shoot personal work.