
Your Custom Text Here

Instant Large Format Photography
What seems a very long time ago, I spotted a curious little thing that Lomo were offering that would fit on the back of our Intrepid Large Format Camera: a Polaroid style back for instant film!
I thought it might be fun to be able to get instant results from photoshoots, so joined the kickstarter and waited.
Then the pandemic hit, so I waited some more!
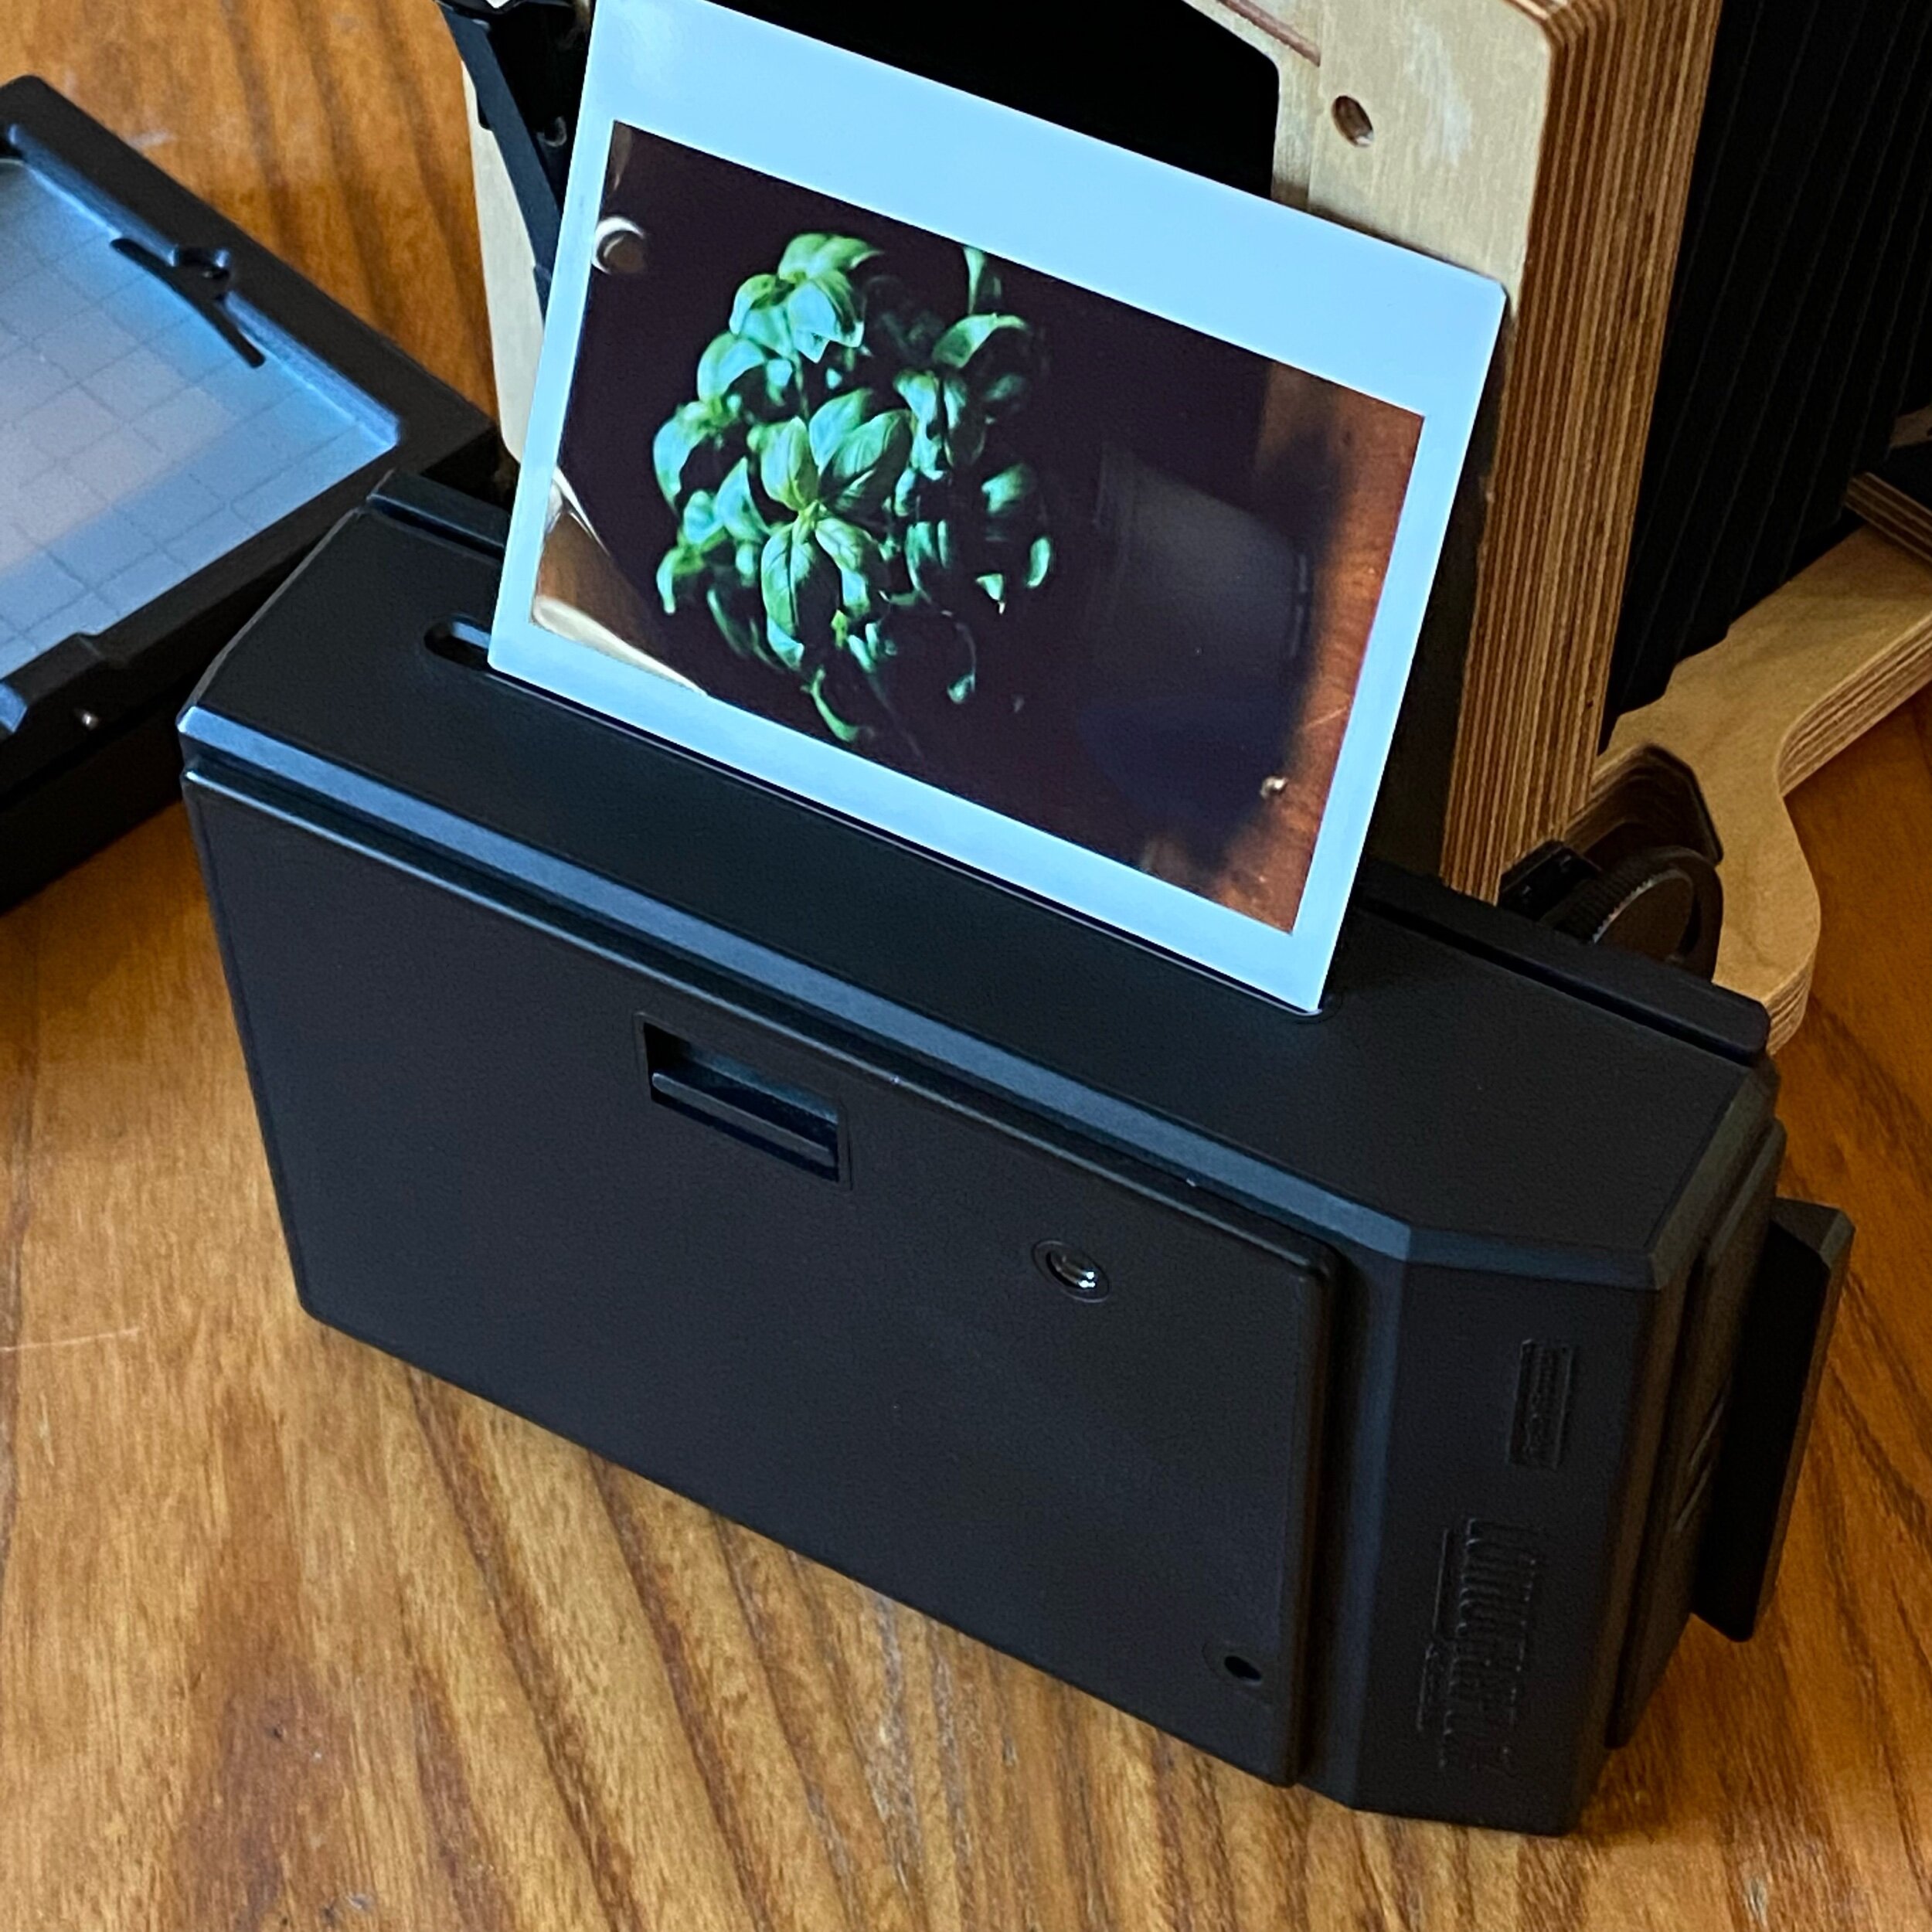
Finally, just recently we received a package containing a nondescript black plastic box, shown here attached to the camera:

The process of taking a photo is even more of a faff than the film process we’ve documented previously on this blog! Once you have the camera set up and focussed, you place the back on the camera and then take the photo.
You then have to remove the back (I think this is an Intrepid thing - if you leave it on the back, the clip you can see in the picture scratches the photo as it ejects) and press the button to eject the photo:
We tried this out on a recent maternity shoot and it’s great fun and helped get us all in to the right mood for the digital shots. It’s really lovely to all gather round and watch the picture appear as if by magic.
The pictures you get from this system can be very charming, but they are nowhere near the quality you can get from film in this camera or from our Fuji digital kit, but they are a unique instant memento and have a very different look to them. We’ll definitely be using it lots in the future.

Scanning Large Format Negatives

A new scan of one of our earlier shoots
A big part of creating analogue images is producing a final usable result.
When working with large format, this is further complicated because the equipment for mechanically enlarging the negatives is harder to find, more expensive, and harder to accommodate.
We’ve been looking into doing contact prints, which would give us a physical copy made entirely using the old methods, but this would be limited to prints of 4x5 inch size.
So, we also need to scan the negatives so that we can print them digitally. Our first attempts at this process involved using a flat-bed scanner and then reversing them in software to produce a positive image.
We thought the results were passable, but blamed our analogue process for the quality of the results:

Initial attempts at scanning were less than perfect!
Although this method captured the essence of the old process, it really doesn’t reflect the quality that is possible from a large format camera.
So…we kept looking.
Our scanner can scan 35mm negatives as well as medium format, but there’s no option for large format…but photoshop can stitch images together, so we thought we’d try that.
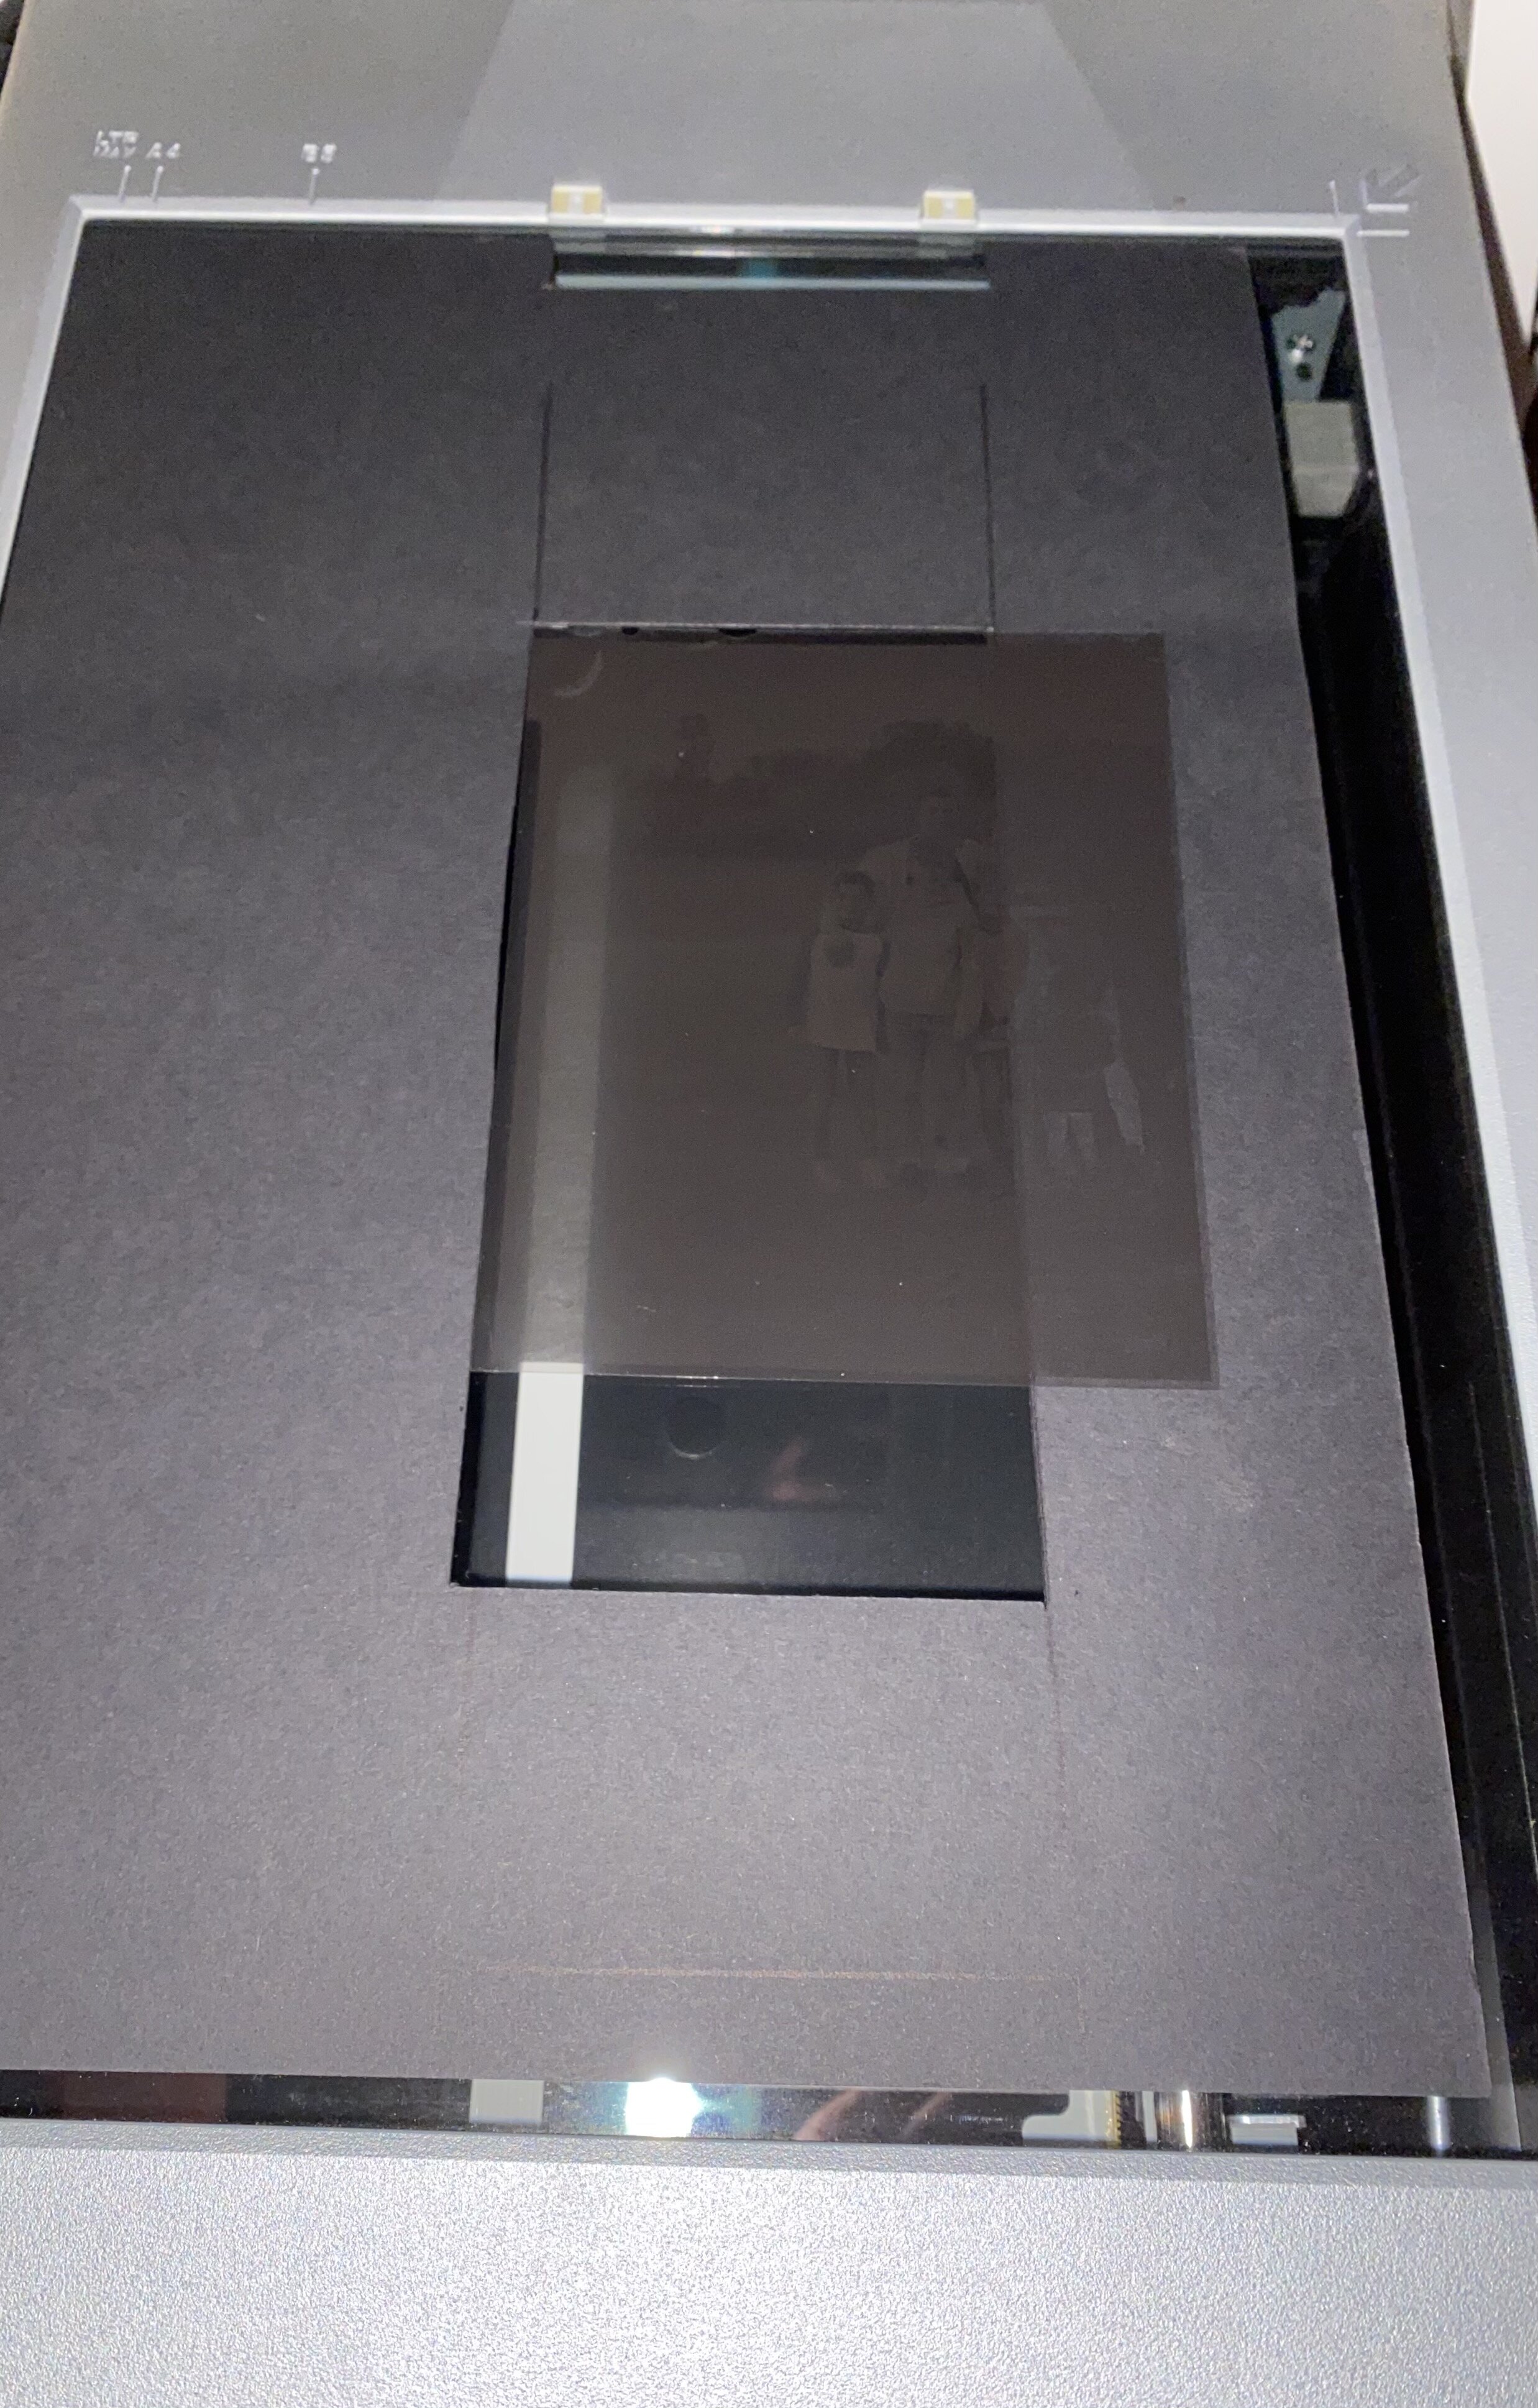
The mask is just a big piece of black card, roughly cut to shape
And it works!
I had to make a mask to put on the glass of the scanner, and we have to move the negative twice for each scan then feed the two images into photoshop.
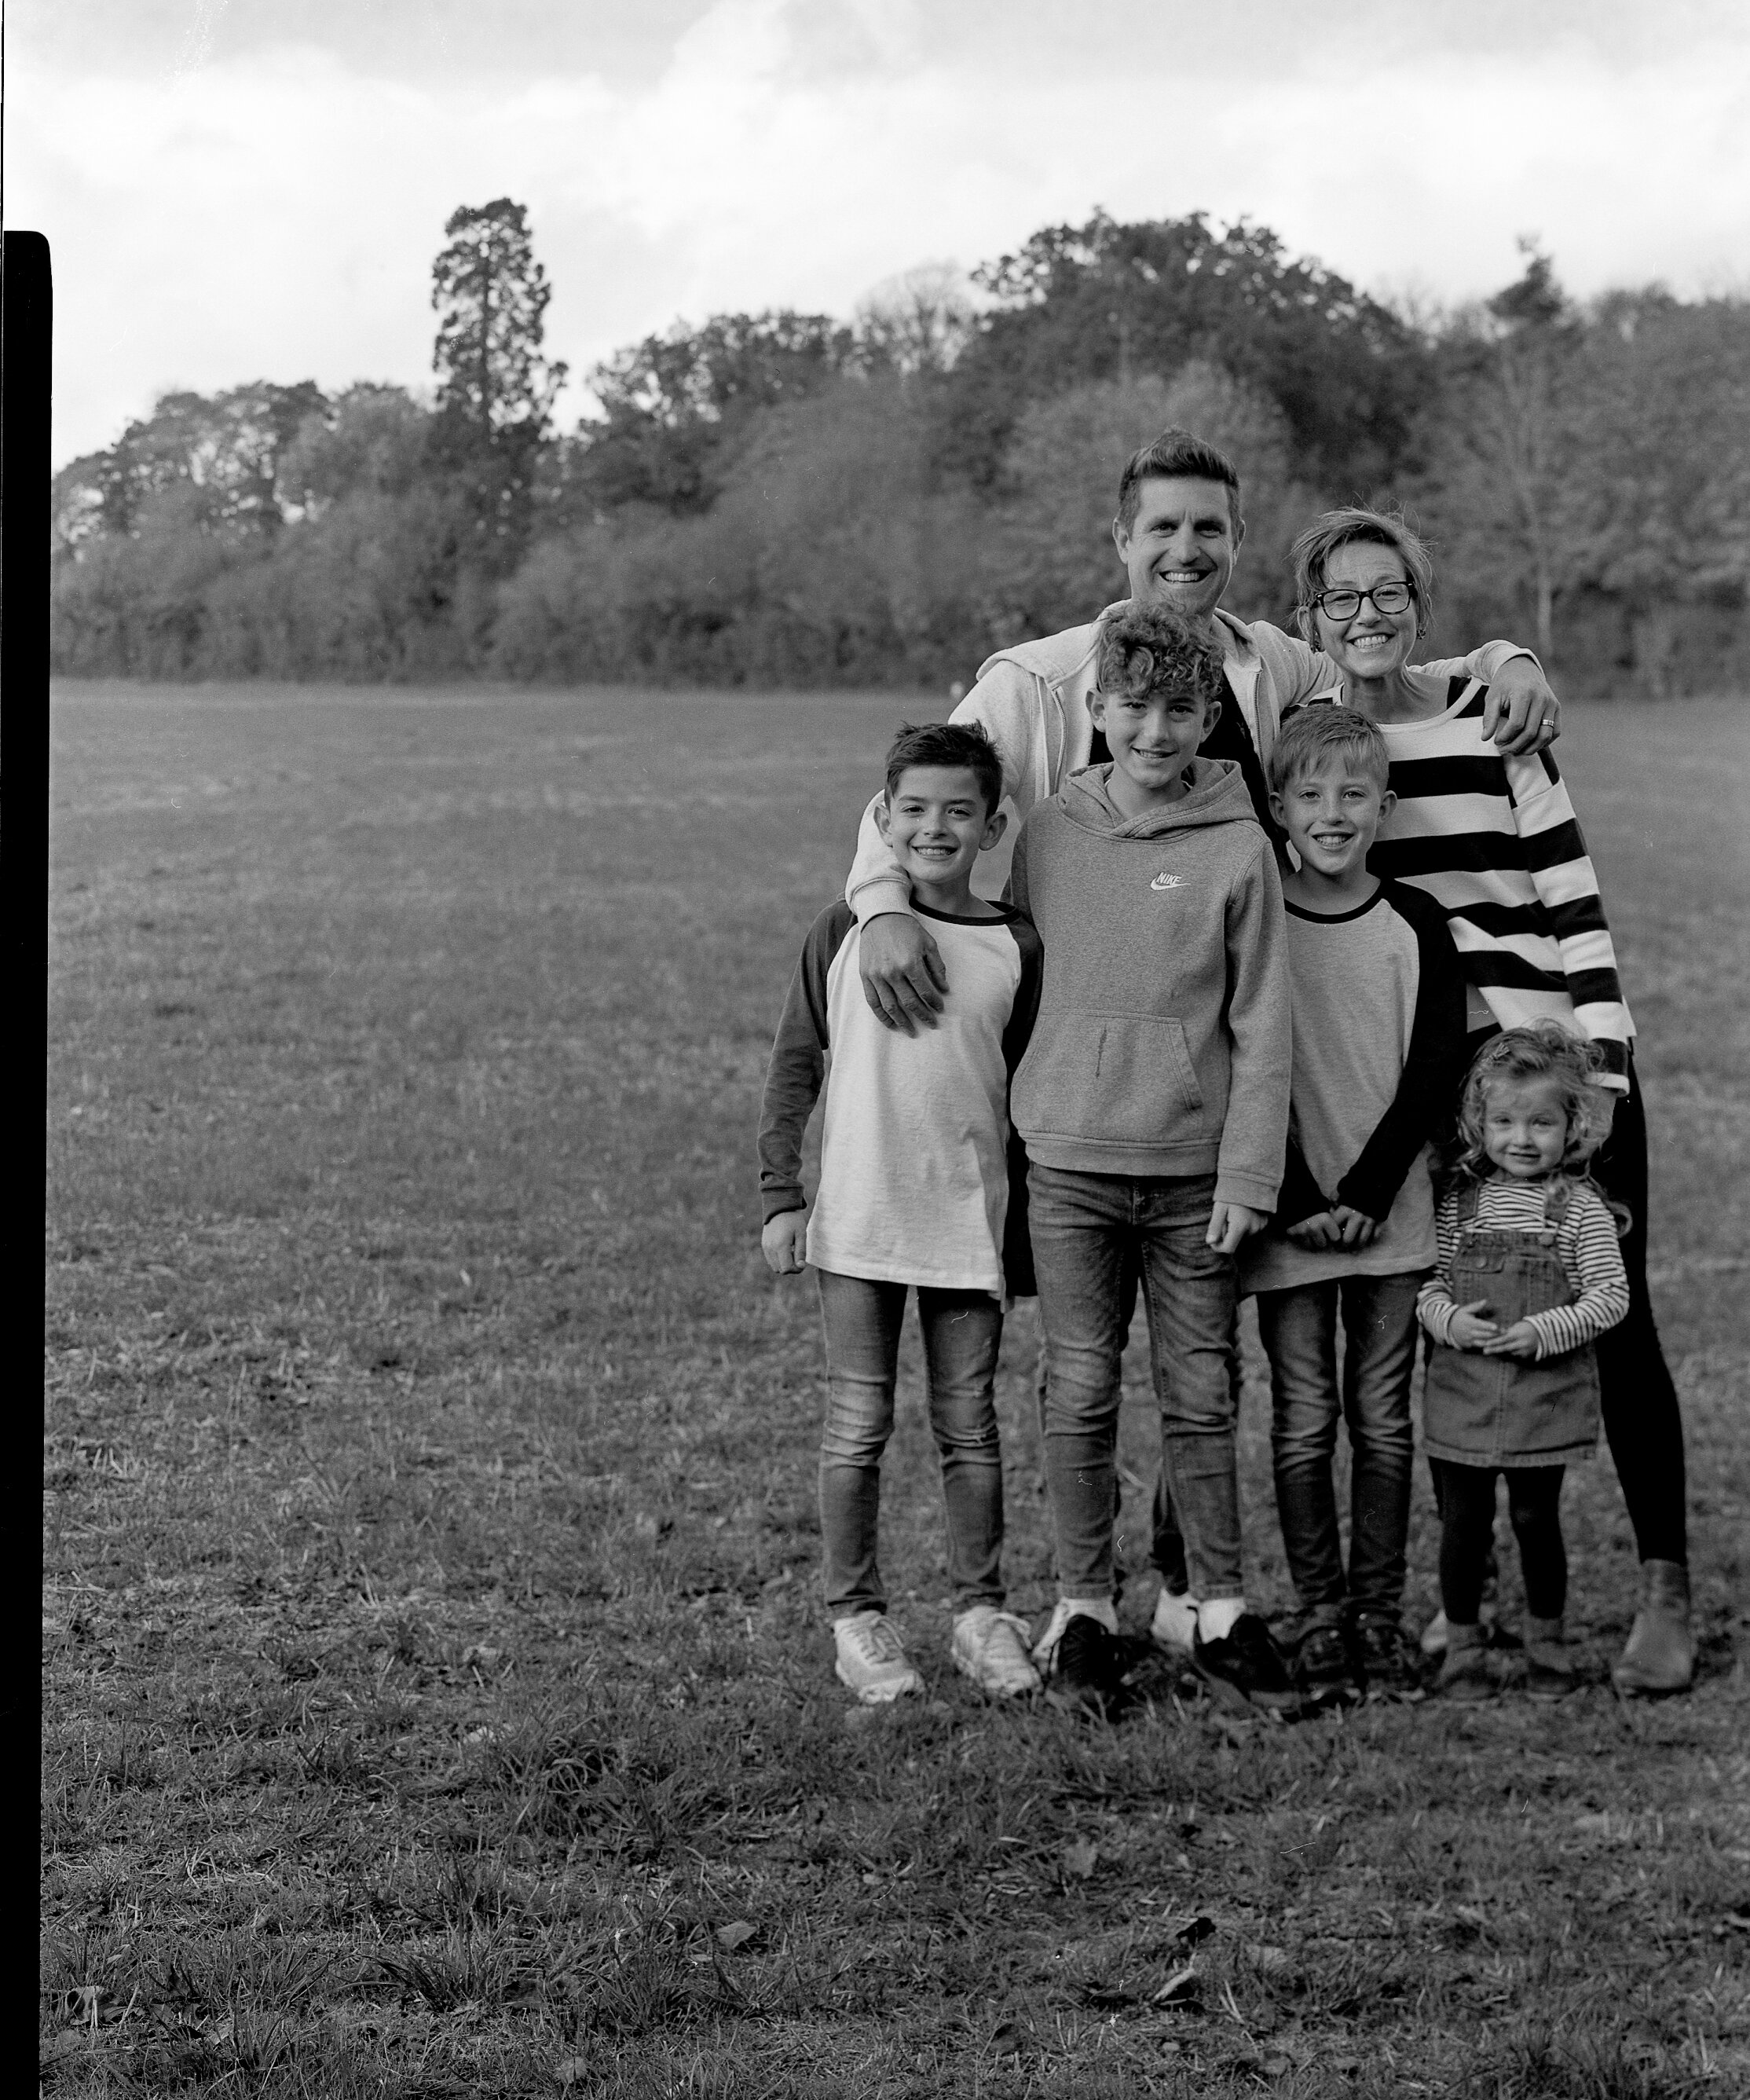
The results are night and day between the two methods (the new scans are shown after the old ones):


Large Format Photography
Lockdown has given us some time to perfect our large format photography process - we were able to shoot a few during our most recent wedding, and we’ve shot some portraiture at home using each other as subjects.

Woz, shot by Em.
We’re using the Intrepid 4x5 as shown in previous posts and using sheet film, in this case Ilford HP5.

The film has changed what we can photograph. Previously working with paper negatives meant we needed so much light, and such long exposures that the process wasn’t really practical, especially in winter.
The film allows us to even take pictures indoors with windowlight.
Pictured with the film is the processing system we’re using - an SP-445 from stearmanpress.com
This is what’s enabled us to shoot film - as film is far more sensitive to light, it’s much harder to process in a darkened room as even a tiny amount would fog the image.
This is what it looks like with the lid off:

It’s essentially a light proof bottle that allows you to pour and mix the chemicals in daylight, meaning that you don’t need a darkroom to process the negatives.
That said, it’s still a long process, needing a sink and lots of different bottles. Calling it a processing system makes it sound a lot more automatic than it is!

Woz, shot by Em.
This and the above portrait were both shot in window light, with a single reflector being used to create some fill. Without this, one side of my face would be in very dark shadow. The reflector was hung from a light fitting in the kitchen! Not exactly a studio, but it does show that we could do this anywhere where there’s enough light.
Even in my little cottage with small windows, the exposure times aren’t too bad - these were at 1/15s, which means we won’t be shooting any indoor sports or even vague movement!
I’ll write in another post about the trials and tribulations of actually using large format in a wedding situation, which offers many more challenges!
Intrepid Camera family shoot
We had a family shoot towards the end of October and as we were preparing to finish we asked if they would be happy to pose long enough for us to try out our Intrepid large format camera. They were very keen! When the camera emerged from the car they were all extremely curious and wanted to get under the dark cloth and have a look at the screen to see what we saw.
The image you get on the back, as you’re focussing the camera, is upside down and reversed, which makes framing the image quite interesting!
When you add that you can’t just ‘click a button’ and get a picture, the whole thing becomes much more of an event than using a digital camera.
Here’s the rough process, to give you an idea of the time it all takes:
Arrange everyone in the frame. There’s no zoom and everything is cumbersome and on a tripod, so this involves moving people and camera around a lot…which you’ll see we didn’t quite get right!
Get under the dark cloth and focus the image.
Get a meter reading (we cheated and used one of our Fuji cameras)
Set the Aperture and shutter speed.
Realise people have moved, so refocus the image.
Notice a cloud has covered the sun, so take another meter reading and change the settings!
Manually cock the shutter - this is priming a spring that will open and close the shutter for a set time when you eventually get to press it!
Close the shutter - you have to do this manually and if you forget you will expose the film when you remove the dark slide at step 10 and get no picture.
Insert the film holder (you can’t do this before as it goes in front of the focussing screen and blocks your view).
Remove the dark slide.
Get everyone to smile…while noticing the cloud has moved so the light has changed!
Press the shutter button.
Replace the dark slide.
Remove the film holder.
This process happens for each shot, and takes a while! Weirdly though, it’s such a performance that the family posed really well and it’s about the only time we got them all to hold still and smile at the same time!
Of course, we had no idea if we’d managed to actually capture anything on our 4 shots, so off we went to process the film.
Result!

Of the four shots, we got one dud, which we think was because the shutter was cocked but not closed, and two that are a bit too contrasty because the light changed before we took the picture.
Overall though, we’re happy with the results on this first trial. Next time, we’ll definitely spend more time posing and hopefully less time in the process of taking the image!


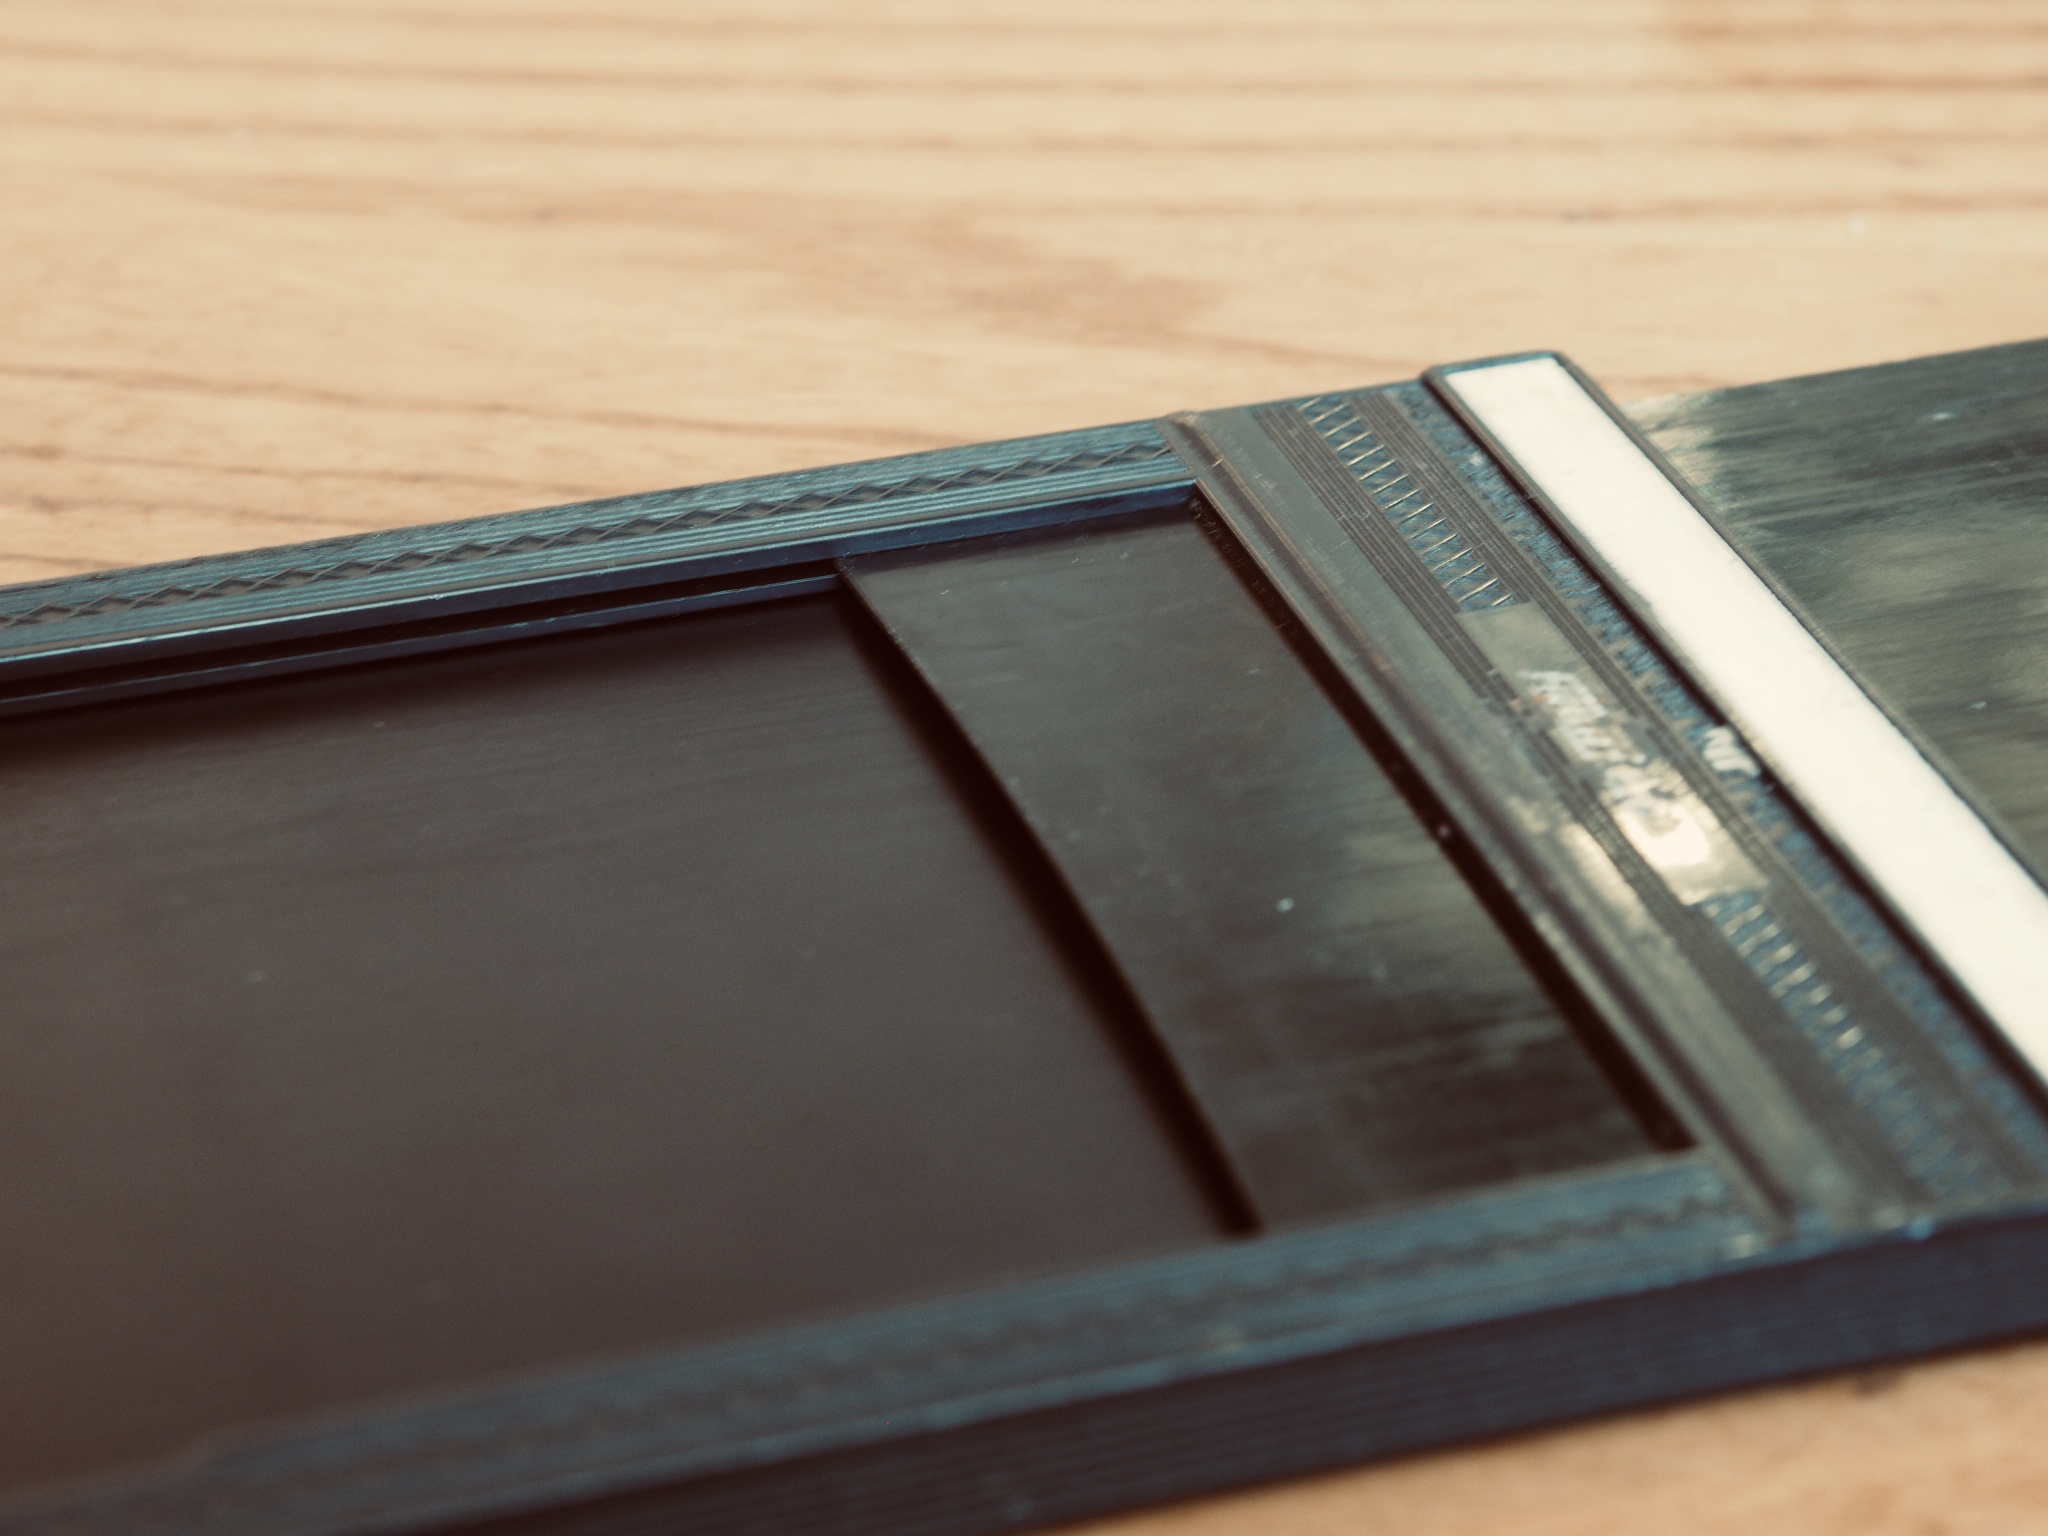
film holders
film holders attach to the back of the camera body and hold the sheets of film. their purpose is to stop light getting to the film until you’re ready, to keep it perfectly flat, and to let you take more than one picture at a sitting. to help with this last point, each of the film holders we show here can take a sheet of film to a side.
you have far less flexibility with wet plate photography as each plate is simply a treated piece of metal (or glass) which has to be shot and processed within a matter of minutes…but we’re not there yet!
the film holders pictured are relatively cheap and from ebay - they’re well used but work perfectly fine. in the second image you can see the dark slide pulled back to show the slot where the film is held. the dark slide prevents any light from hitting the film until it is removed.
more about the Intrepid camera
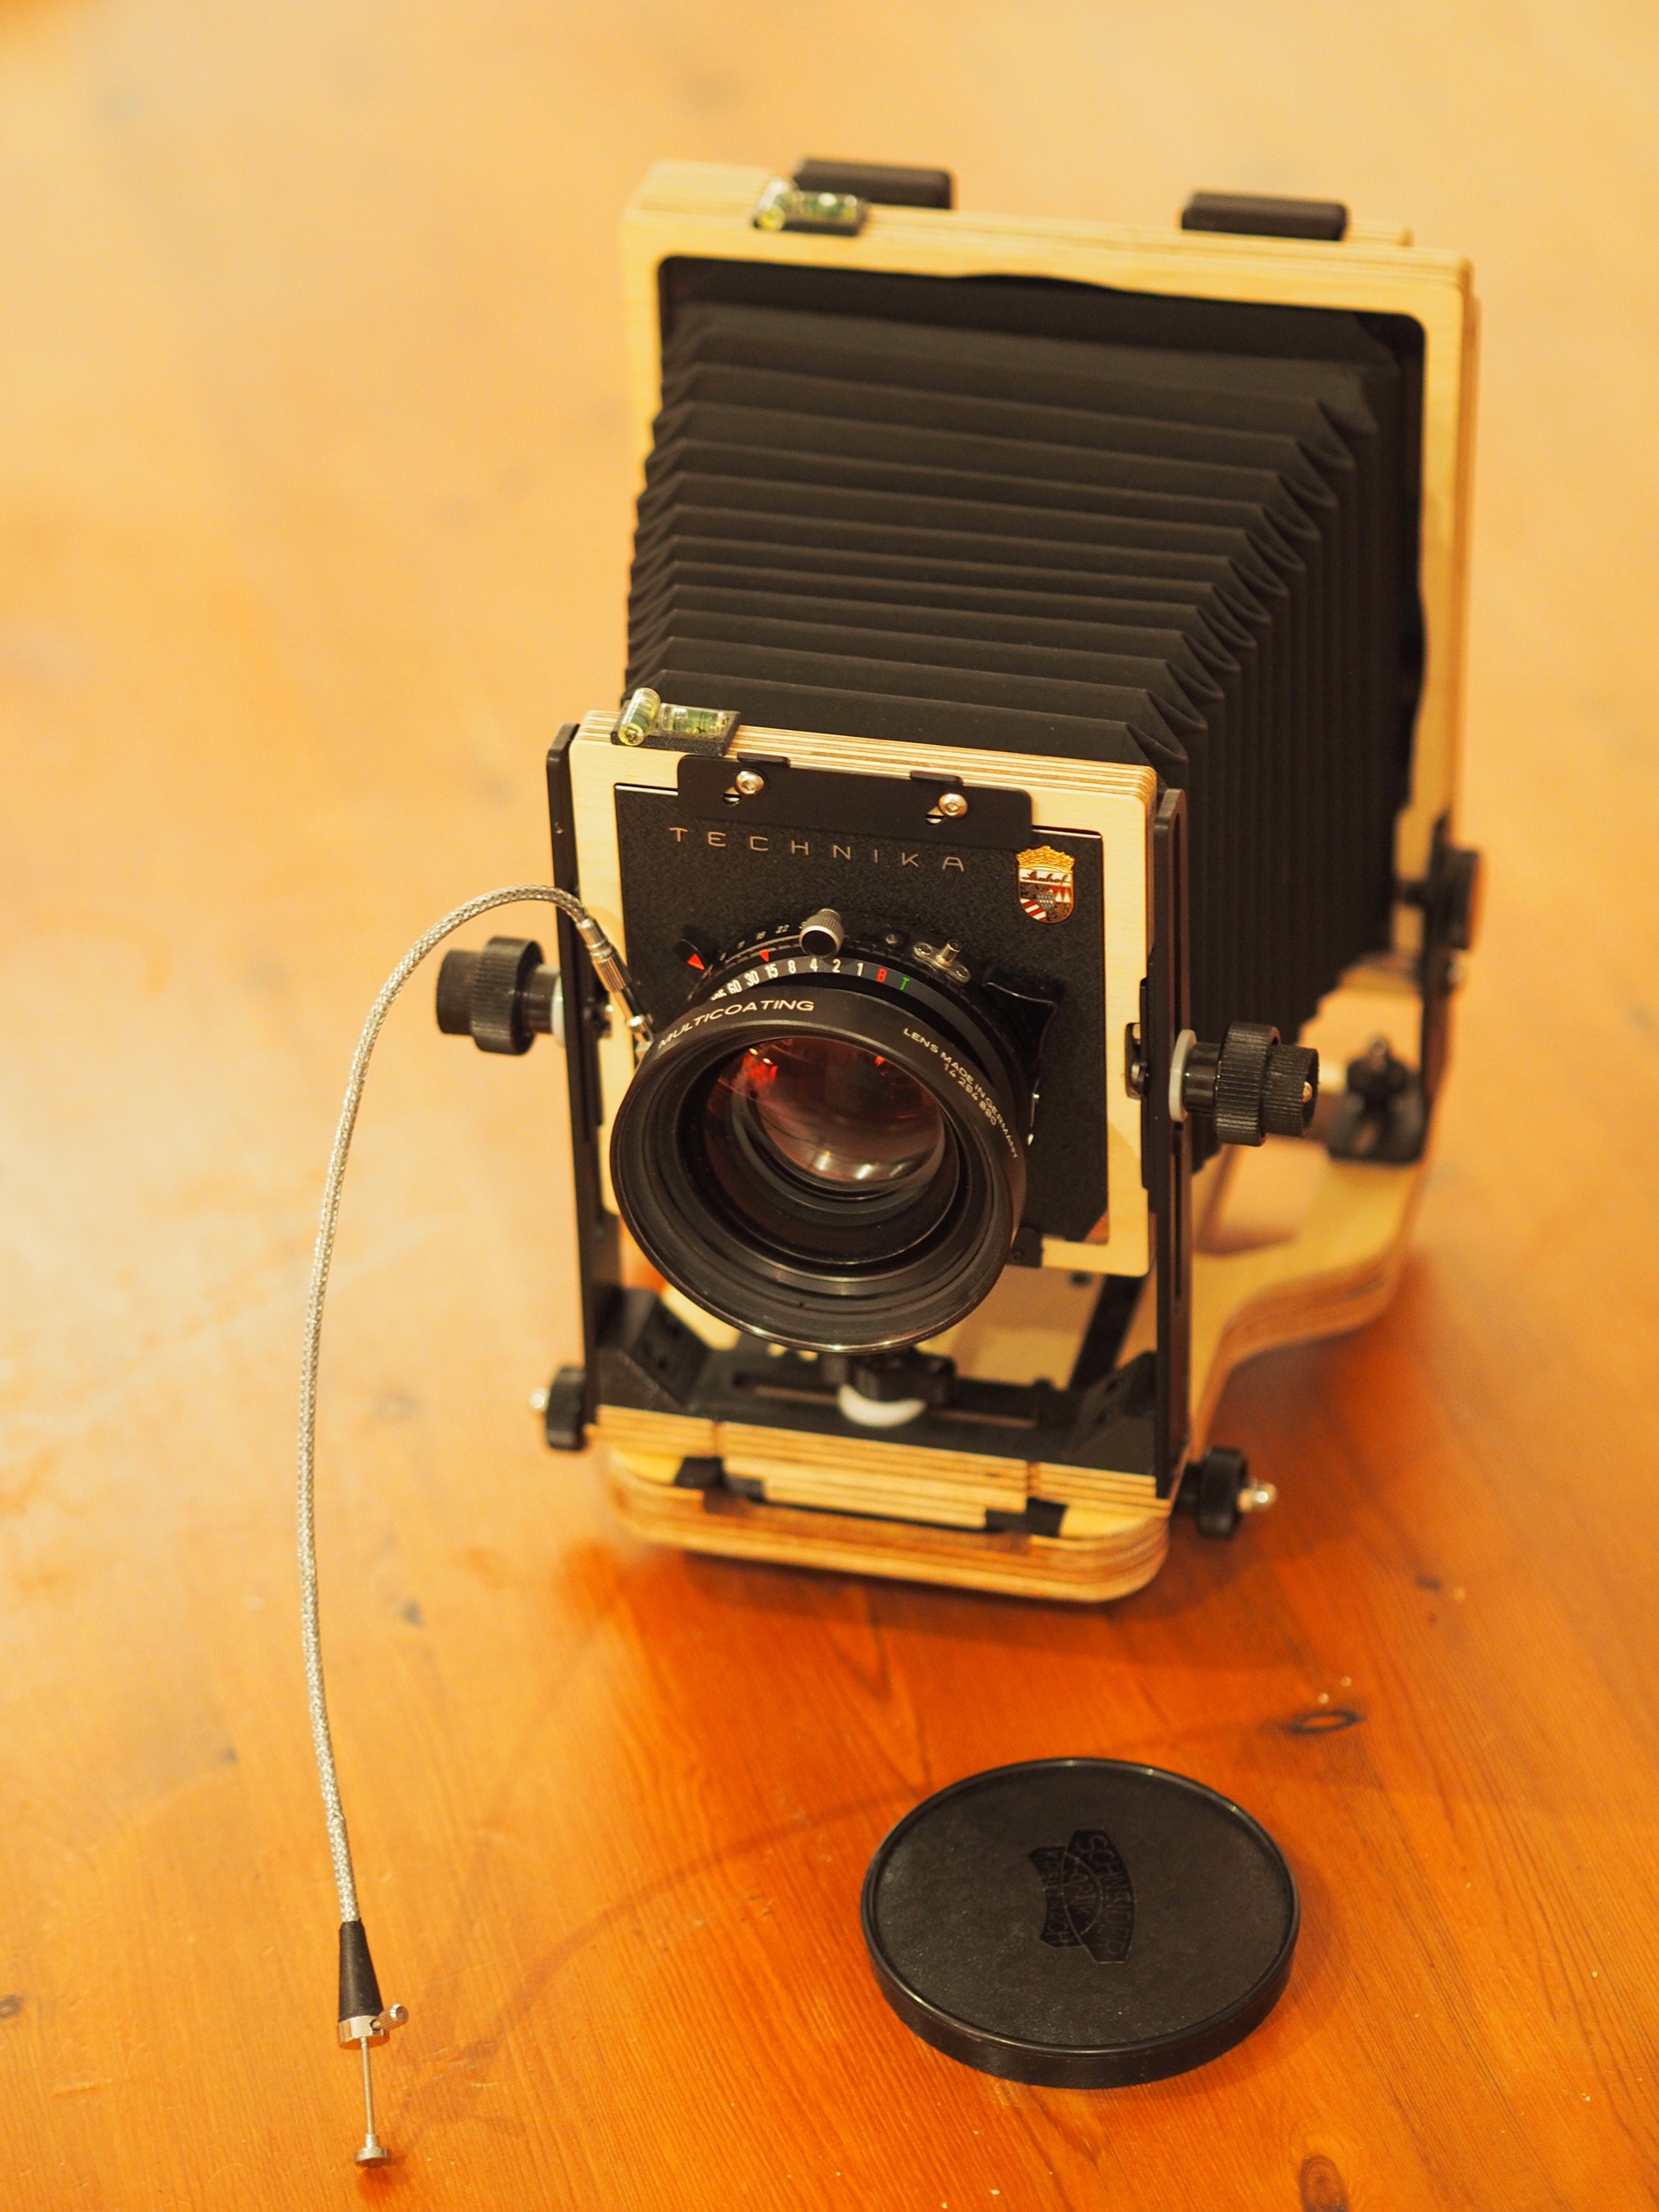
film cameras are essentially a light-proof box with a lens on one end and film at the other. the distance between the two is what causes the image projected by the lens to be in focus on the film.
nowhere is this more obvious than with large format photography. in the case of the Intrepid camera, the distance between the film and the lens is controlled by bellows and a simple rail system. the main camera body is laminated wood and there’s little else to it.
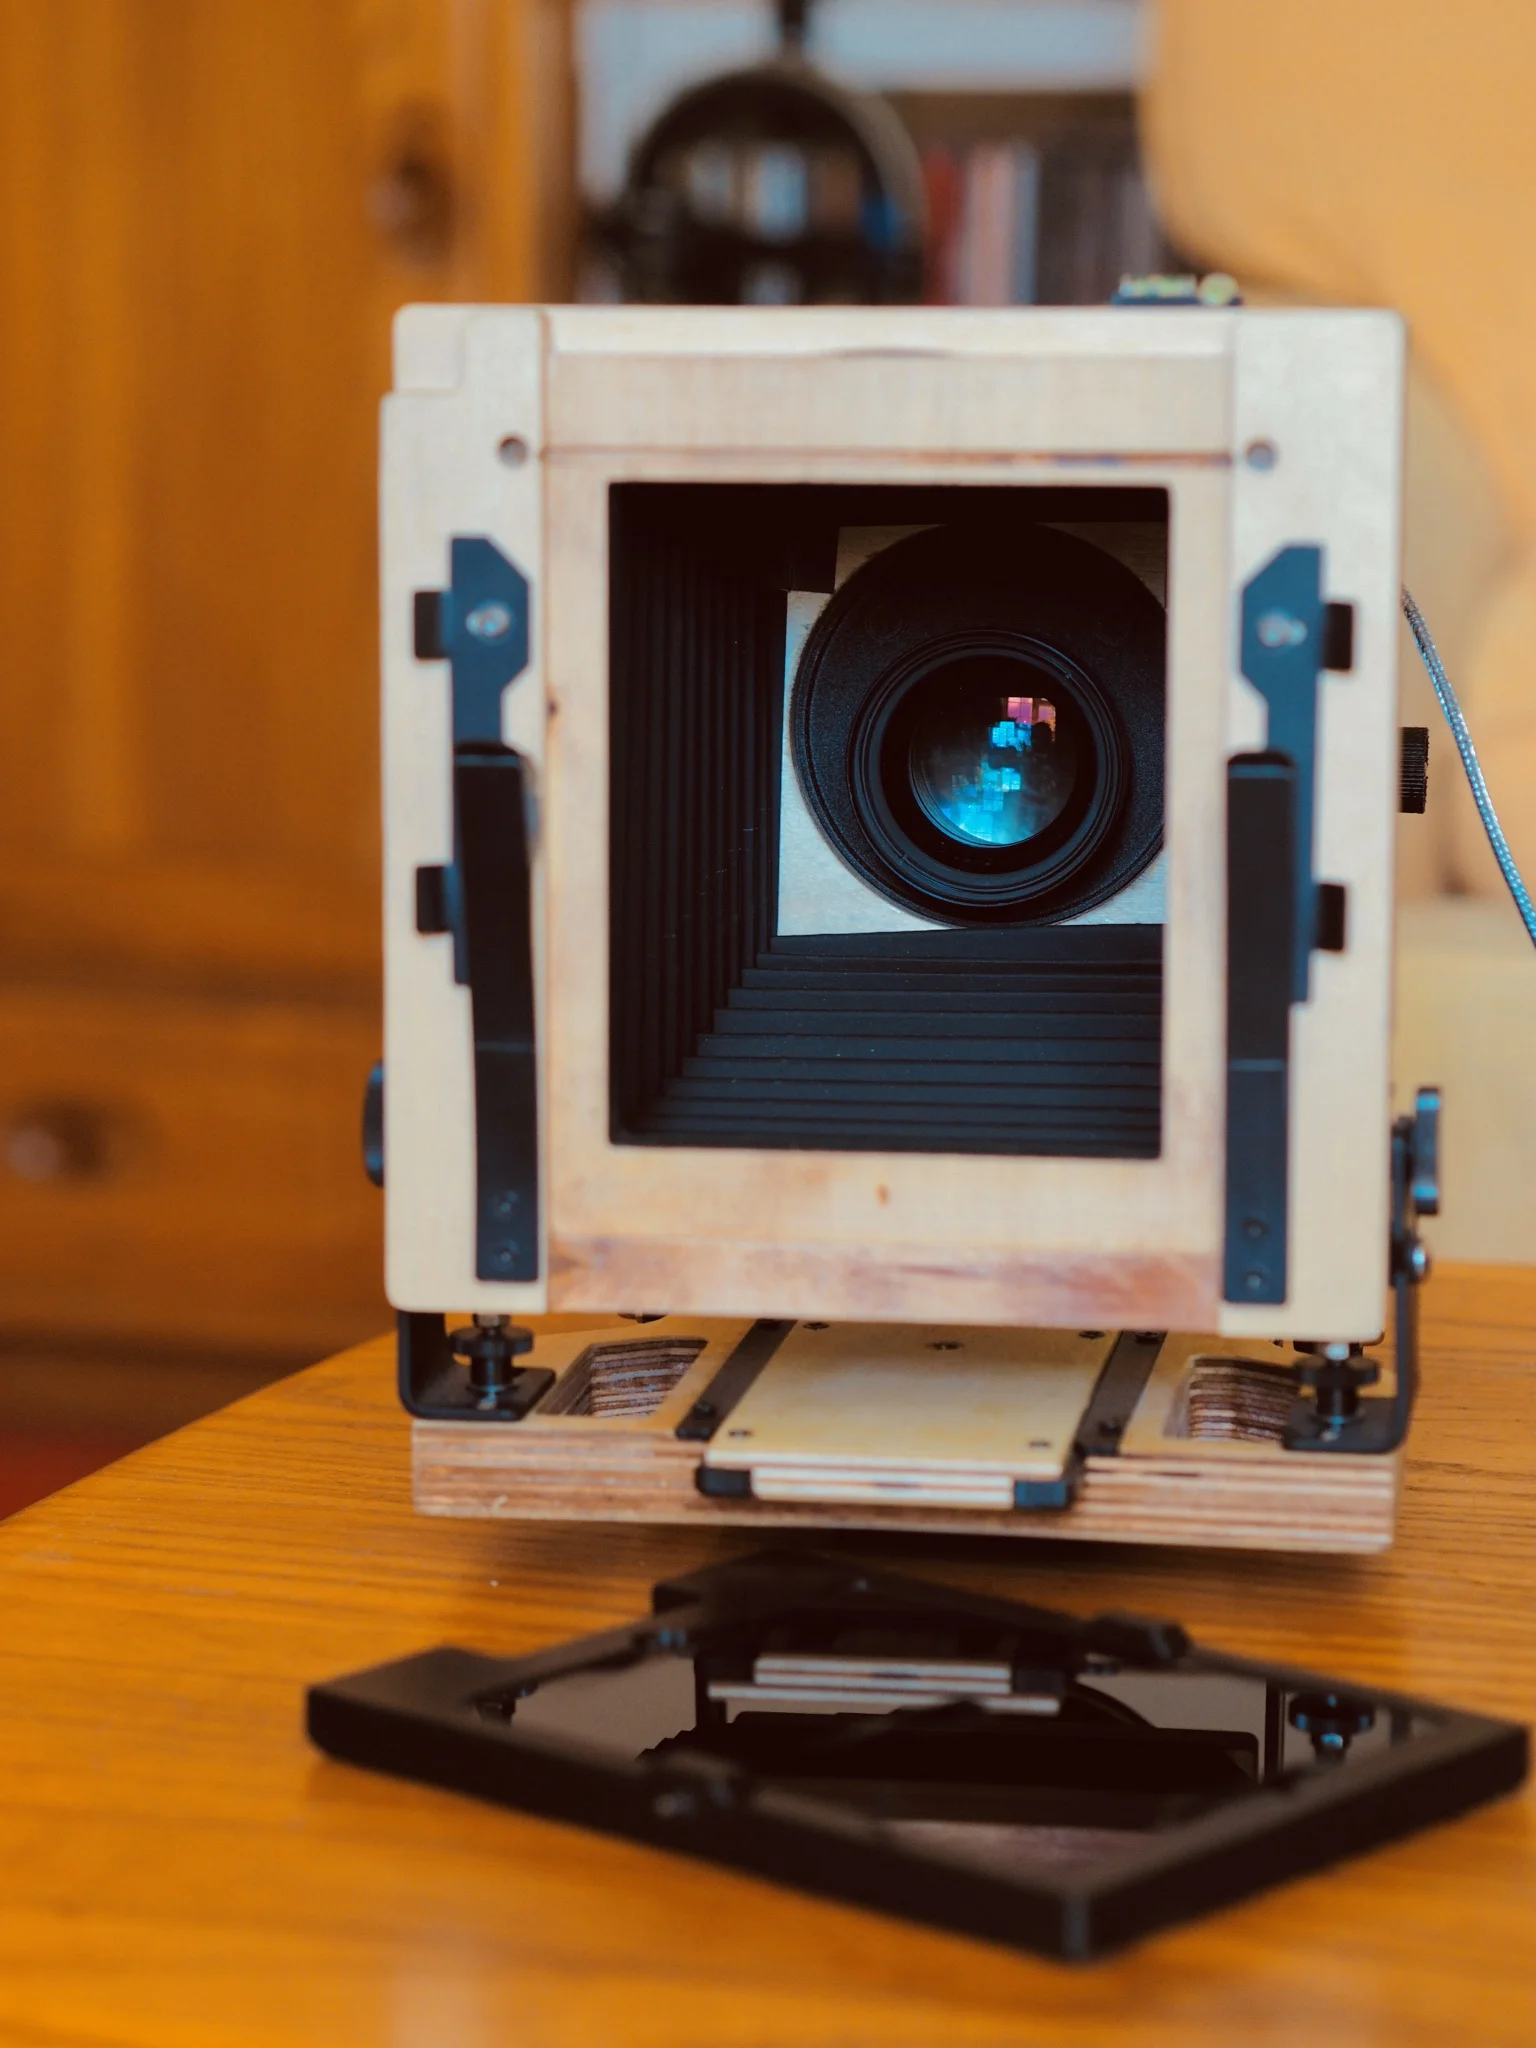
here are a couple of images of our camera, with the film holder and ground glass removed from the back so that you can see right through to the lens.


the next thing that a camera needs to do is control the amount of light that hits the film. this is controlled by the lens and shutter, and we’ll talk a bit about that later.
The Intrepid Camera
As we mentioned in the first post, we have purchased an Intrepid Camera and lens. Typically, mere days after we had taken delivery, Intrepid announced an updated version of the camera! Having had a good look at the new model it doesn’t offer anything we desperately need so it’s not too distressing.
The camera
The camera itself is essentially a light-proof box with a hole at one end for the lens (which must be mounted on a lens board) and a hole at the other end for the ground glass screen and (once focussed) the film plate. The bellows allows you to move the two ends so that the lens is correctly focussed. And that’s really it!
Here’s the view from the back.

When you see pictures of people using these cameras in the field, they have a black cloth over their head - the cloth isn’t actually attached to the camera (which is what I thought) but just draped over themselves to block the light from outside as the image you see above on the screen is actually very pale and hard to see in daylight. Once the picture’s focussed, you pull the glass plate out and replace it with a film plate…more on that in another post!.